How to Repot Plants: Pick the Right Pot Size First
Filip Leszczyński 11 November 2026 12 min read
In this article
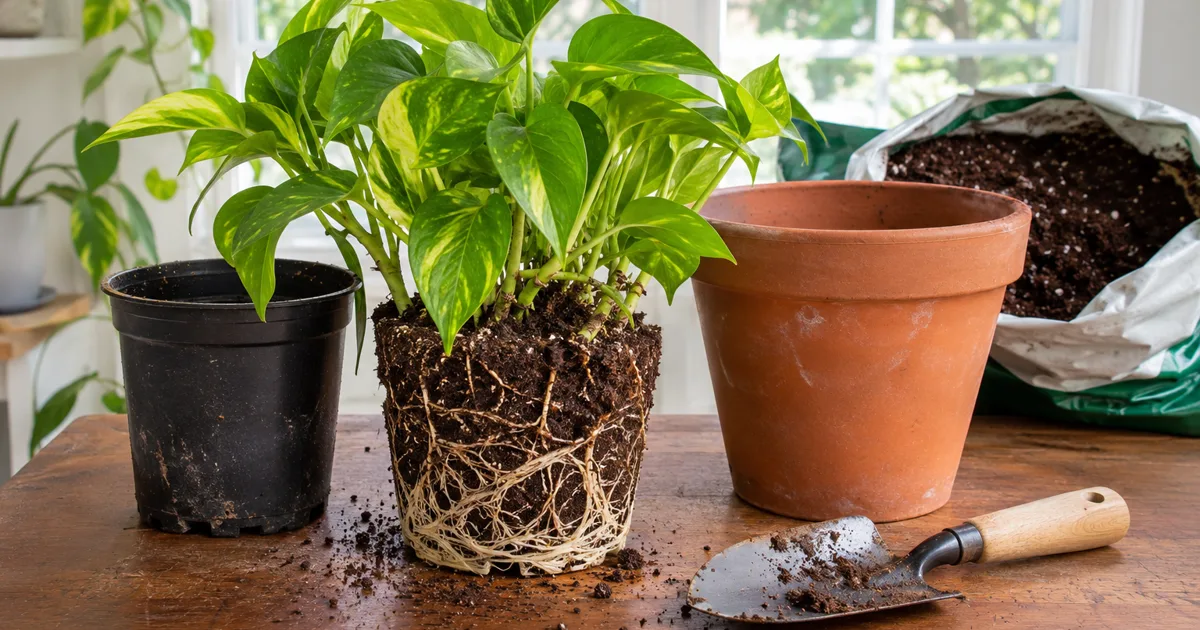
To repot a plant, water it the day before, slide it out of its old pot, loosen any roots circling the outside, and set it at the same depth in a pot only 1 to 2 inches wider, filled with fresh potting mix. Water it once until water runs out of the drainage hole, then keep it out of direct sun for a week or two.
The part most people get wrong is the pot, not the technique. A much bigger pot feels generous, but the extra mix holds water that the roots cannot reach yet, so it stays wet and the roots start to rot. Go up one size, or skip the bigger pot entirely and just refresh the mix.
When to repot a plant
Repot when the roots have run out of room or the mix has worn out, not on a fixed date. Spring, as the plant starts growing again, is the easiest time, because new roots grow quickly into the fresh mix. The RHS guide to repotting also advises against repotting in autumn and winter, when growth slows and fresh mix is more likely to sit too wet.
These are the signs worth acting on:
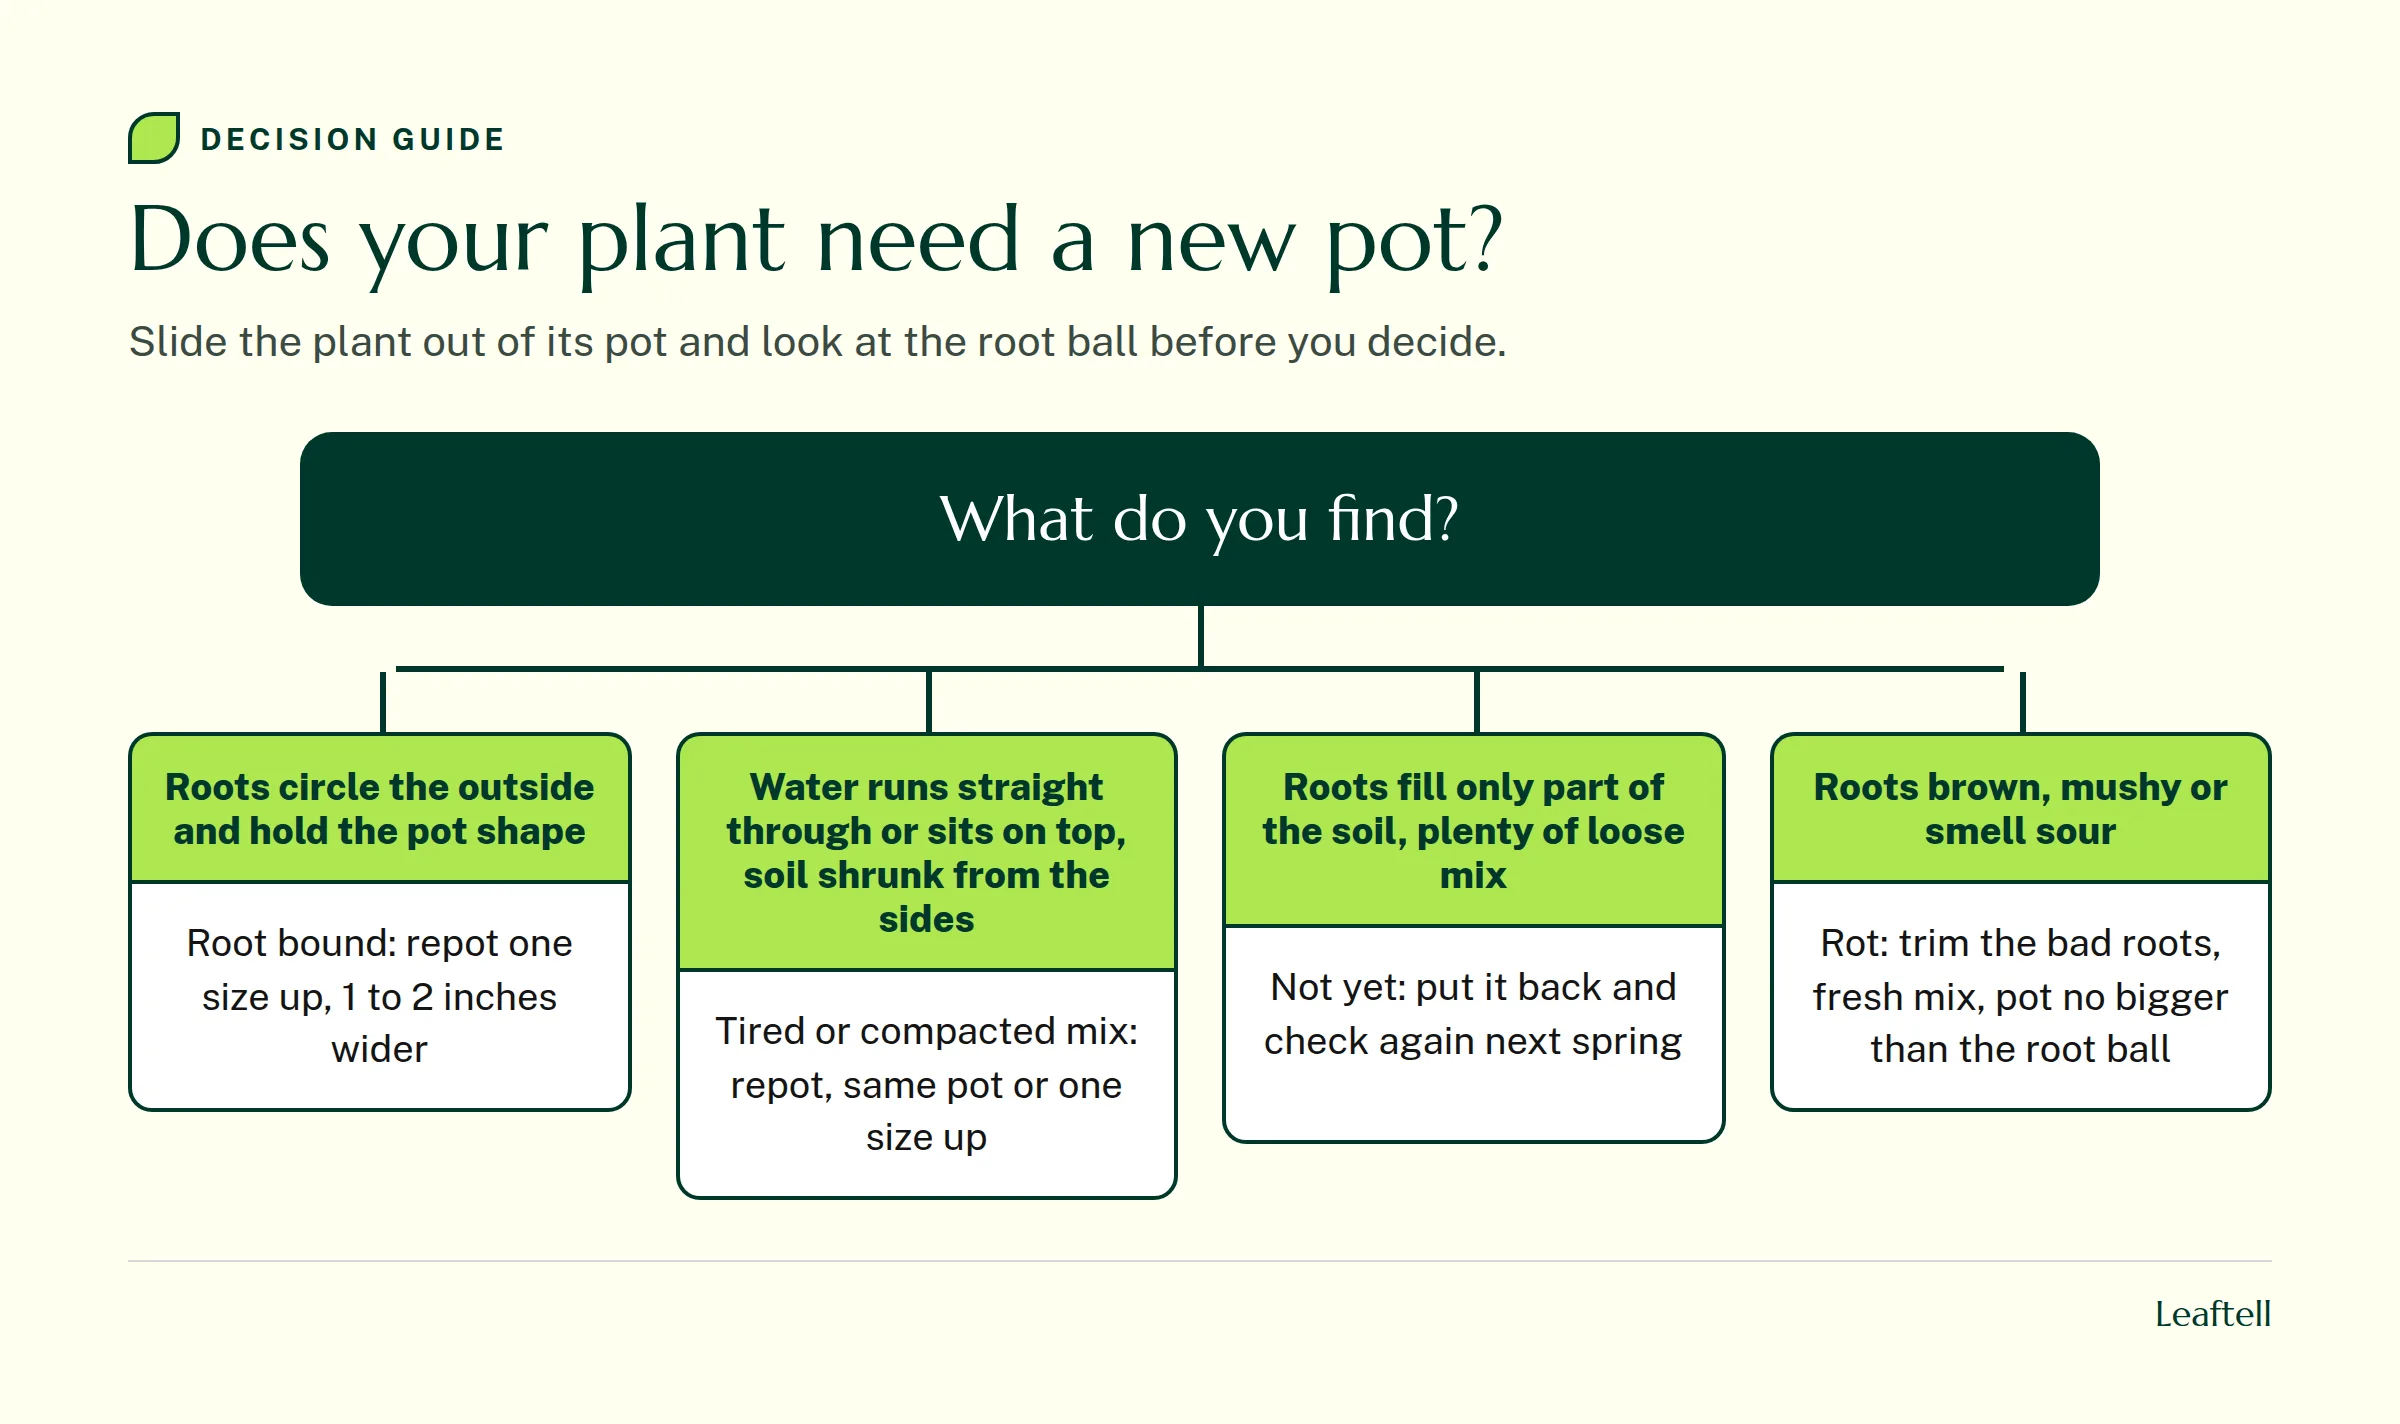
- Roots circle the root ball. Slide the plant out. A solid mat of roots that keeps the shape of the pot means it is root bound.
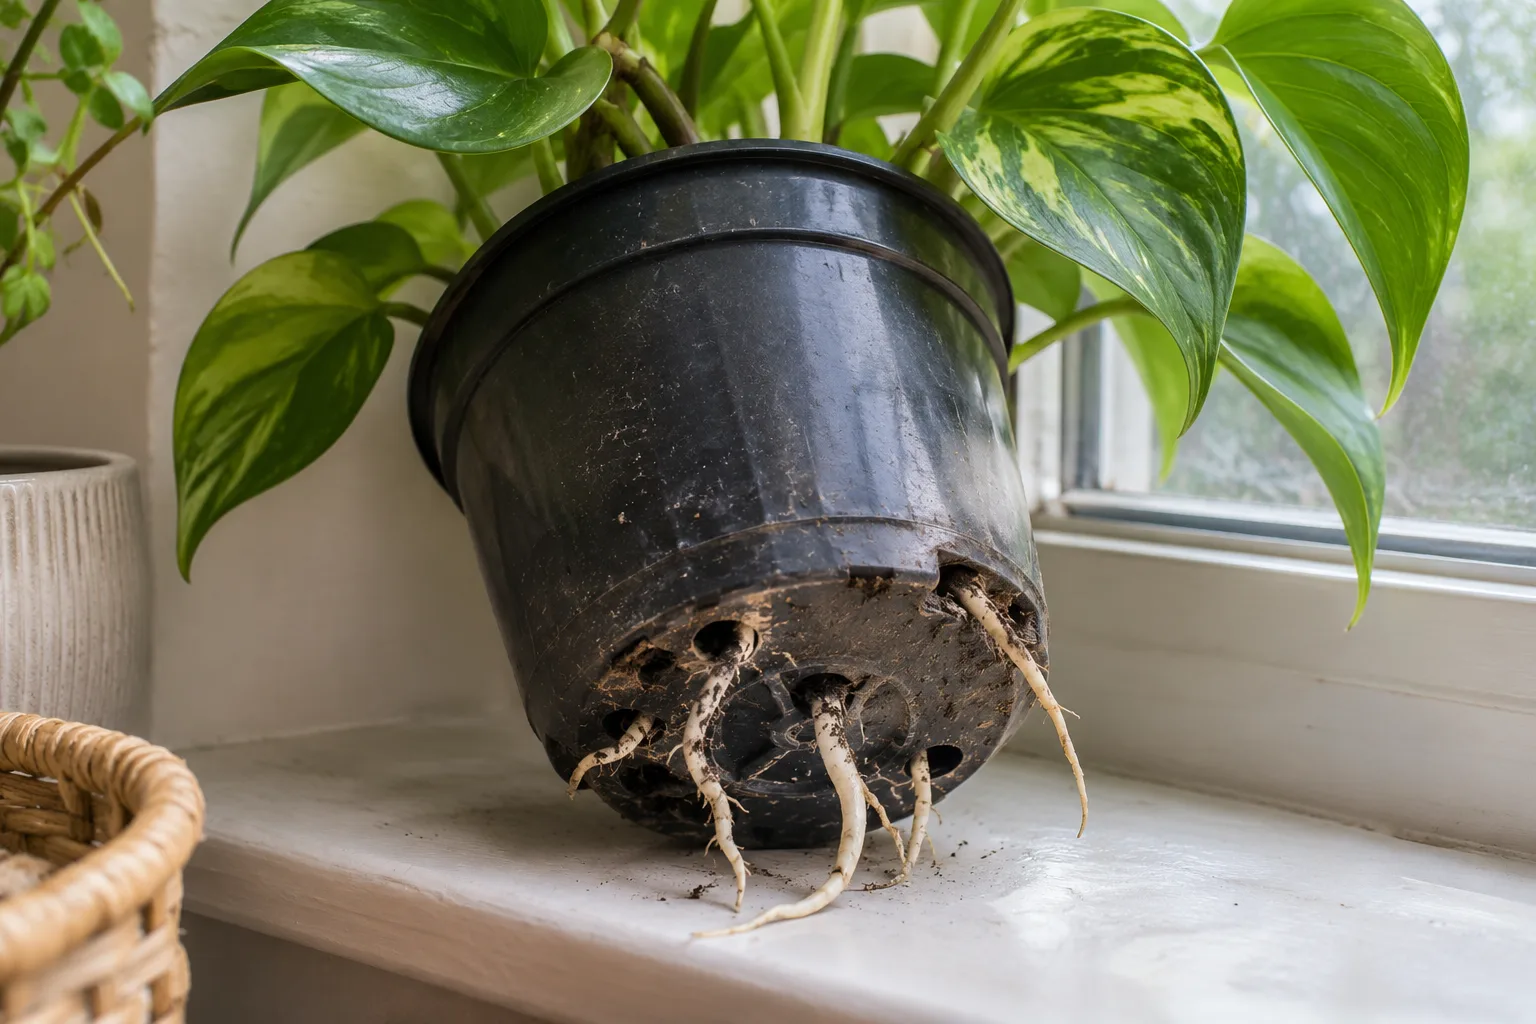
- Roots push out of the drainage holes. A root or two is fine. A thick tangle means the pot is full.
- Water runs straight through. A packed root ball, or mix that has shrunk away from the sides, lets water race down the gap without soaking in.
- The mix stays wet for days or smells sour. Old mix breaks down, loses its air pockets and drains poorly.
- The plant is top heavy. It tips over, or needs water every day or two in its usual spot.
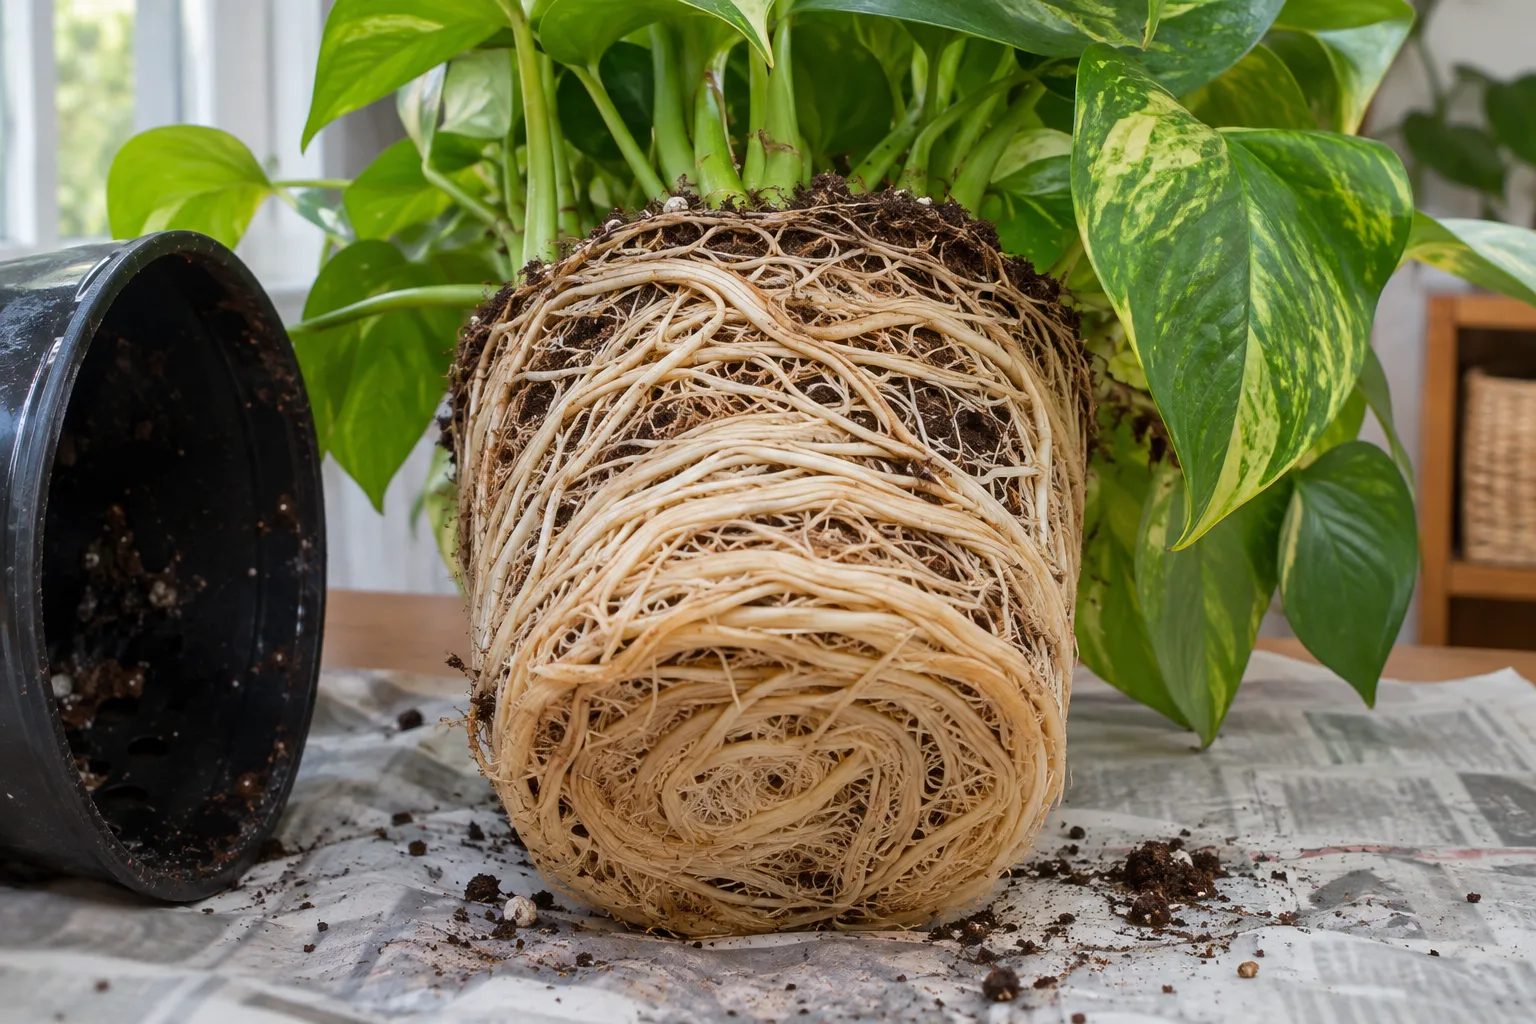
Roots poking out of the bottom alone are not an emergency. Many plants send a few roots out of the holes for months before they are truly crowded. Slide the plant out and look before you decide.
How often do plants need repotting?
There is no one interval that fits every plant, because it depends on how fast the plant grows, the size of the pot and the mix it sits in. The RHS suggests that every three to five years suits most container plants. Fast growers in small pots, like pothos, spider plants and monstera, often fill their pots sooner, so check the roots each spring. That root check fits naturally into the spring restart of a houseplant care routine that follows the seasons.
| Plant type | Examples | When to check | What usually happens |
|---|---|---|---|
| Fast growing foliage | Pothos, spider plant, monstera | Every spring | Often needs one size up |
| Slow growers that like a snug pot | Snake plant, ZZ plant, peace lily | Every spring | Often only fresh mix |
| Succulents and cacti | Aloe, jade, echeveria | When roots fill the pot | Gritty fast-draining mix, same or one size up |
| Orchids in bark | Phalaenopsis | When the bark breaks down | Fresh bark, same size pot |
| Rotting or sick plants | Any | Right away | Trim rot, fresh mix, smaller pot |
Choose a pot only 1 to 2 inches wider
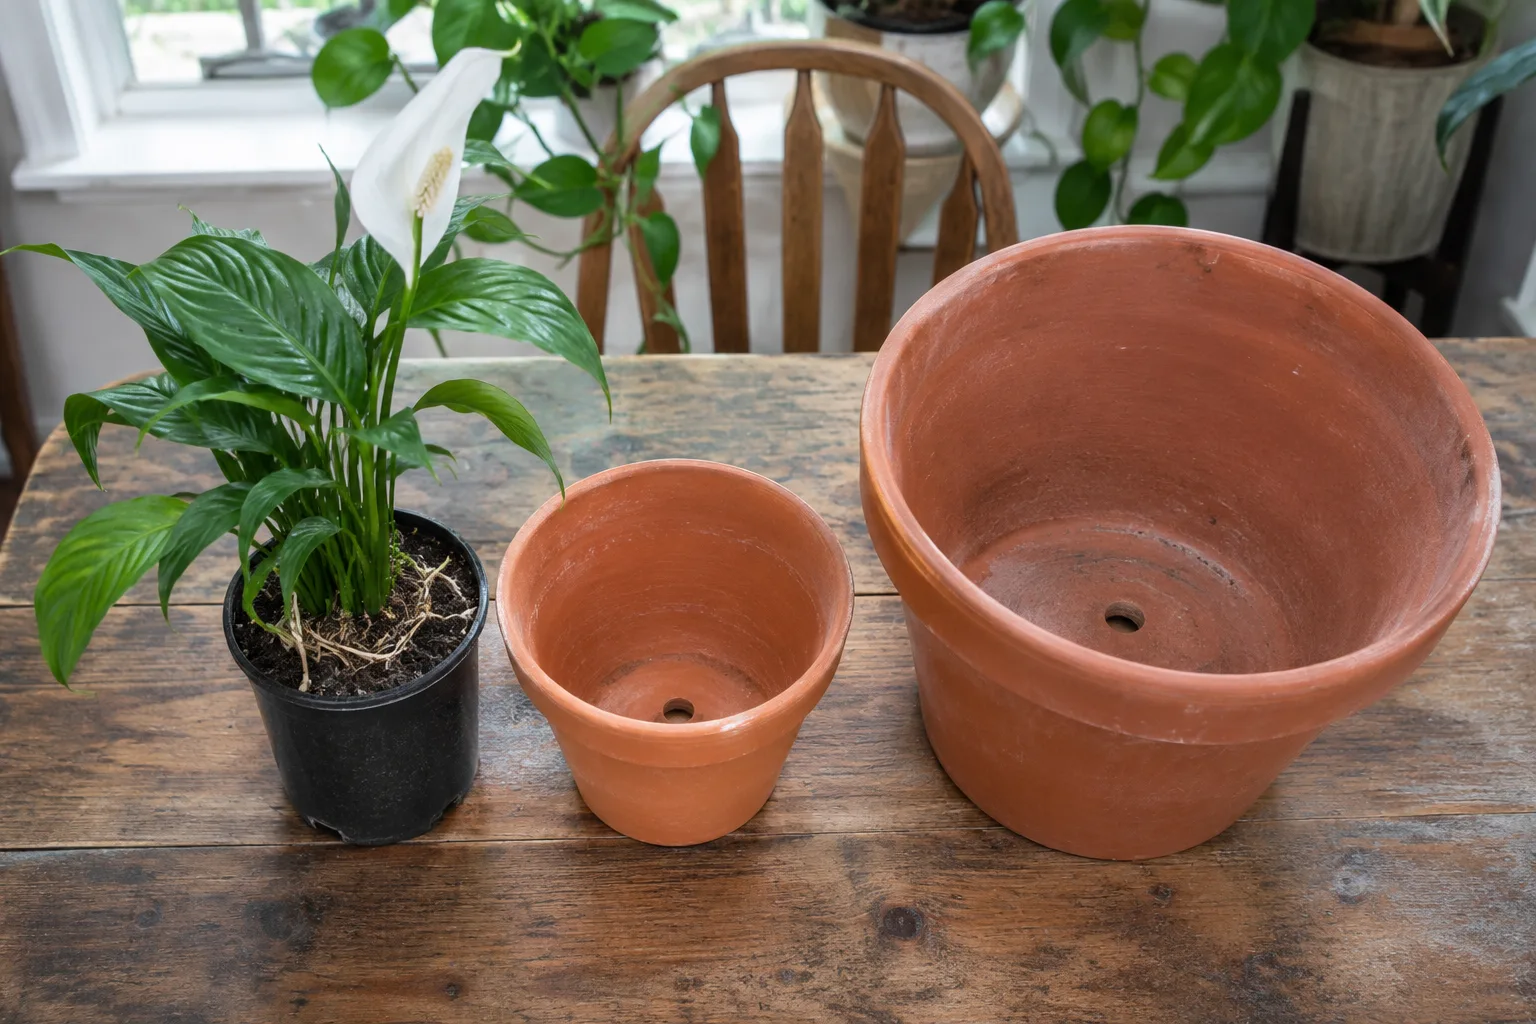
For pots under about 10 inches across, the RHS suggests moving to a pot about 1 to 2 inches deeper and wider than the old one. A plant in a 6 inch pot goes into an 8 inch pot, not a 12 inch one. Larger plants in big containers can step up a little more, but no more than about a third larger.
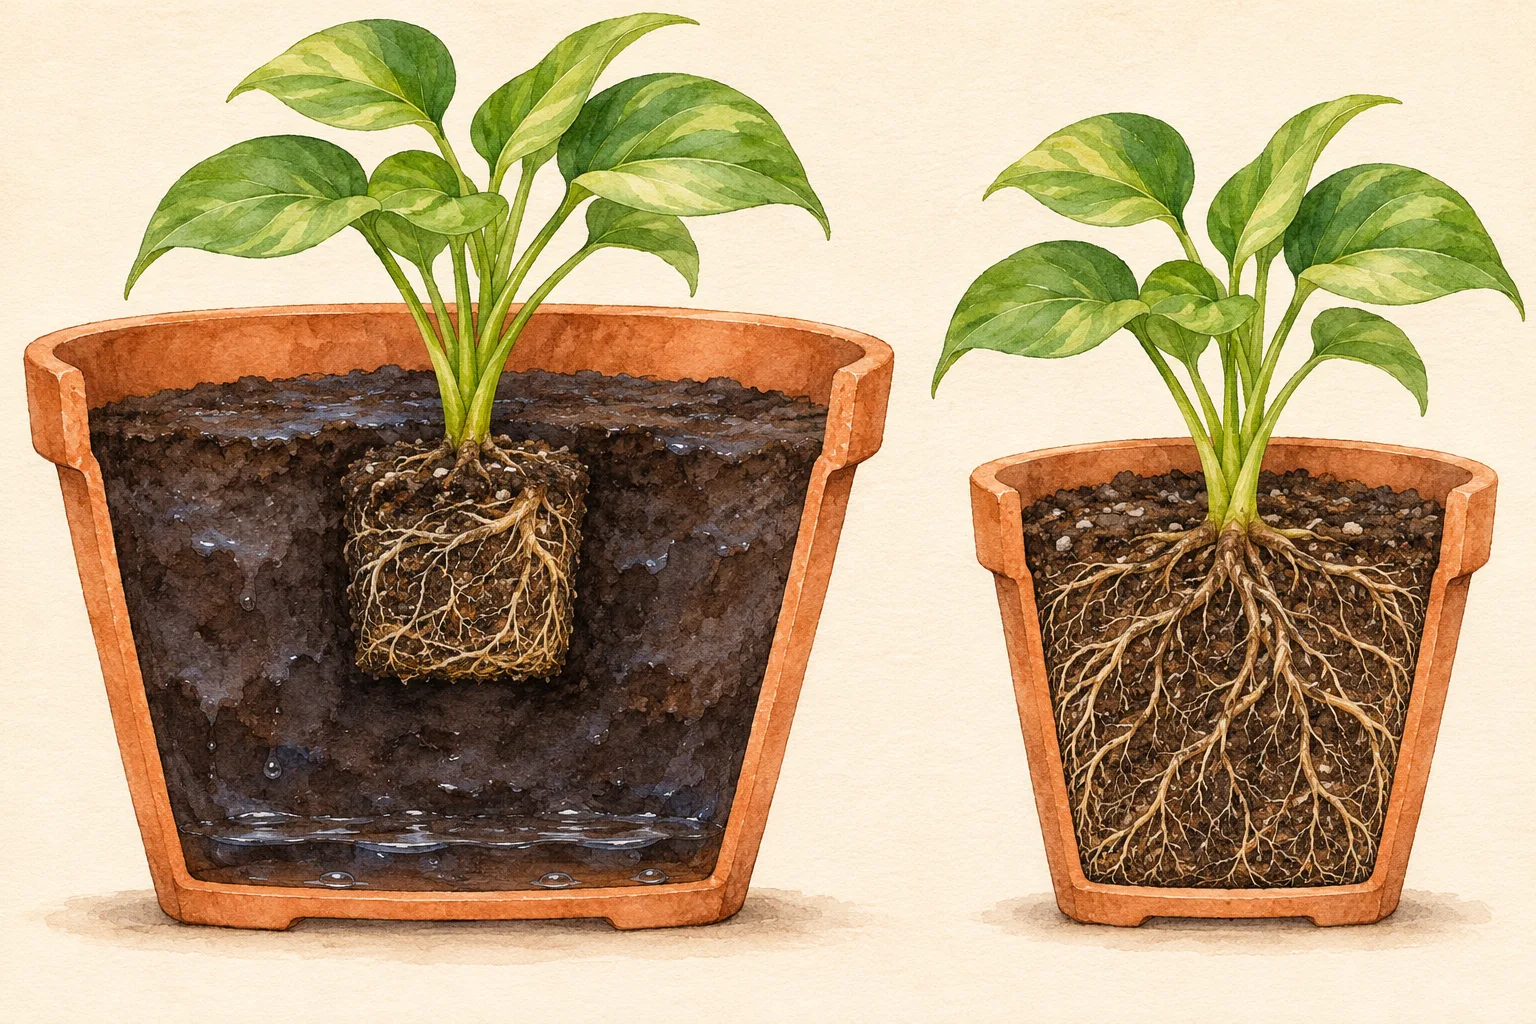
Why it matters: roots dry out the mix by drinking from it. A small root ball in a huge pot is surrounded by mix with no roots in it, so that mix stays wet for days after each watering. That cold, airless mix is where root rot starts. The RHS calls this overpotting, and it is the most common way a well meant repot goes wrong.
Two more rules for the pot:
- It needs a drainage hole. A decorative pot without one can hold the plant in its plastic nursery pot instead. Tip out any water that collects in it after watering.
- Terracotta or plastic both work. Terracotta dries faster, which suits succulents and anyone who tends to overwater. Plastic holds moisture longer, which suits thirsty ferns and peace lilies.
Pick the right potting mix
Use fresh, bagged potting mix, never garden soil, which packs down hard in a pot. Most houseplants do well in an all-purpose indoor mix. Succulents and cacti need a gritty mix that drains in seconds, and orchids need chunky bark. Our guide to the best potting mix for indoor plants covers the ingredients and when to add perlite or bark.
Skip the layer of gravel in the bottom of the pot. It does not improve drainage. Water stays in the mix above the gravel instead, so the wet zone sits higher, closer to the roots.
How to repot a plant, step by step
How to repot a plant
- Water the day before
Water the plant a day ahead so the root ball is moist and holds together. A soaked root ball is heavy and messy; a bone dry one crumbles and tears fine roots.
- Prepare the new pot
Put 1 to 2 inches of fresh mix in the bottom of the new pot, enough that the top of the root ball will sit about an inch below the rim.
- Ease the plant out
Tip the pot on its side, hold the plant at the base of its stems and slide it out. Squeeze a plastic pot or run a butter knife around the inside of a rigid one if it sticks. Never pull on the stems.
- Loosen the roots
Tease circling roots outward with your fingers or a chopstick so they will grow into the new mix. Crumble off loose old mix from the top and sides. Cut off any roots that are brown, mushy or hollow with clean snips.
- Set it at the same depth
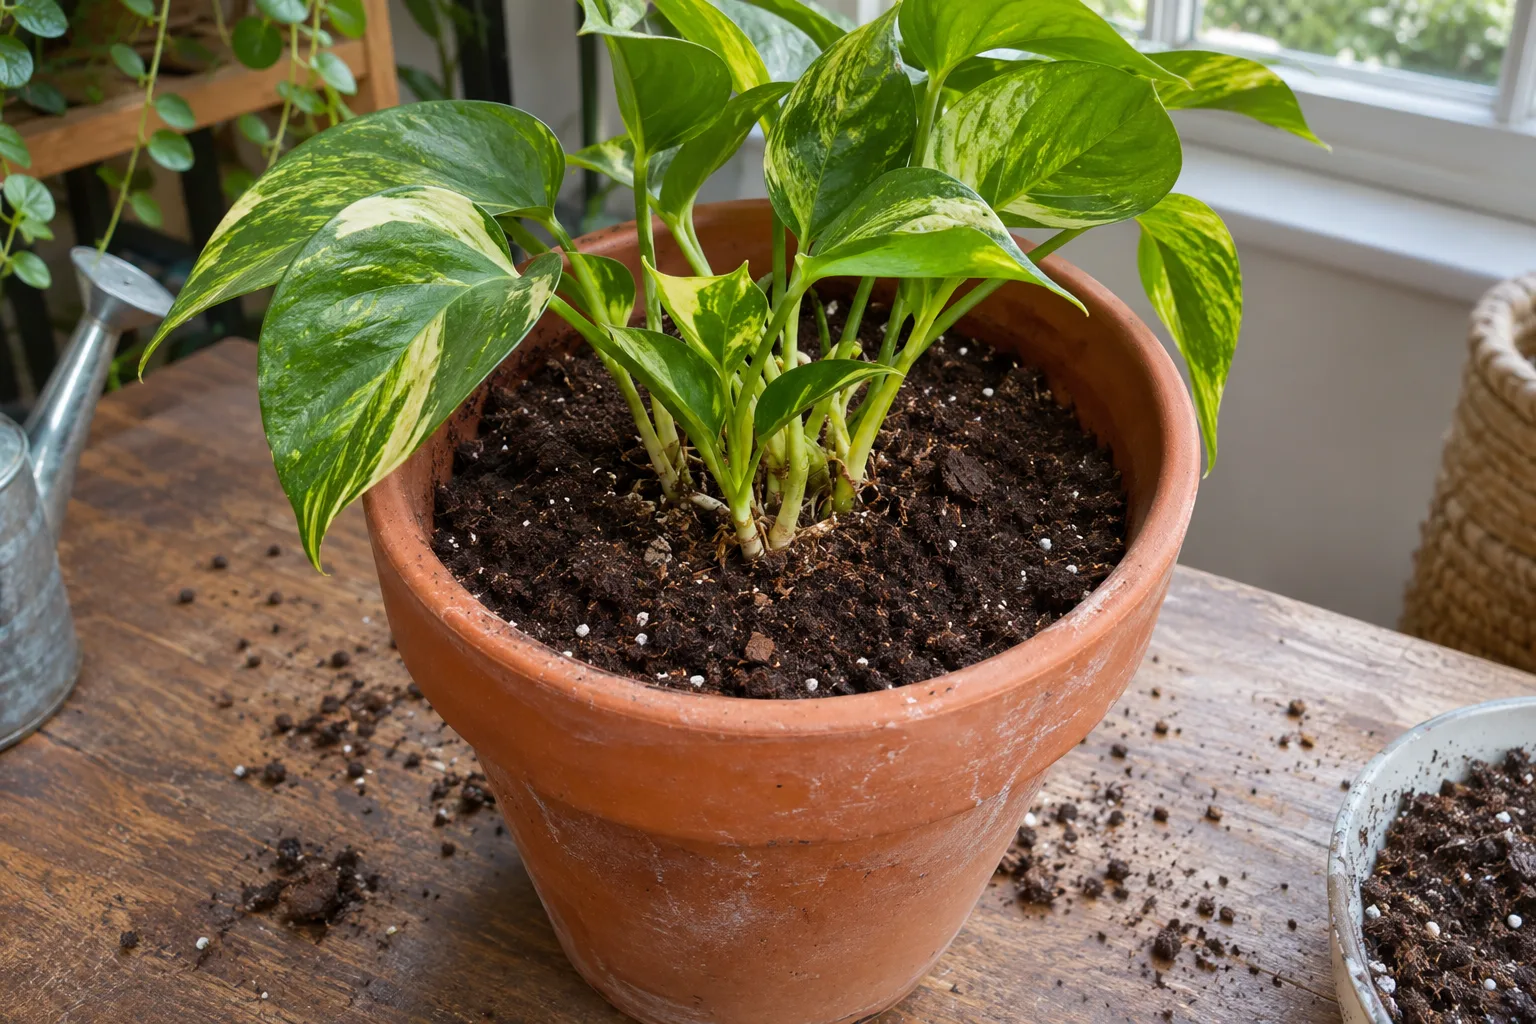
Stand the plant in the center of the new pot so the top of the root ball sits at the same level it did before, about an inch below the rim. Burying the stems deeper invites rot.
- Fill around the sides
Add mix around the root ball and firm it gently with your fingers to close large air gaps. Do not pack it down hard; roots need the air.
- Water once and let it drain
Water slowly until it runs out of the drainage hole, then let the pot drain completely. Top up any mix that settles.
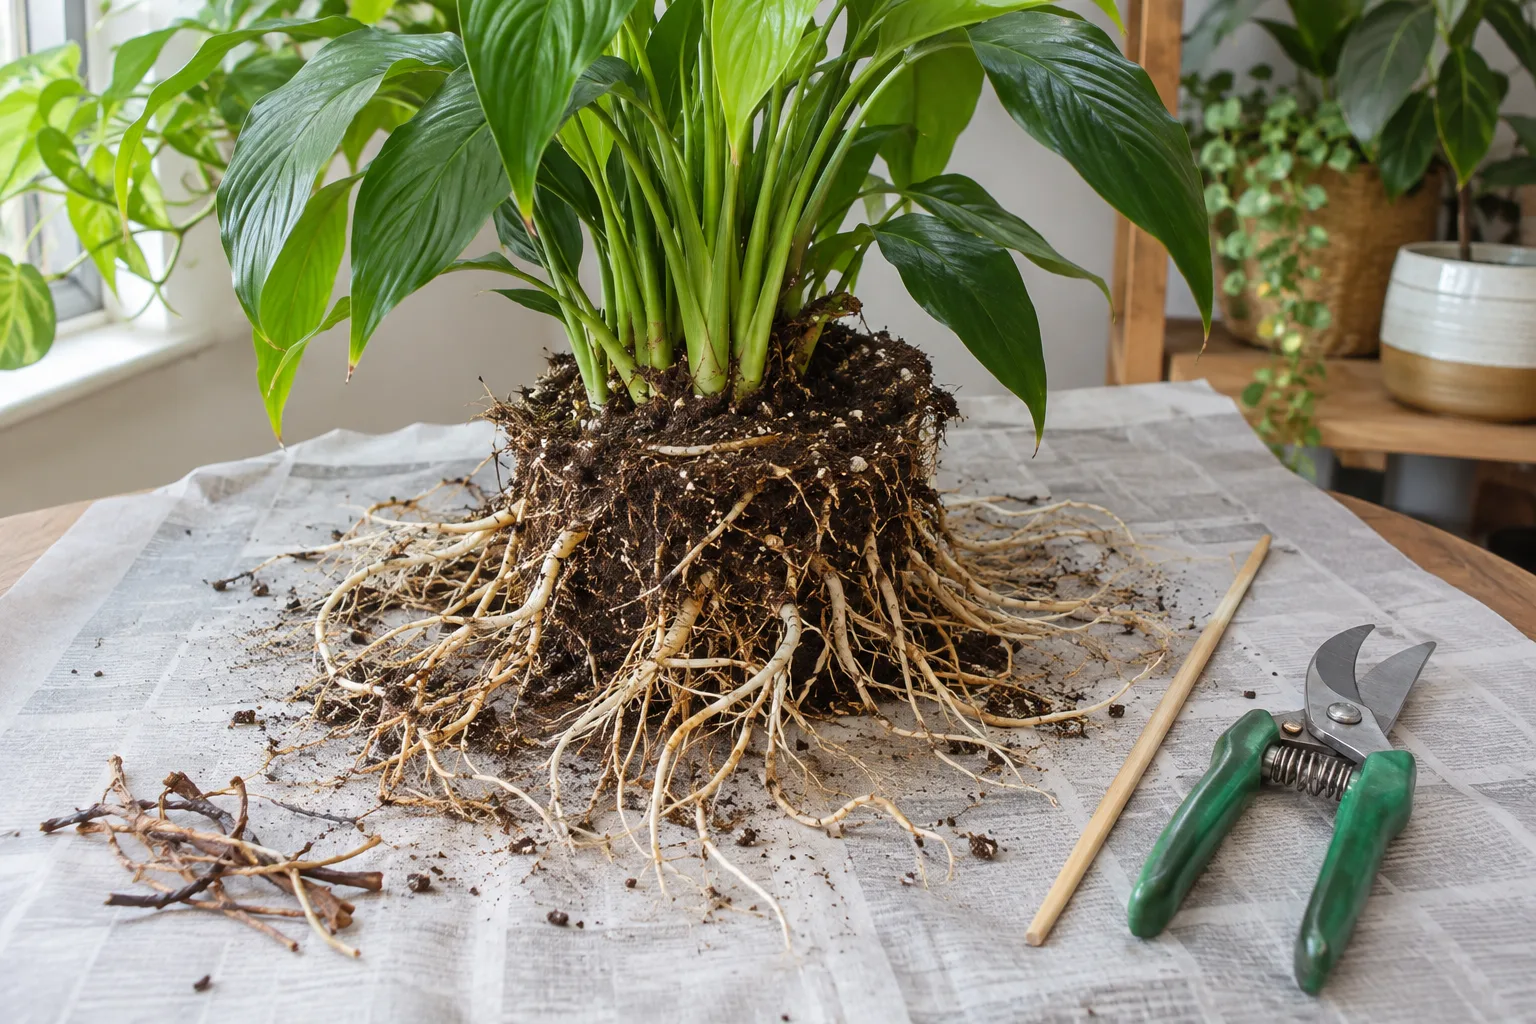
If the roots you find are brown and mushy rather than white or tan and firm, you are dealing with rot, not crowding. Trim it back to healthy tissue and use a pot no bigger than what is left of the root ball. Our guide to fixing root rot covers that case in detail.
Do you water a plant after repotting?
Yes, water once right after repotting, slowly and thoroughly, until water runs out of the drainage hole. That settles the fresh mix around the roots and closes air pockets. Then wait until the mix is dry about 2 inches down before you water again, which often takes longer than you expect because the new mix starts out moist.
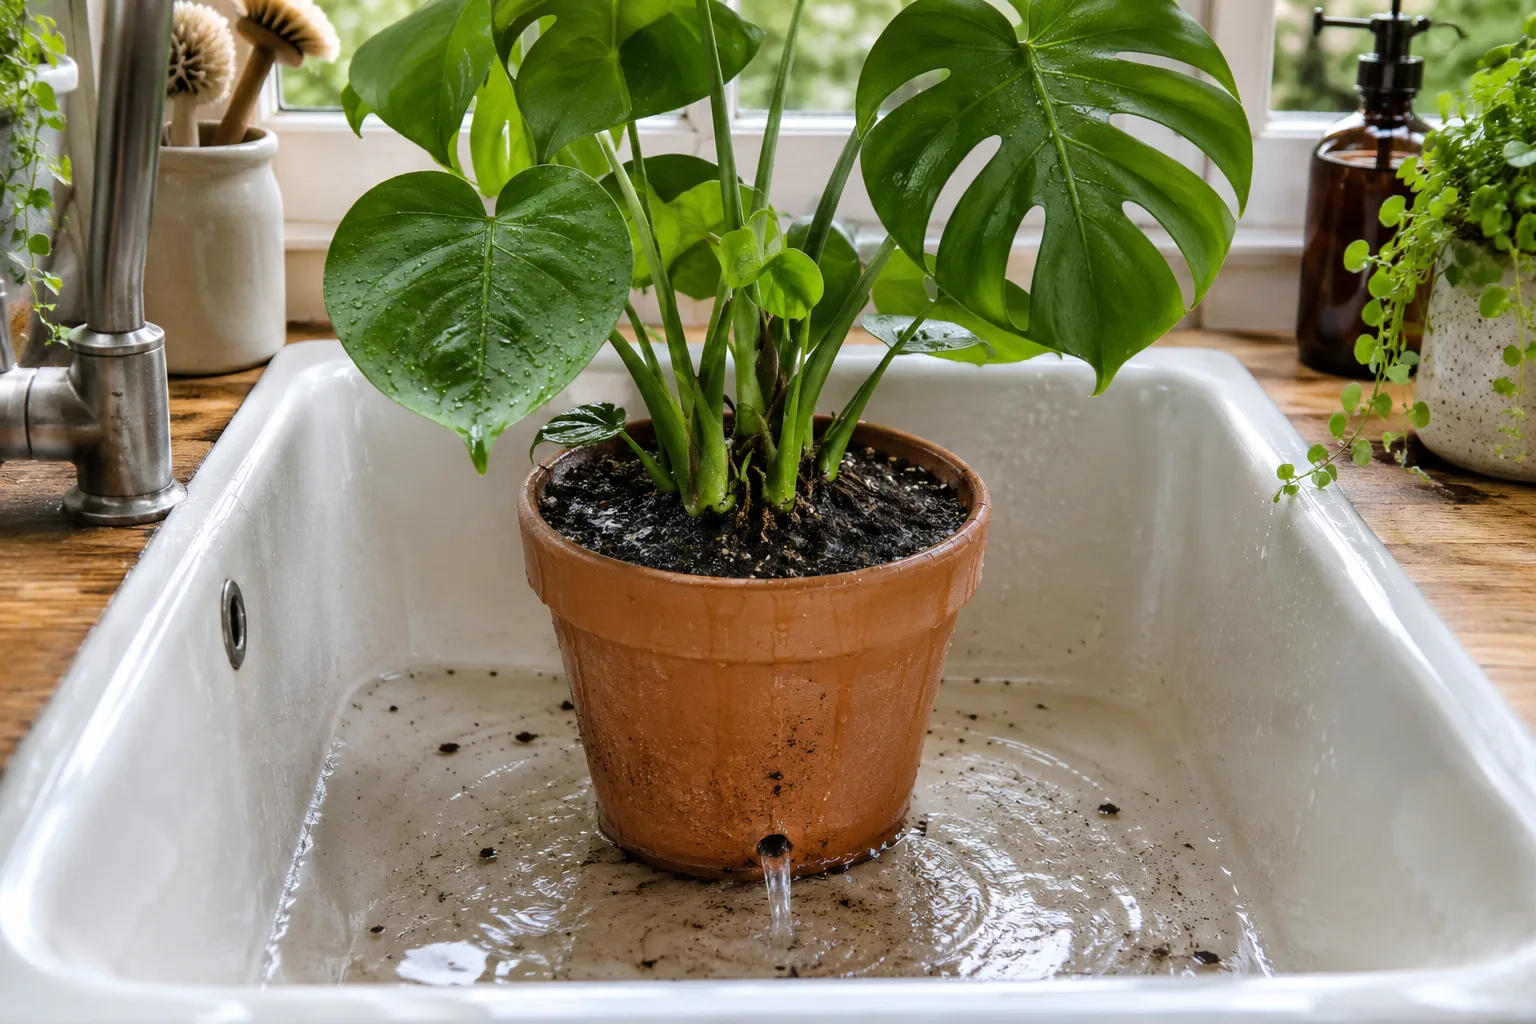
The second watering is where repotted plants usually get into trouble. Disturbed roots drink less for the first week or two, so a plant watered on its old routine sits in wet mix. Feel the soil first; our guide to checking whether soil is wet or dry shows the finger test. Succulents are the exception: many growers wait a few days before the first watering so any broken roots can heal, as our succulent care guide explains.
How to prevent transplant shock
Transplant shock is the droop, a yellow leaf or two, and a pause in growth that can follow a repot while the roots recover. You prevent most of it with a gentle repot and an easy first two weeks:
- Repot in spring or early summer, when the plant is growing.
- Keep as much of the root ball intact as you can; loosen roots, do not strip them bare.
- Put the plant in bright, indirect light with no direct sun for a week or two.
- Hold off on fertilizer for about a month. Fresh mix usually contains some, and new roots burn easily.
- Do not water again until the mix is dry 2 inches down.
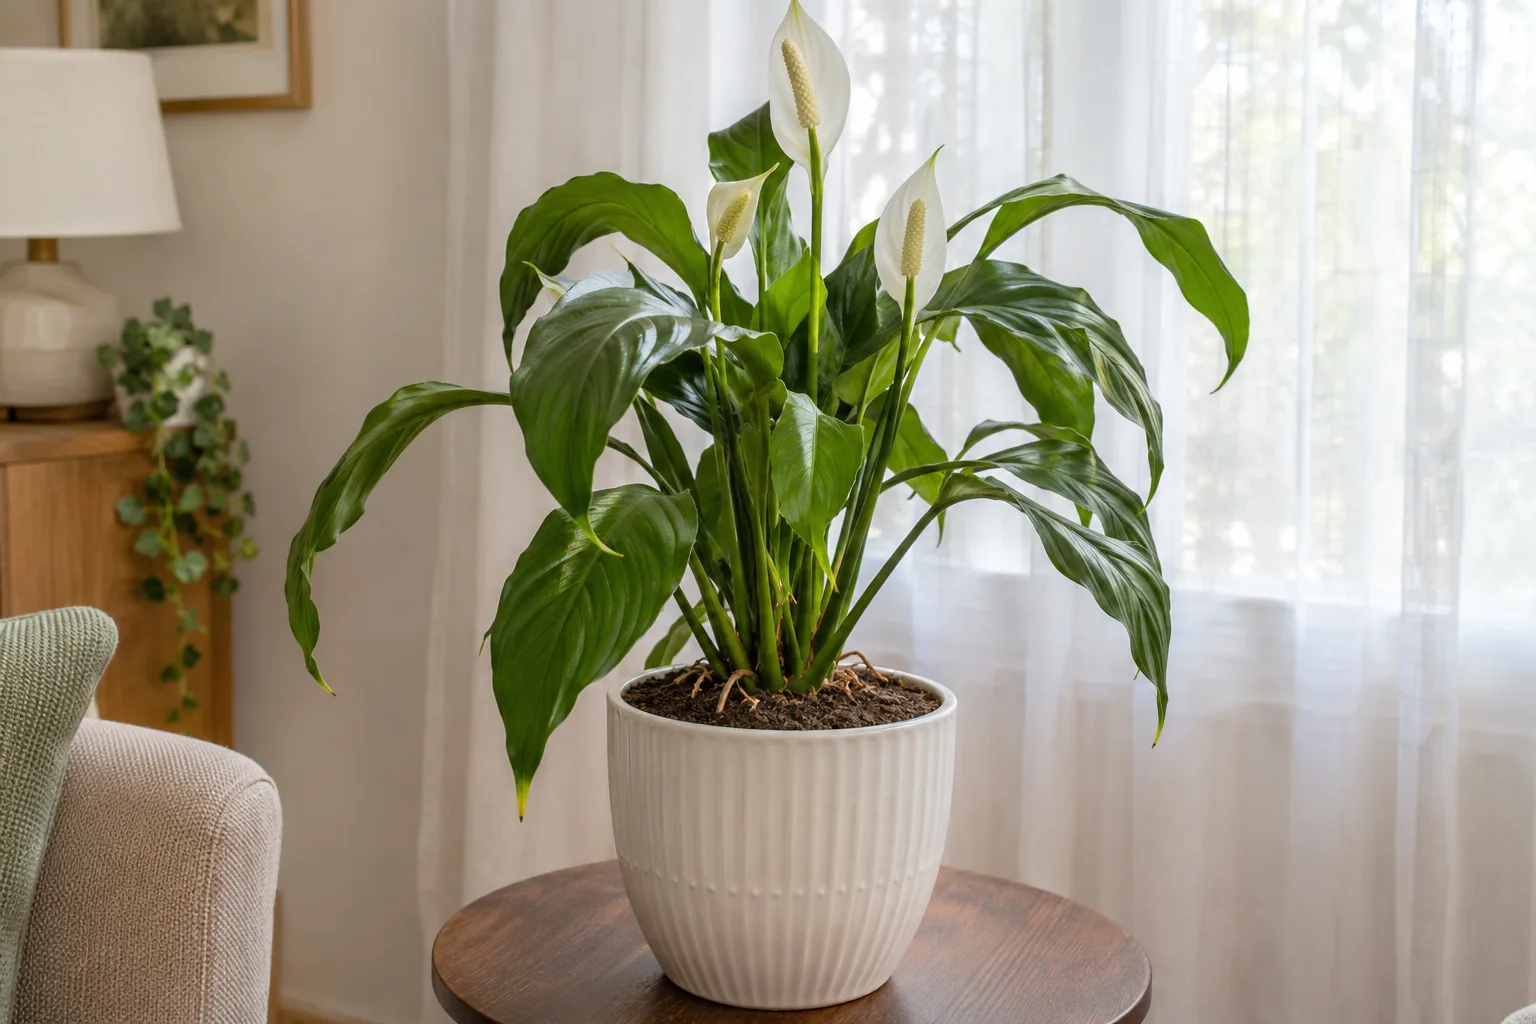
A little drooping in the first few days is normal and usually passes within a week or two. If it does not, our guide on why a plant wilts after repotting walks through the other causes. Drooping that gets worse in wet mix points to too much water, not shock; our guide on how to save an overwatered plant covers what to do next. If a ZZ plant flops after repotting, give it time and bright shade rather than extra water.
Repotting mistakes that cost you the plant
| Mistake | What happens | Do this instead |
|---|---|---|
| Pot far too big | Mix stays wet, roots rot | Go up 1 to 2 inches |
| No drainage hole | Water pools at the bottom | Use a nursery pot inside the decorative one |
| Garden soil | Packs hard, drains badly | Fresh bagged potting mix |
| Planting deeper | Stems rot at the soil line | Same depth as before |
| Watering on the old schedule | Wet mix, droop, yellow leaves | Wait until 2 inches down is dry |
| Fertilizing right away | Burned new roots | Wait about a month |
| Repotting a struggling plant on a hunch | Extra stress on top of the real problem | Find the cause first |
The last row matters more than it looks. Repotting is not a cure for yellow leaves or a drooping plant. If the roots are not crowded and the mix is not sour, the cause is usually light or watering, and a new pot only adds stress. Our overwatered plant symptoms guide helps you rule that out first.
What to watch in the weeks after
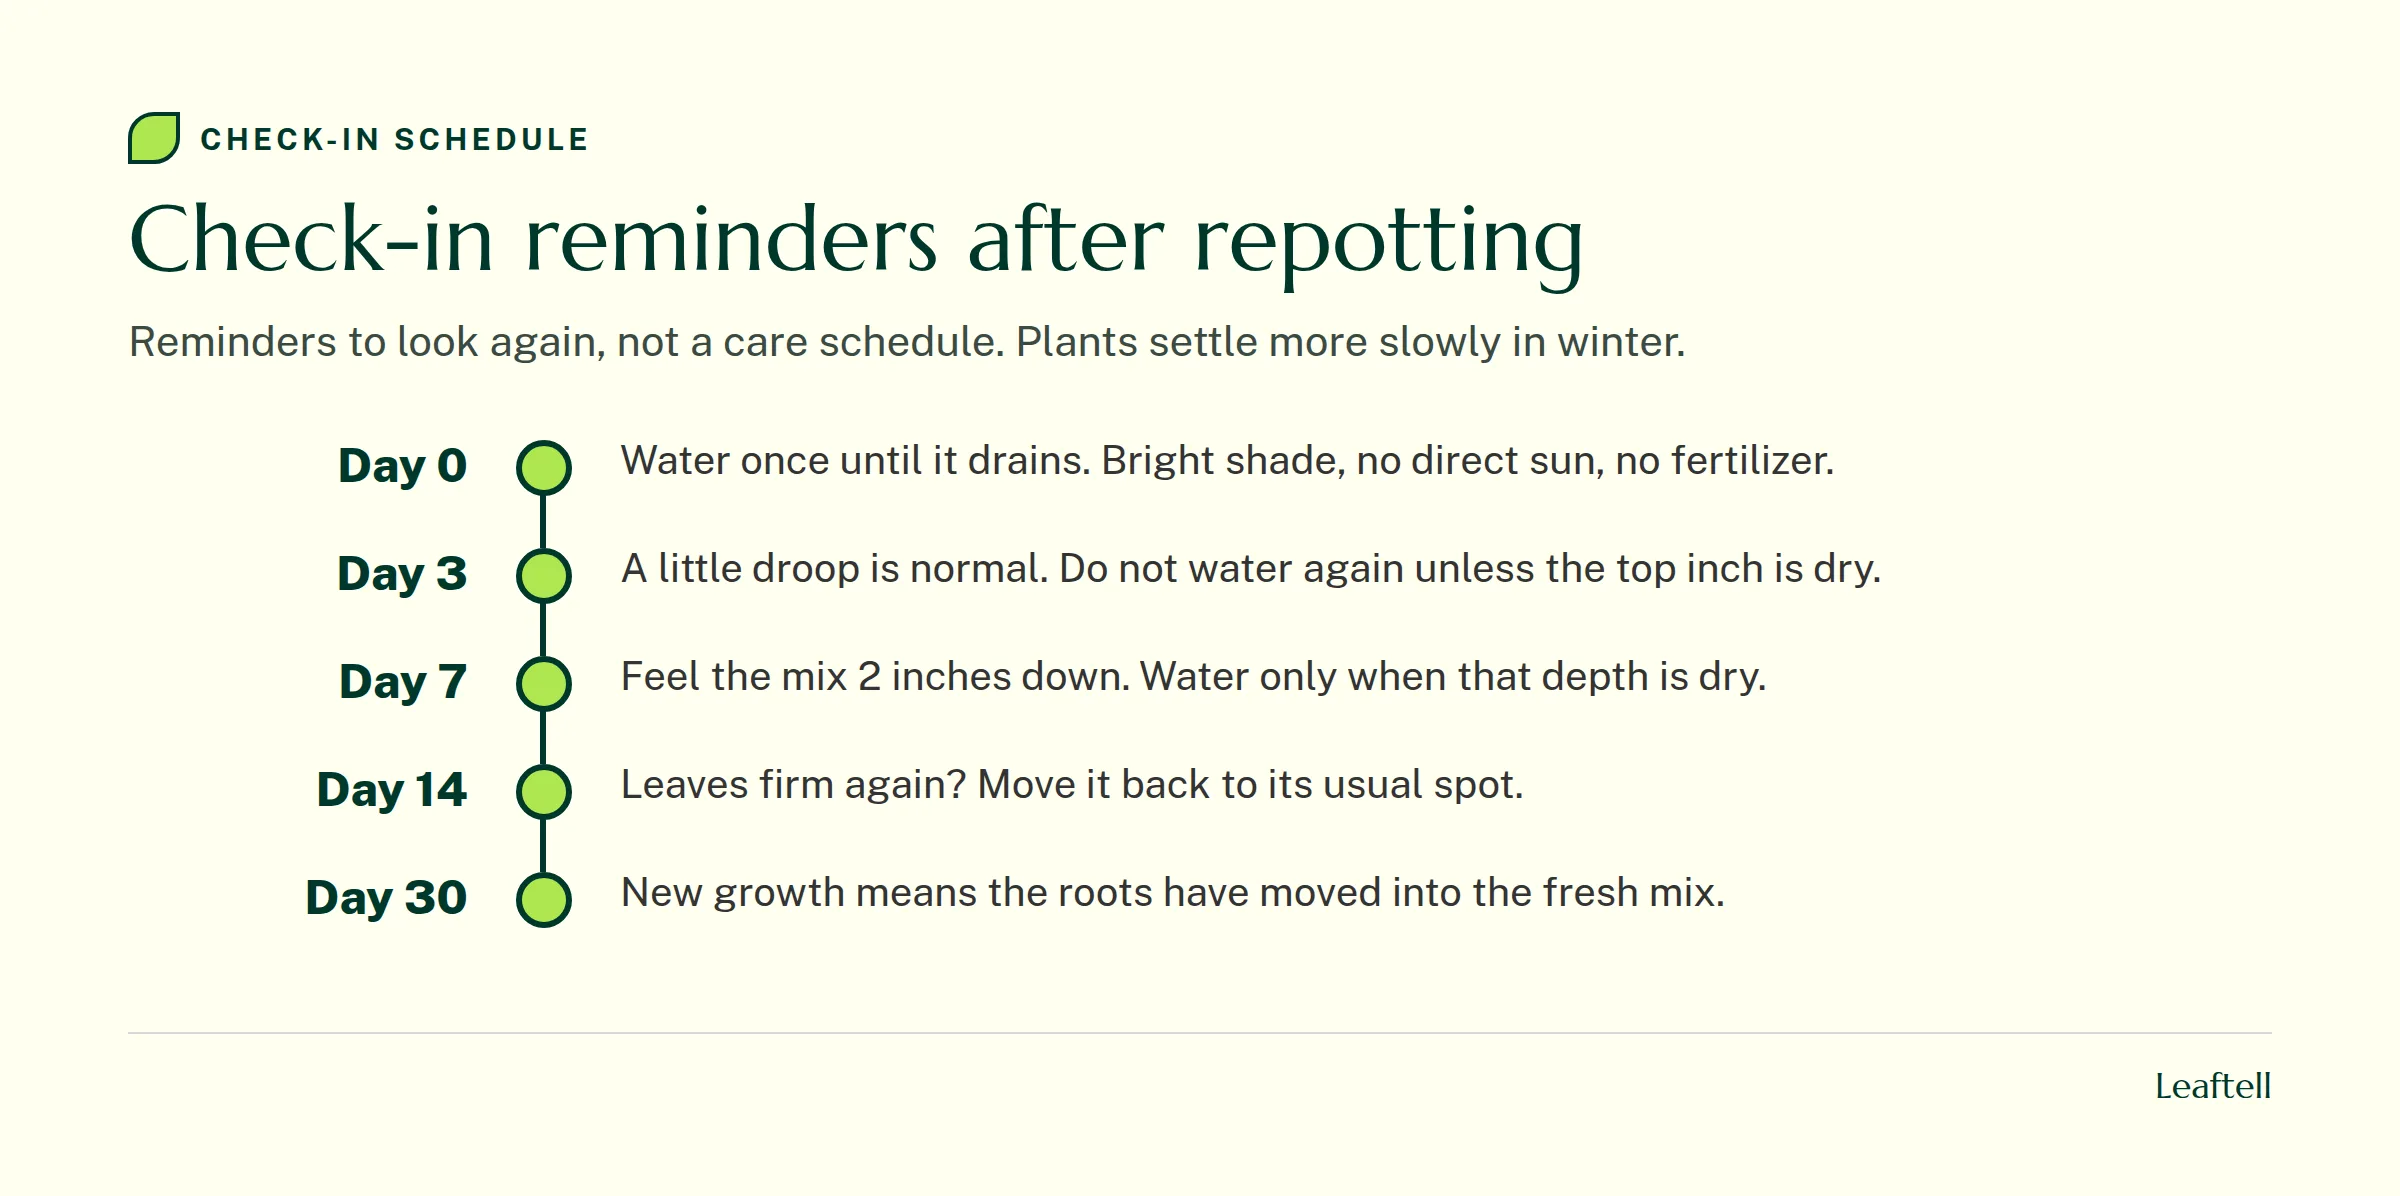
The first month tells you whether the repot worked. Firm leaves within two weeks and new growth within a month mean the roots have moved into the fresh mix. Treat the dates below as reminders to look again, not as a watering schedule.
Check your plant in Leaftell
If your plant droops or yellows after a repot and you cannot tell shock from too much water, check your plant in Leaftell. Send a photo of the whole plant and one close up of any yellow or drooping leaves, and note how the mix feels 2 inches down, since a photo cannot feel the soil. Then take a fresh photo in about a week as a check-in reminder and compare.
Check your growing conditions with the plant watering calculator.
Frequently asked questions
Slide the plant out of its pot and look at the roots. If they circle the root ball and hold the shape of the pot, or water runs straight through without soaking in, it is time. A few roots out of the drainage hole alone are not enough; many plants are fine like that for months.
Water the day before, so the root ball holds together, and water once right after repotting until it drains from the bottom. Then let the mix dry about 2 inches down before you water again. Succulents are the exception: wait a few days before the first watering.
Repot in spring or early summer, keep most of the root ball intact, and use a pot only 1 to 2 inches wider. Afterward, keep the plant in bright, indirect light, skip fertilizer for about a month and do not water again until the mix has dried. A little droop for a few days is normal.
Yes, but less often. Slow growers like snake plants and ZZ plants like a snug pot and may only need fresh mix every few years. Their mix still breaks down and compacts over time, so check the roots each spring and repot only when they fill the pot or the mix drains poorly.
Share article
About the author

Keep checking your plant
Plant care reference
Indoor plant care
Build a routine around your plant, light and potting mix.
Plant care reference
Why is my plant dying
Trace leaf and root symptoms before choosing a care change.
Plant care reference
Pothos plant care
Choose a growing spot and prune a trailing pothos for fuller growth.
Plant care reference
How to fix root rot
Inspect root firmness and drainage, then decide whether to repot.