Scale on plants: spot the bumps and stop new damage
Filip Leszczyński 16 October 2026 11 min read
In this article
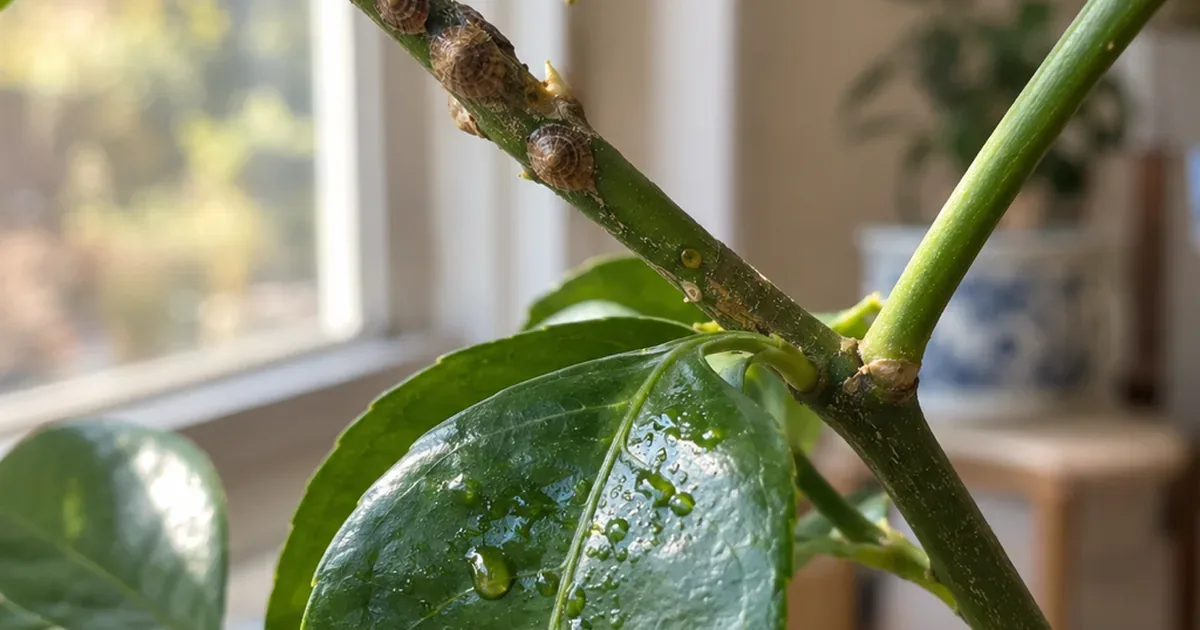
Scale on plants often looks like fixed brown bumps along stems or leaf veins, sometimes with sticky honeydew below. Separate the plant, check that the bumps are insects rather than normal tissue, and gently remove accessible scale before choosing a treatment.
The surprising part: a cover can remain after the insect is no longer active. A photo of bumps alone cannot tell you whether the infestation is growing; you need a cleaned reference area and a record of what appears next.
Scale on plants pictures: bumps or normal tissue?
Scale tends to form repeated shell-like bumps on stems or veins; normal scars follow the plant's growth structure. Compare a healthy stem before lifting or removing anything.
Look closely at the shape, position, and repetition of the bumps. Scale may gather along veins or stems, while normal bark, leaf scars, and other structures follow the plant's own growth pattern. Compare a suspected area with a similar healthy stem. Do not scrape away every raised feature in an attempt to test the idea.
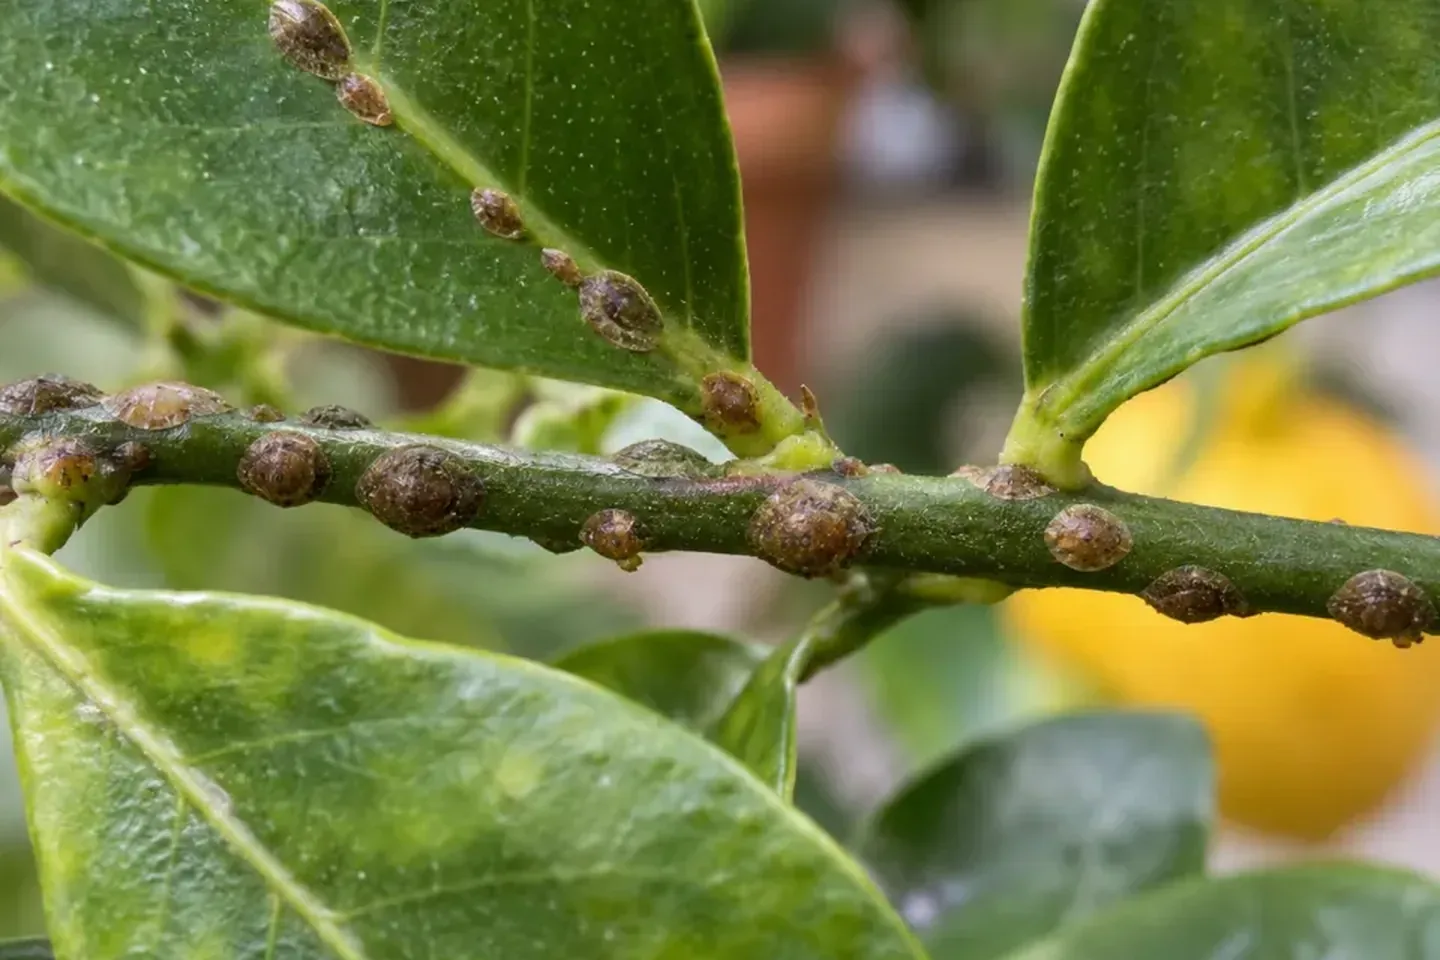
Use a hand lens and gently examine one representative bump if the tissue allows. Photograph it first. Whether a covering can be lifted can be useful evidence, but forceful scraping injures the plant and may remove the detail an adviser needs. Note whether the underlying stem is firm and whether nearby leaves show decline.
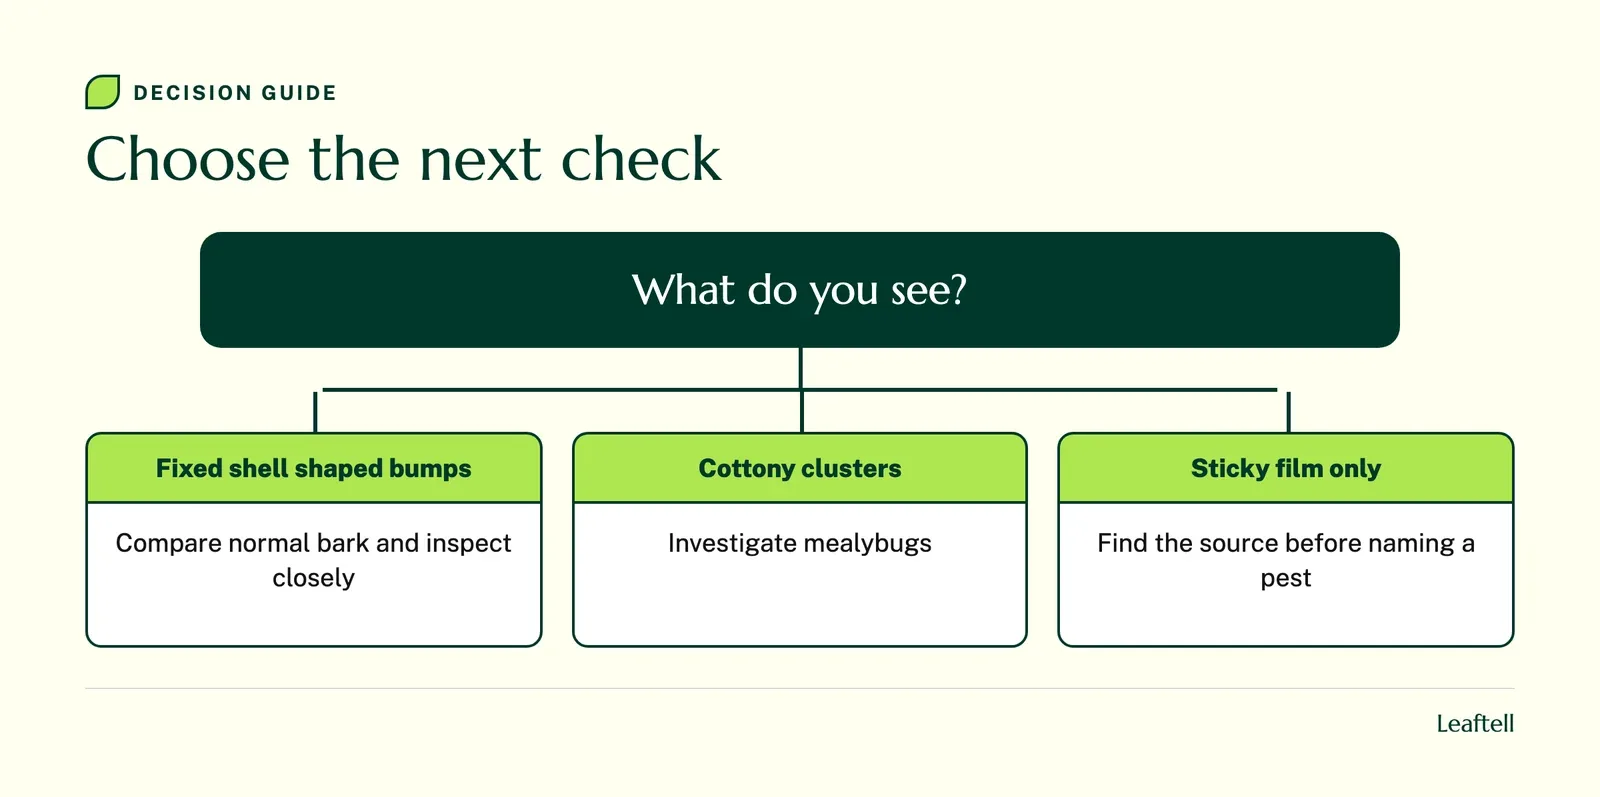
Compare mealybugs on plants when the covering is cottony rather than shell-like. Exposed colonies on soft growth may instead fit how to get rid of aphids. Houseplant pests offers a broader comparison if identification remains unclear. Keep the suspected plant separated while checking it. A fixed bump is easy to overlook precisely because it does not move like a familiar insect, so inspect deliberately rather than waiting to see obvious motion during a brief glance.
Observation checklist. Review dates are suggested check-ins, not watering or treatment intervals.
| What you find | Best next check |
|---|---|
| Raised bumps along veins or woody stems | Compare with normal leaf scars and inspect one representative area gently. |
| Sticky leaf beneath an affected branch | Search above the deposit for the actual feeding site. |
| Cleaned stem segment on day 7 | Record new bumps separately from covers left by old insects. |
| Mobile young stages observed | Ask for identification and label-directed timing rather than setting a universal spray interval. |
Trace sticky deposits upward
Check the leaves and surface beneath the affected stems for sticky deposits. Some scale insects produce honeydew, but not all scale types do. A lack of stickiness therefore does not rule out scale. Conversely, a sticky leaf does not identify scale by itself because other sap-feeding pests and non-pest residues can produce a similar clue.
Clean a small reference area gently after photographing it and note whether fresh deposits appear later. That is more informative than repeatedly touching a surface that has remained sticky for weeks. The article on sticky leaves on plants explains how to compare deposits with visible organisms and the plant's surroundings.
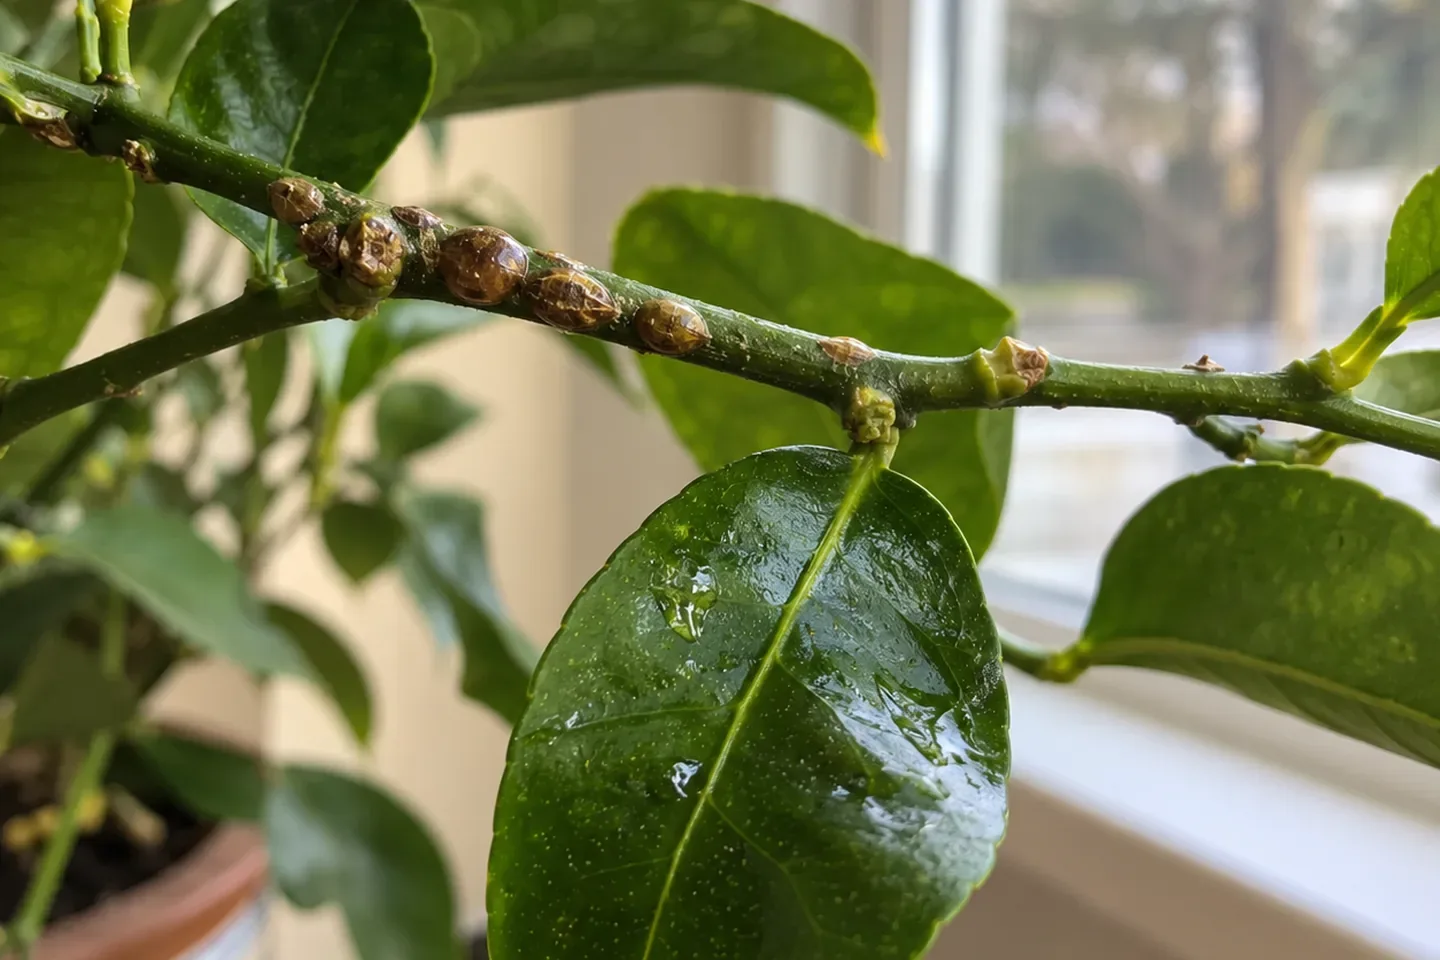
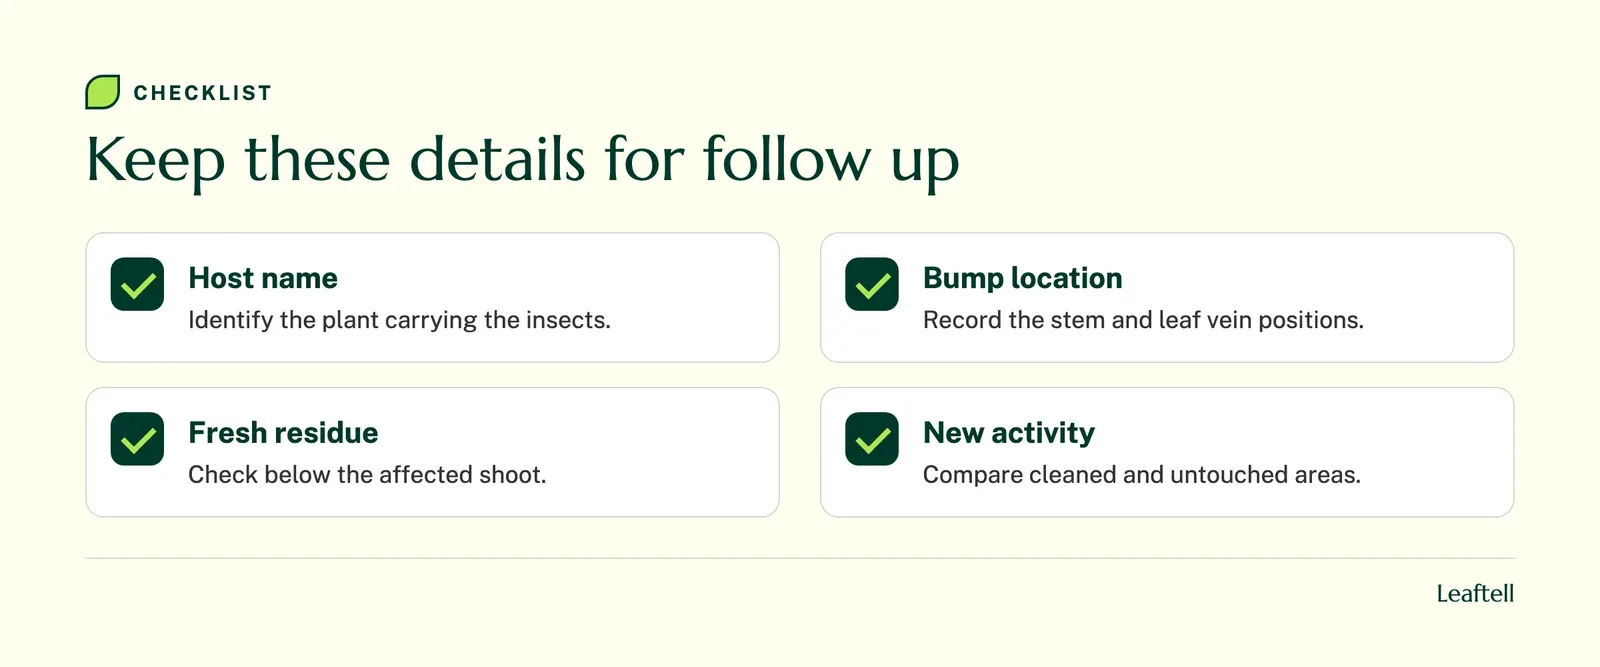
Inspect stems above the sticky leaf as well as the leaf itself. Material can fall from an infested shoot onto healthy foliage below, making the lower leaf look like the source. For a climber, monstera plant care helps you understand the stem and support arrangement during inspection. Record where the bumps actually occur. This simple map directs physical removal toward the host tissue carrying insects, instead of repeatedly washing only the surfaces where the residue happens to collect.
UC IPM distinguishes soft scales from armored scales. Identify the attached insects before choosing control; a sticky surface or yellow leaf by itself cannot tell you which group is present.
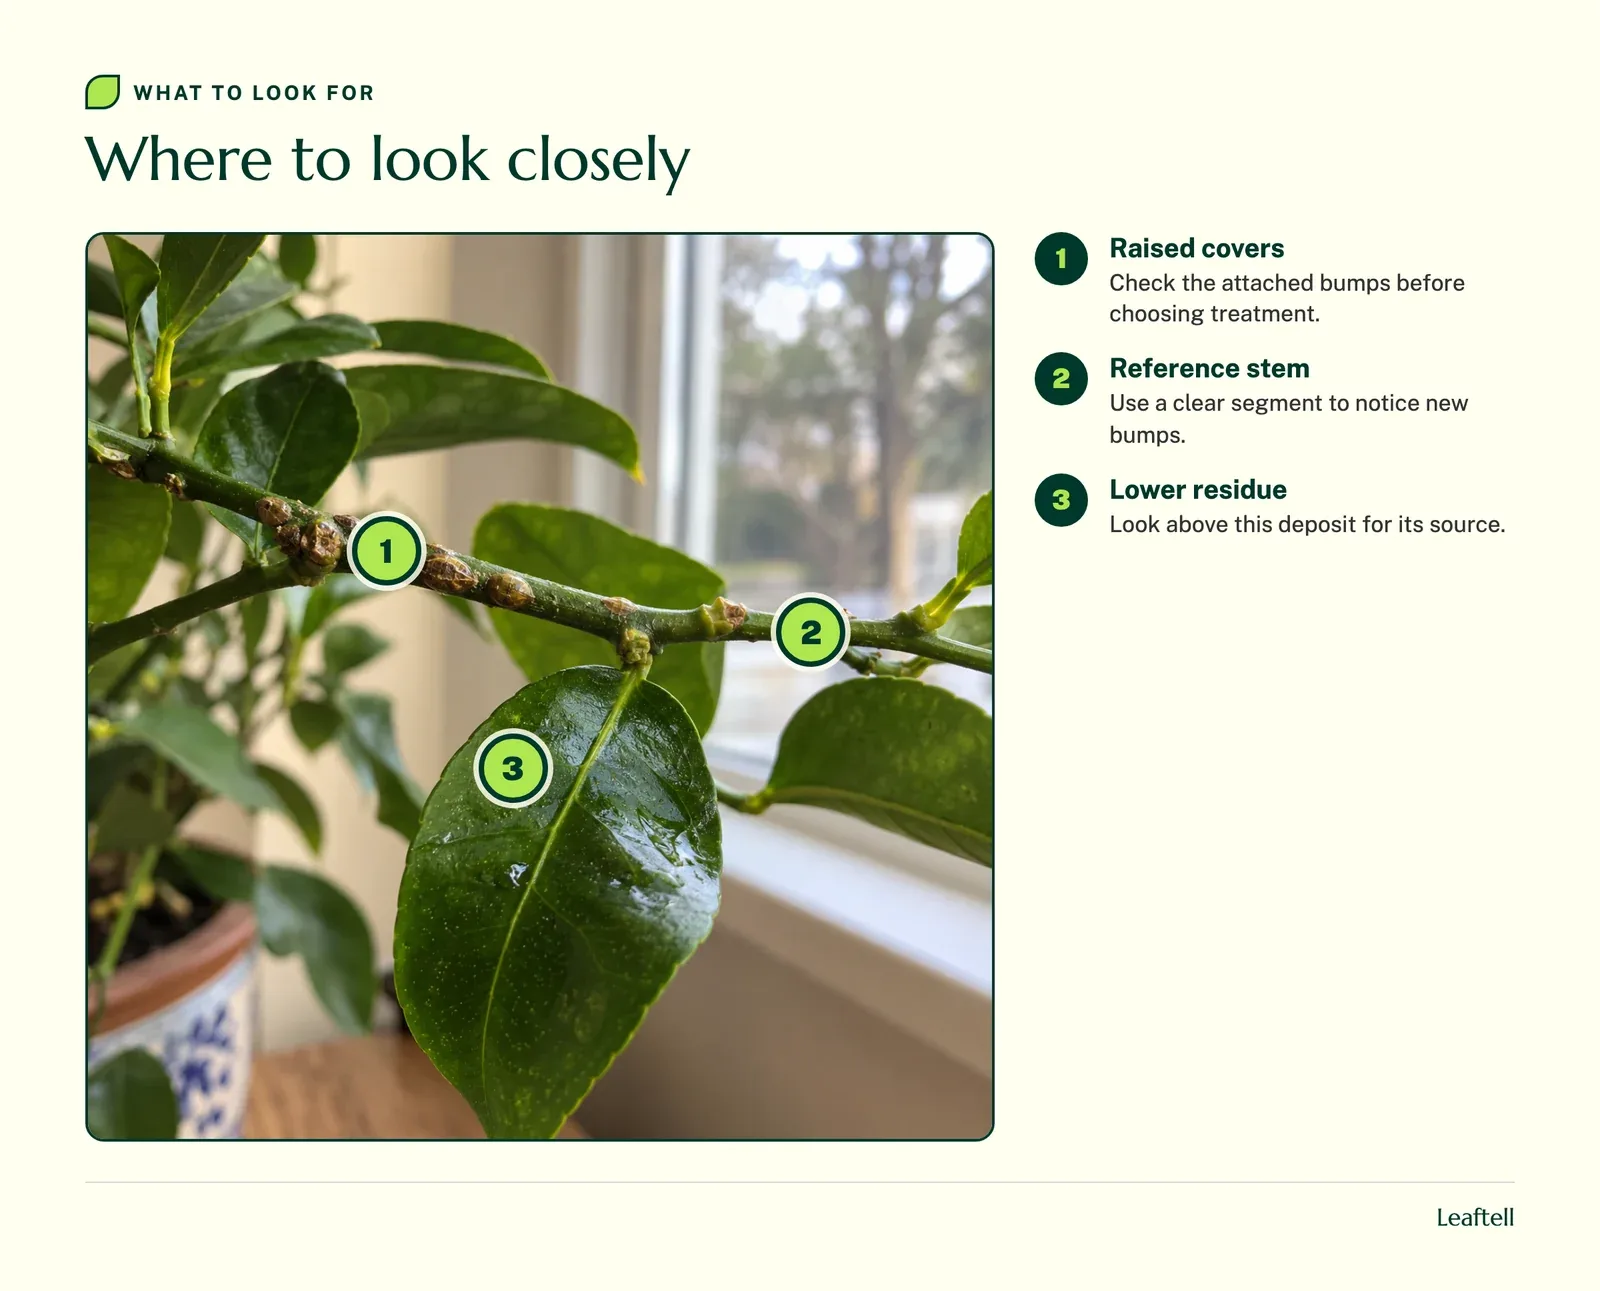
How to get rid of scale on plants naturally
Separate the plant and begin with careful removal of accessible scale where practical. Use a soft damp cloth or suitable gentle tool while supporting the stem. Avoid gouging bark or peeling healthy tissue to remove a stubborn covering. A few localized insects on a sturdy stem present a different task from dense infestation throughout fragile new growth.
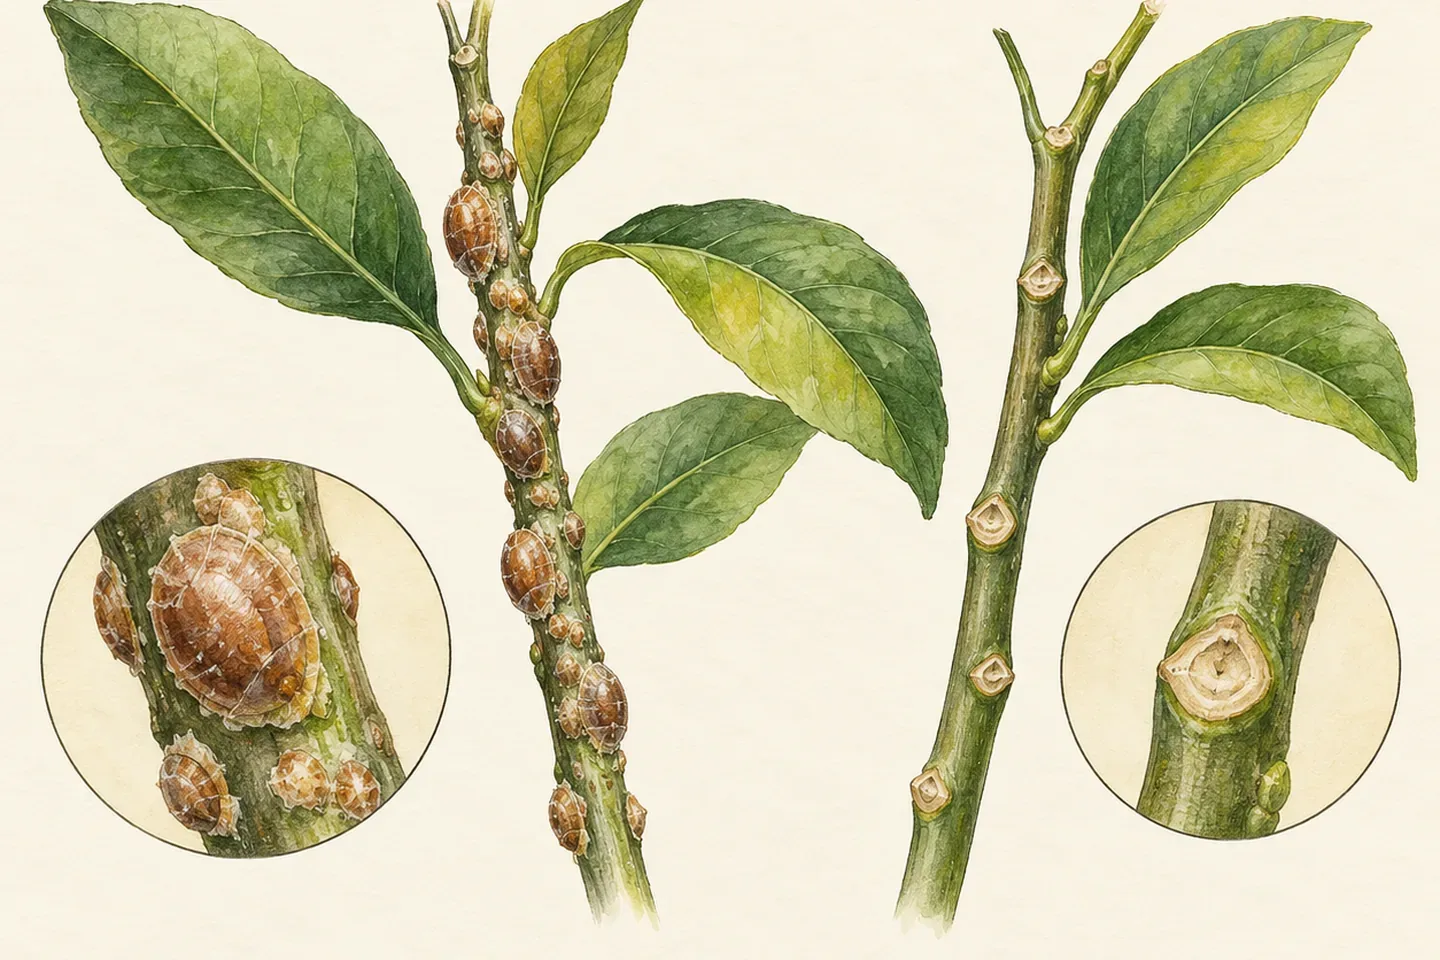
If a heavily affected branch can be pruned without removing most of the plant's useful foliage, contain it before carrying it elsewhere. Clean the tool and work surface afterward. Inspect the support, pot rim, and neighboring leaves. Do not take apparently clean cuttings from the same plant without checking them closely for small overlooked stages.
Record what was removed and photograph the cleaned area. Old covers can remain attached even when the insect is no longer active, so visual cleanliness is not a perfect measure of success. Check for new bumps and fresh deposits during follow-up. If removal causes repeated injury, pause and seek a host-specific approach rather than increasing the scraping force. Protect the root ball from unnecessary wetting during repeated cleaning, and maintain suitable light while the plant stays apart from the rest of the collection.
How to inspect and remove accessible scale
- Separate without sacrificing light
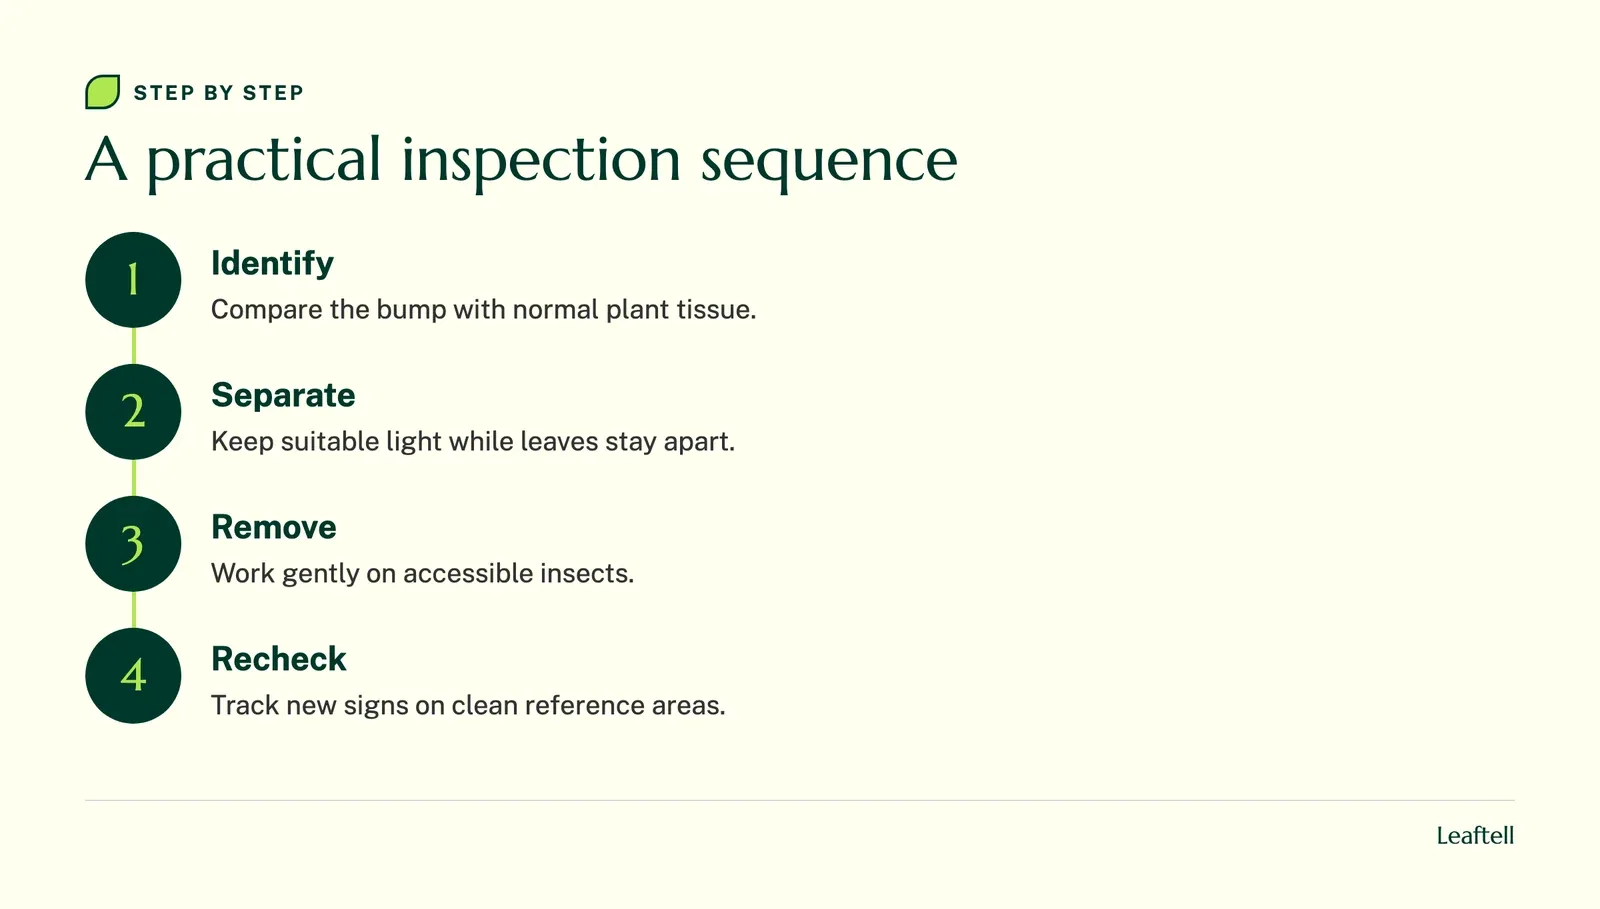
Move the plant so its leaves no longer touch its neighbors. Keep the light suitable for the host and inspect the plants it touched before you moved it. Isolation should not turn a pest problem into a placement problem.
- Save the evidence
Photograph a whole affected branch, then a close view of the bumps. Compare the suspect stem with a healthy one and use a hand lens. Preserve enough detail to distinguish shell coverings from ordinary bark and leaf scars.
- Remove gently
Support a sturdy stem and use a soft damp cloth or a suitable gentle tool on accessible insects. Stop if the tissue tears or the covering resists. Contain any appropriately pruned material and clean tools and the work surface.
- Mark a clean reference
Record the stem segment you cleaned and one leaf below it. Look for fresh bumps and renewed deposits rather than repeatedly scrubbing old marks. Keep checking while the plant stays separate.
Best insecticide for scale insects: identification first
Scale coverings can protect insects from treatments that work only on exposed stages. The mobile young stage is often important in control decisions, but its timing varies with the scale species and environment. That makes a universal household spray schedule unreliable. Ask an extension adviser to help identify the scale and assess an appropriate approach for your plant.
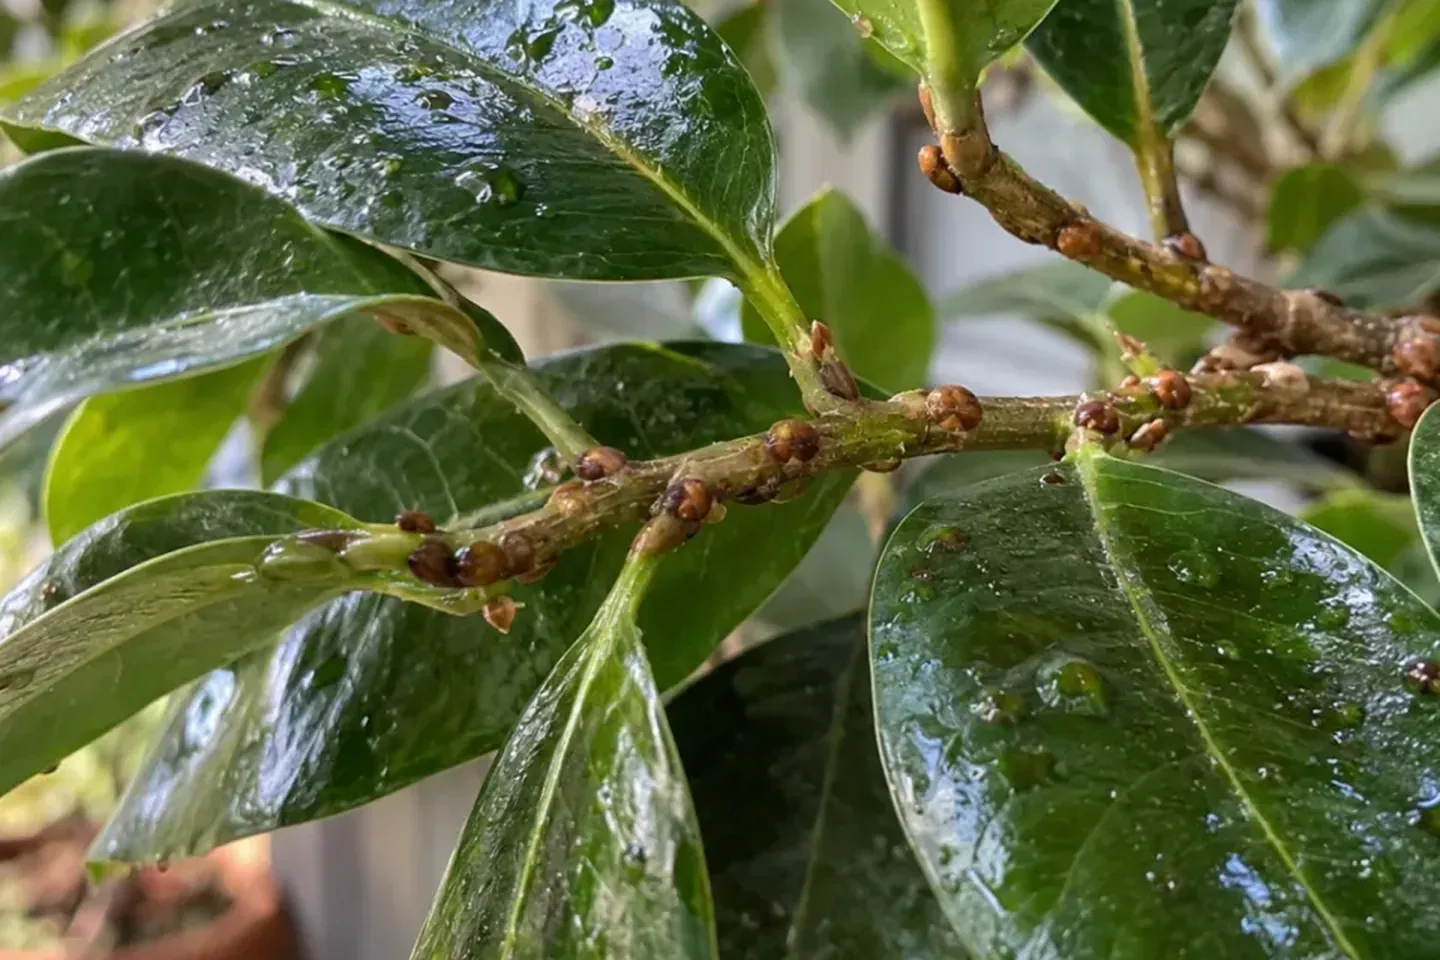
Horticultural oil or insecticidal soap are possible product classes only where the label covers the host, pest, and setting. Follow the label for coverage, testing, temperature restrictions, and repeat applications. Never mix products or apply a stronger solution because old covers remain visible. Record the treatment and inspect for injury as directed before making another intervention.
Keep children and pets away from supplies, runoff, and treated material. The ASPCA plant toxicity list addresses the plant's own toxicity and cannot establish treatment safety. After a suspected exposure, contact a veterinarian or poison service with the label and plant name. For an indoor collection, avoid assuming that a product recommended for an outdoor woody shrub belongs on a houseplant in a living room. Identification, host suitability, and setting are all necessary parts of the decision before any application.
Track fresh activity
Use one cleaned stem segment and one previously unaffected leaf as references. On day three, inspect their surfaces with magnification. At day seven, check whether fresh sticky material has appeared below the suspected source. On day fourteen, look for new bumps or mobile young stages and compare the wider plant's condition with the first photographs.
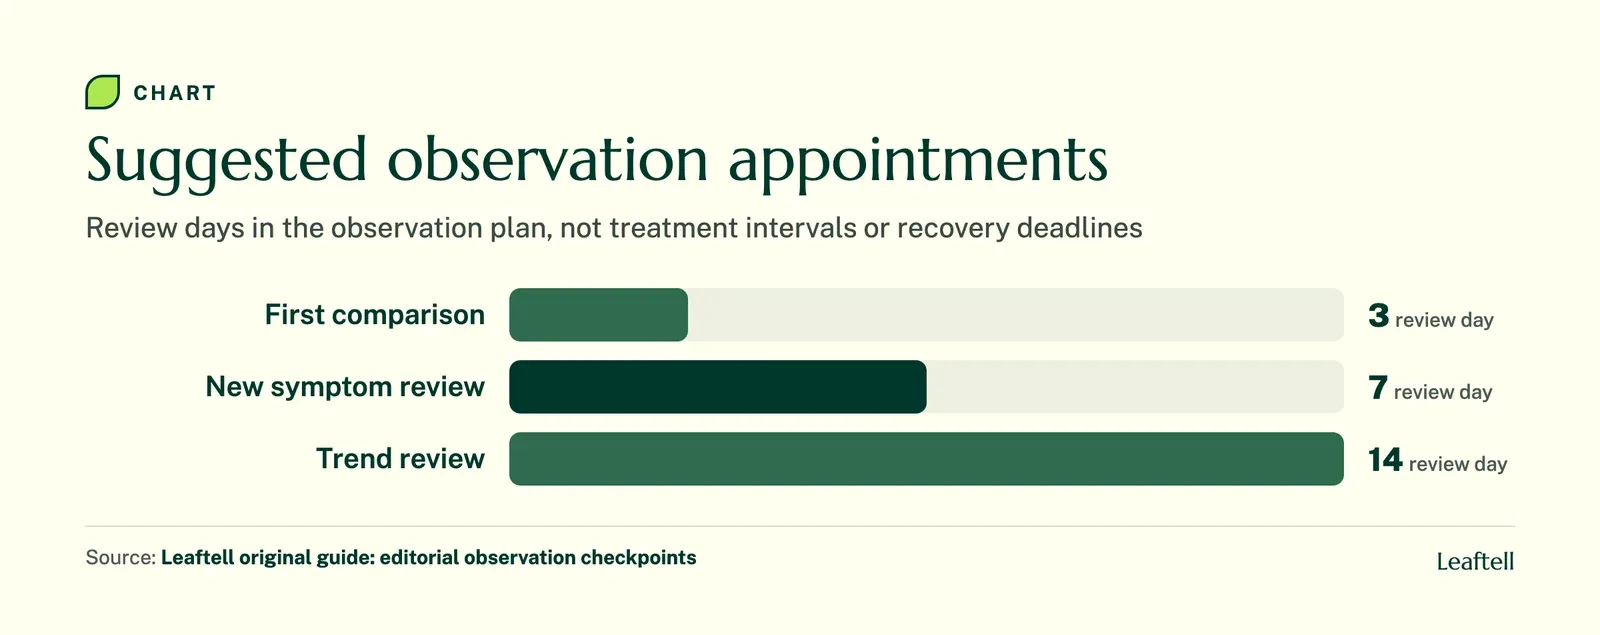
These checkpoints are for observation, not treatment timing. A surviving cover may be old evidence, while a newly established insect in a different spot indicates continued activity. Keep isolation in place while you are still finding new signs. Inspect close neighbors, especially where leaves touched before the plant was moved, without automatically applying treatment to them.
If losses continue, use plant leaves falling off to separate new leaf drop from older damage. Yellow leaves on plants can help when color change becomes the main concern. Return to plant problems when observations no longer support the original pest explanation. Seek expert help if the plant is weakening despite careful removal and a correctly followed plan. Provide photographs of the actual bumps, their position, and your cleaned reference area so the assessment can distinguish old remains from new infestation.
Scale on plants treatment mistakes that injure stems
Scraping until every bump disappears can remove healthy bark along with insect covers. That costs the plant useful tissue and removes the comparison you need to judge new activity. Work on an accessible area and stop when gentle handling no longer works.
Washing the sticky lower leaf but never inspecting the branch above it also misses the point. You remove the deposit while leaving its possible source untouched. Trace the residue upward and record the exact feeding site.
A third mistake is treating an old cover as proof that a correctly chosen treatment failed. Stronger mixtures and extra applications do not establish whether an insect is still alive. Check clean areas for new signs, then seek identification help if the evidence is unclear.
Get help when new signs persist
Ask an extension adviser for help if new bumps keep appearing or the plant weakens despite careful removal. Send close photographs of the insects, their position, and the reference area, plus the plant name and any treatment history. Do not wait for severe leaf loss to seek identification.
Check your scale symptoms in Leaftell. The check uses your answers; photos stay on your device.
Sources
Check your growing conditions with the plant watering calculator.
Frequently asked questions
Confirm that the rose carries scale, then gently remove accessible insects or suitable affected material. For severe cases, get rose specific guidance before choosing a product; follow the label, never mix products, and protect children and pets from supplies and treated material.
Mealybugs belong to the broader scale-insect group, but their waxy appearance and management differ from many armored or soft scales. Identify the type before treating.
A generic insecticide class is not enough to choose a treatment: the current label must cover the host, pest, and setting, and scale life stage matters. Follow the label, never mix products, and keep children and pets away as directed.
Many common scales feed on stems and leaves, while some related pests affect roots. Inspect the plant and identify the insect rather than assuming every bump came from the soil.
No method guarantees permanent exclusion. Remove or treat the current infestation appropriately, inspect new plants, and monitor clean areas for new crawlers or bumps.
A labeled horticultural oil or insecticidal soap may suit some scale stages and hosts after identification and gentle removal. Follow the label, never mix products, and protect children and pets from exposure; plant toxicity and treatment safety are separate checks.
Share article
About the author

Keep checking your plant
Plant care reference
Indoor plant care
Build a routine around your plant, light and potting mix.
Plant care reference
Why is my plant dying
Trace leaf and root symptoms before choosing a care change.
Plant care reference
Pothos plant care
Choose a growing spot and prune a trailing pothos for fuller growth.
Plant care reference
How to fix root rot
Inspect root firmness and drainage, then decide whether to repot.