Brown Tips on Leaves: 5 Causes and How to Stop New Damage
Filip Leszczyński 16 October 2026 12 min read
In this article
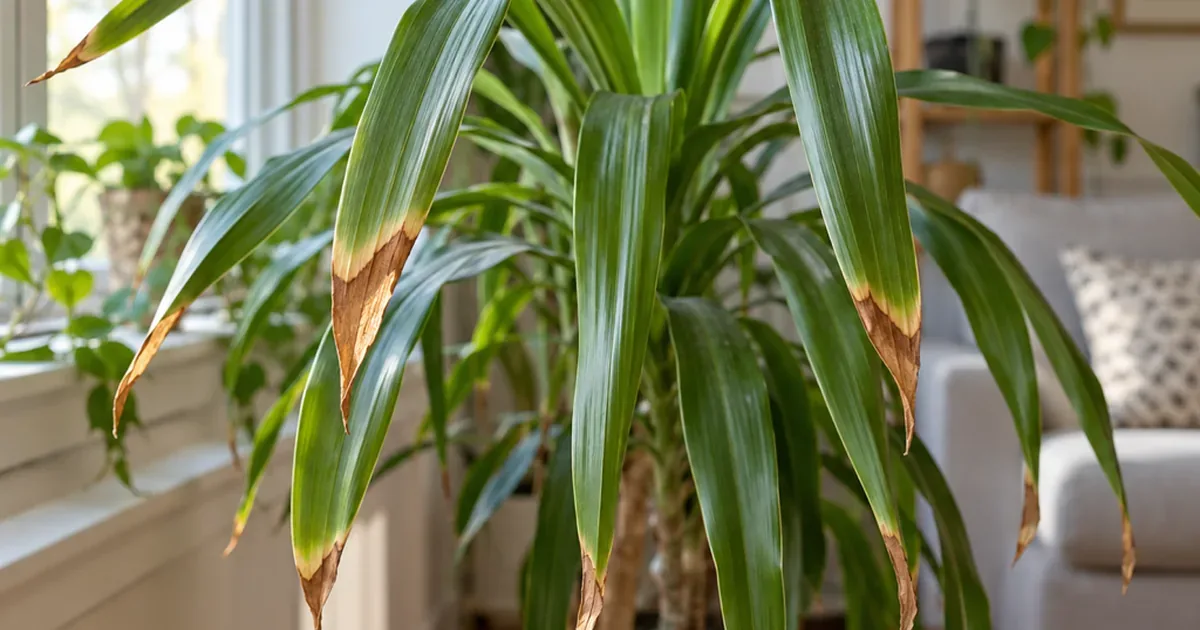
Brown tips on leaves usually come from moisture swings in the pot, built-up fertilizer salts, dry warm air from a heater or vent, or too much sun after a move. The brown part is old damage and will not turn green again, so the goal is to find the cause and stop new browning, not to fix the tips you already have.
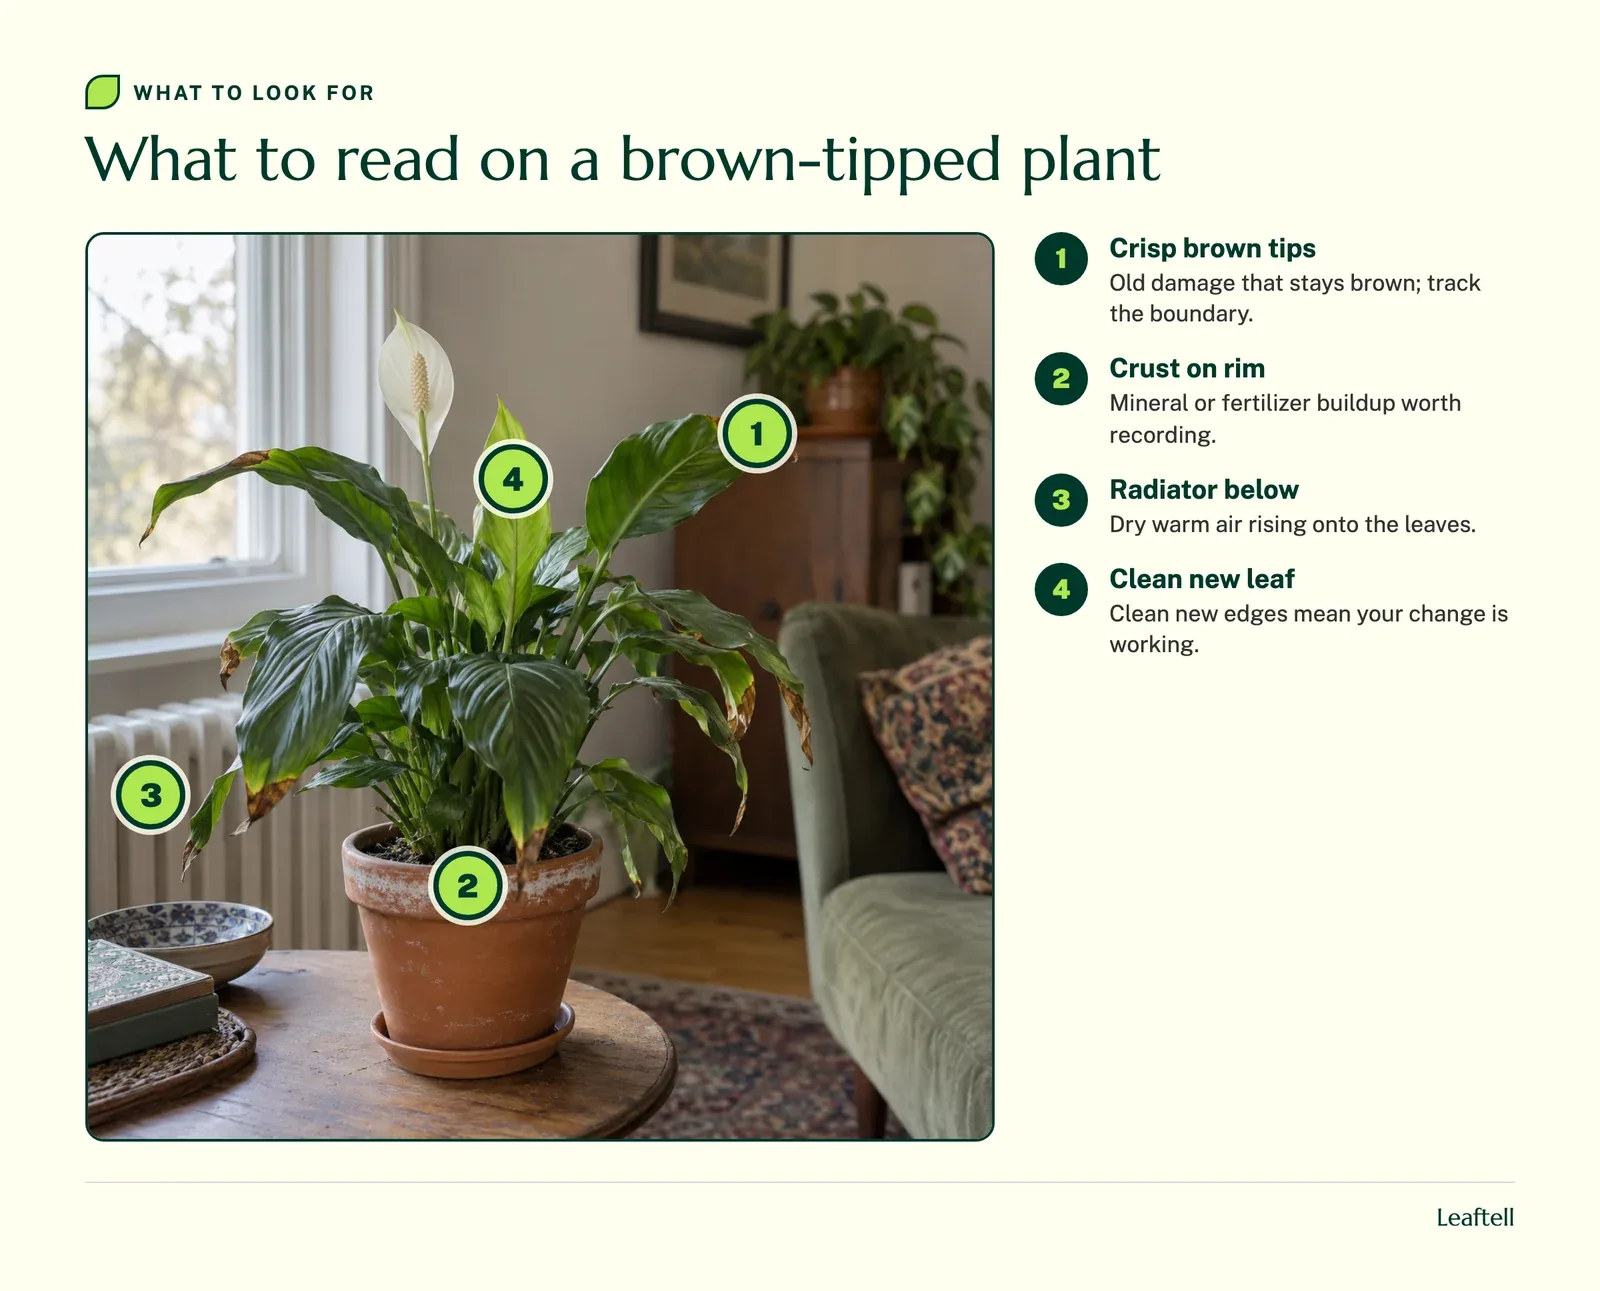
That changes how you judge success. Look at the line where green meets brown, and at the newest leaves. If that boundary stops moving and new leaves open clean, whatever you changed worked, even if the old tips look exactly as bad as before.
A photo shows the brown edge. It cannot show how dry the middle of the root ball gets between waterings, what is in your fertilizer, or that the plant sits in the path of a heating vent. Those answers point to the cause, and they are what Leaftell asks you about.
Plant leaves turning brown: tip, edge or spot?
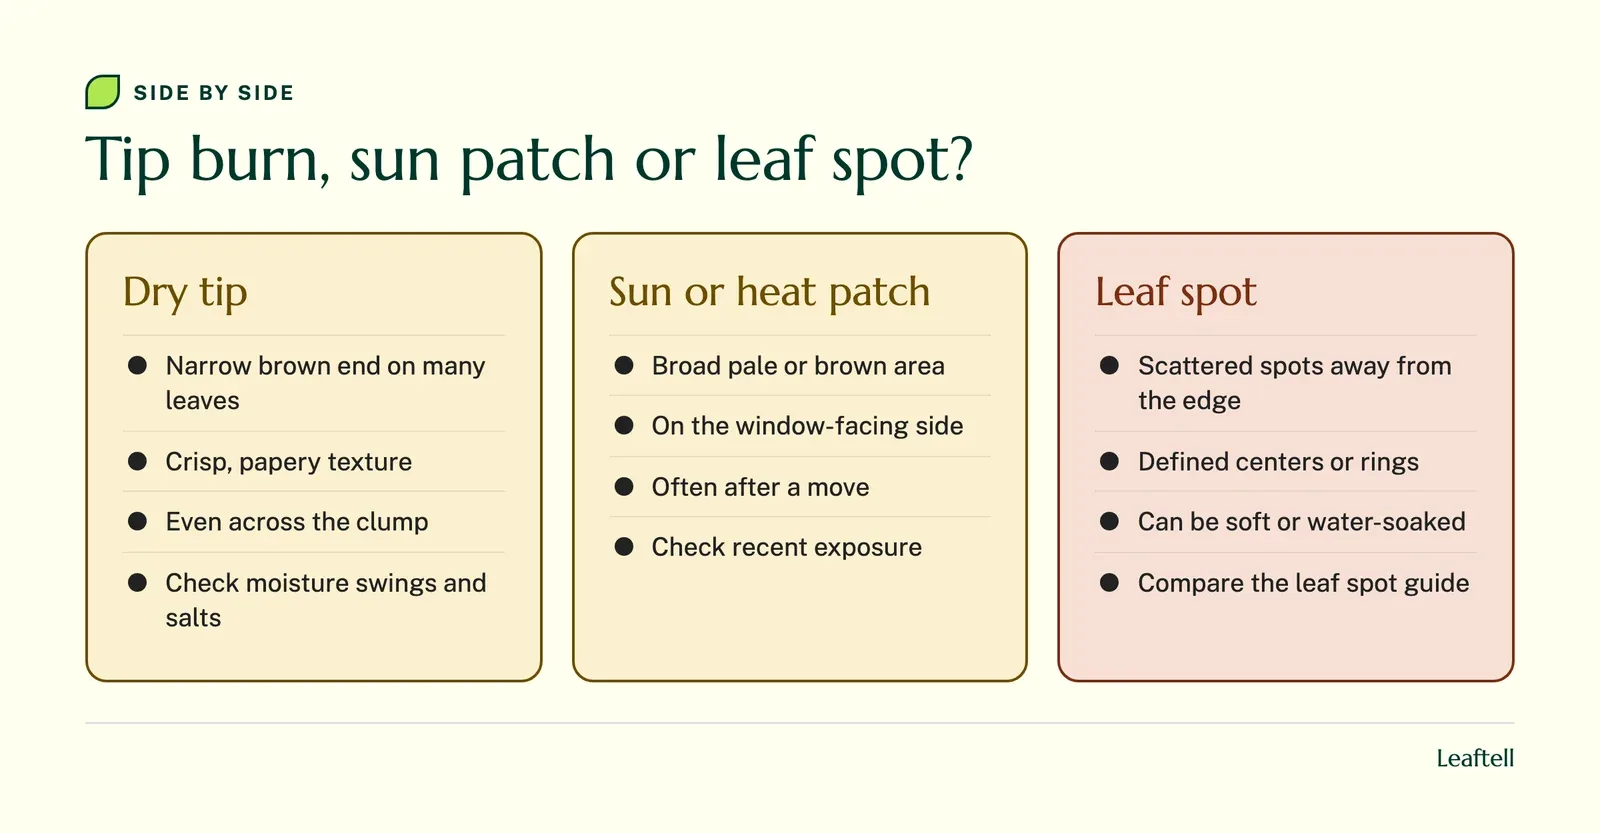
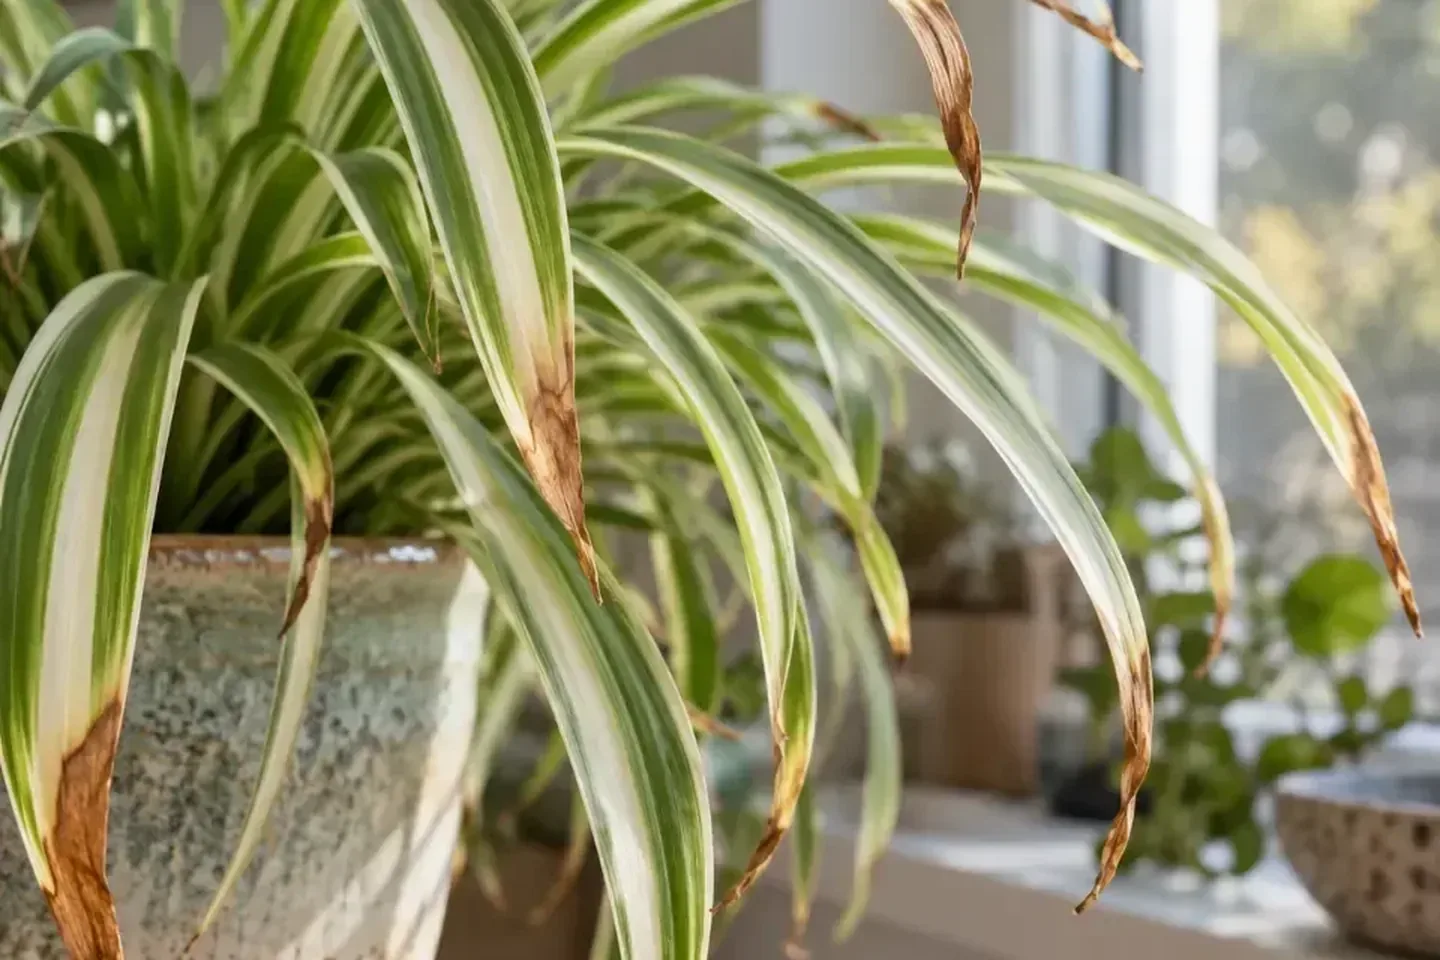
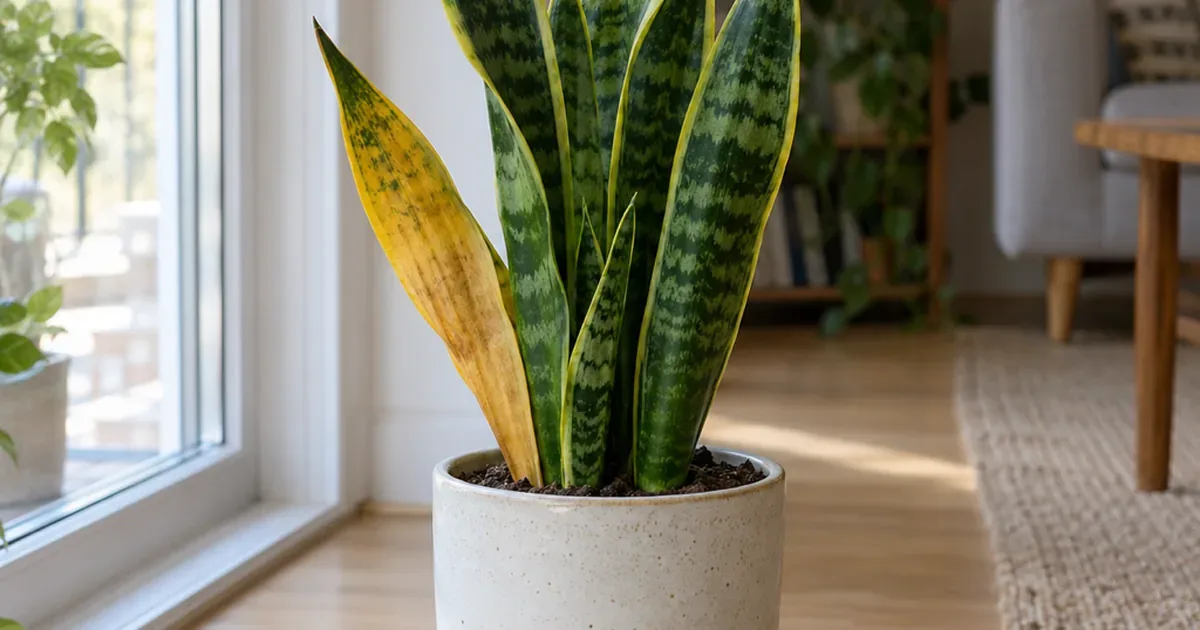
Start by finding where healthy tissue ends and brown begins, because not all plant leaves turning brown have the same problem. A narrow dry tip at the end of a long leaf is a different story from a broad pale patch on the sun-facing side, and both differ from scattered spots in the middle of the leaf.
If browning persists after stabilizing moisture, compare the water quality and feeding checks in our spider plant care guide before changing the whole routine.
Look for the same mark on several leaves. Then note whether the affected leaves are old or newly emerging. Matching tips across a whole clump suggest a growing-condition cause. One leaf damaged where it pressed against a cold window is just that one leaf.
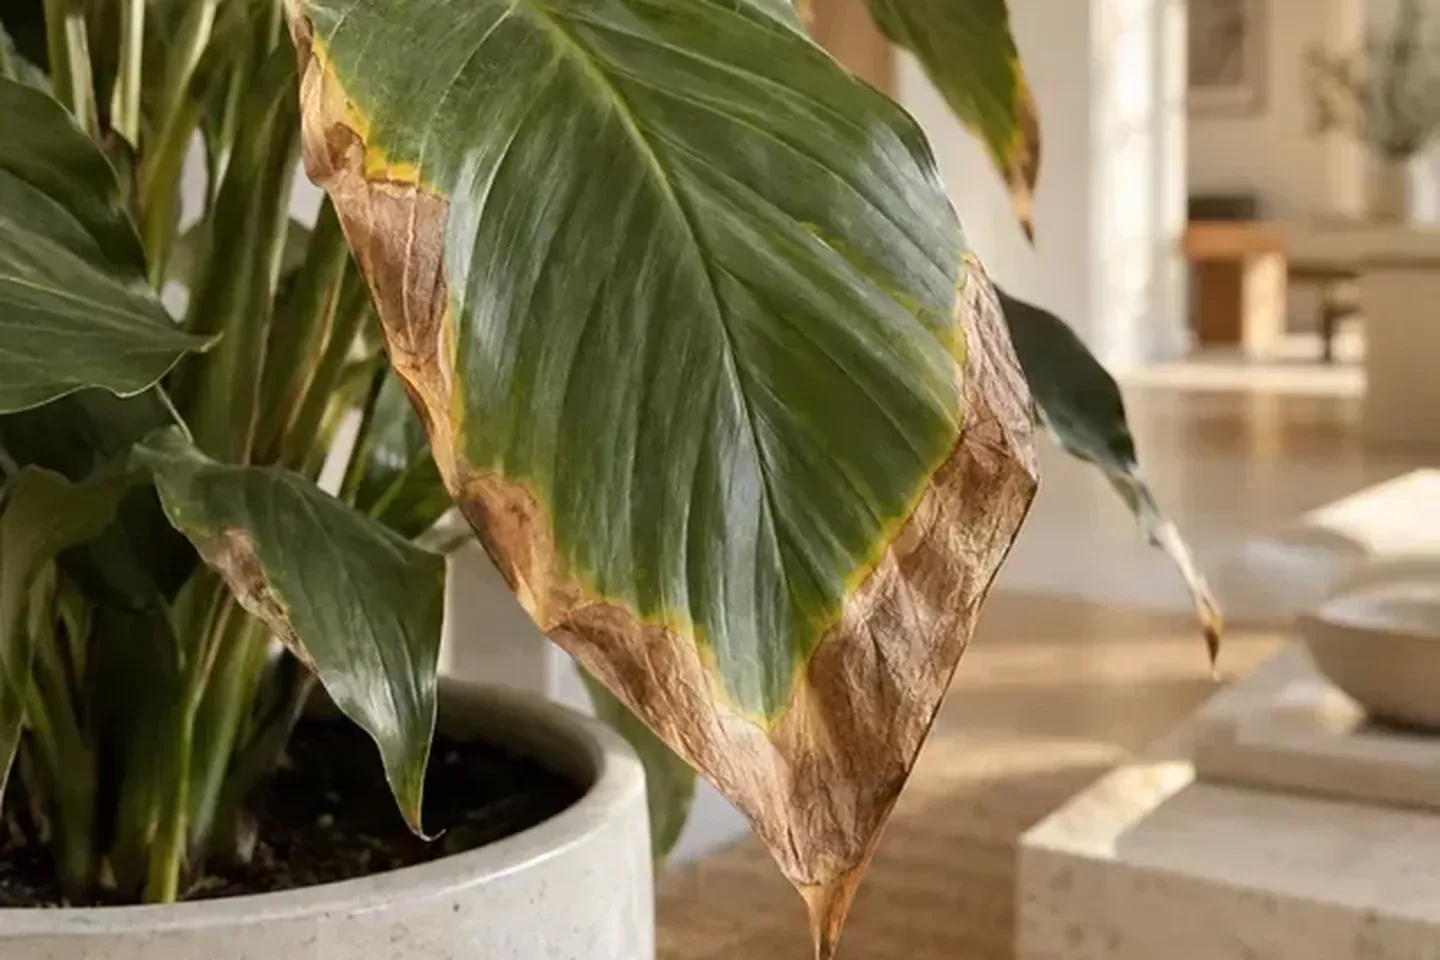
Touch only enough to judge texture. Crispy tissue differs from a soft, water-soaked patch, but texture alone still does not name the cause. Photograph the leaf before you cut anything. If the brown areas have distinct centers or sit away from the edge, compare leaf spot disease instead of assuming dry air.
Check both sides in daylight. Fine stippled feeding marks or moving insects send you to the houseplant pests guide. No pests? Sketch which side of the plant faces a heater, an air conditioner or a bright window. That rough sketch often shows an environmental pattern faster than staring at single leaves.
| What you see | Likely cause | First check |
|---|---|---|
| Only the narrow tip is dry, on many leaves | Moisture swings or salt buildup | Moisture at depth and feeding history |
| Broad pale or brown patch on the window side | Sun or heat after a move | Recent change in exposure |
| White crust on the pot rim plus browning | Fertilizer or water minerals | Water source and every feed added |
| Brown edges on the side facing a vent | Dry warm or cold airflow | Move out of the draft |
| Scattered spots with defined centers | Leaf spot, not tip burn | Compare the leaf spot guide |
Indoor plant leaves turning brown and crispy: follow the moisture cycle
Indoor plant leaves turning brown and crispy often trace back to a pot that swings between bone dry and soaked. More frequent watering is not the automatic fix. First learn whether the center of the root ball actually dries, whether water soaks in evenly, and whether excess sits in an outer pot.
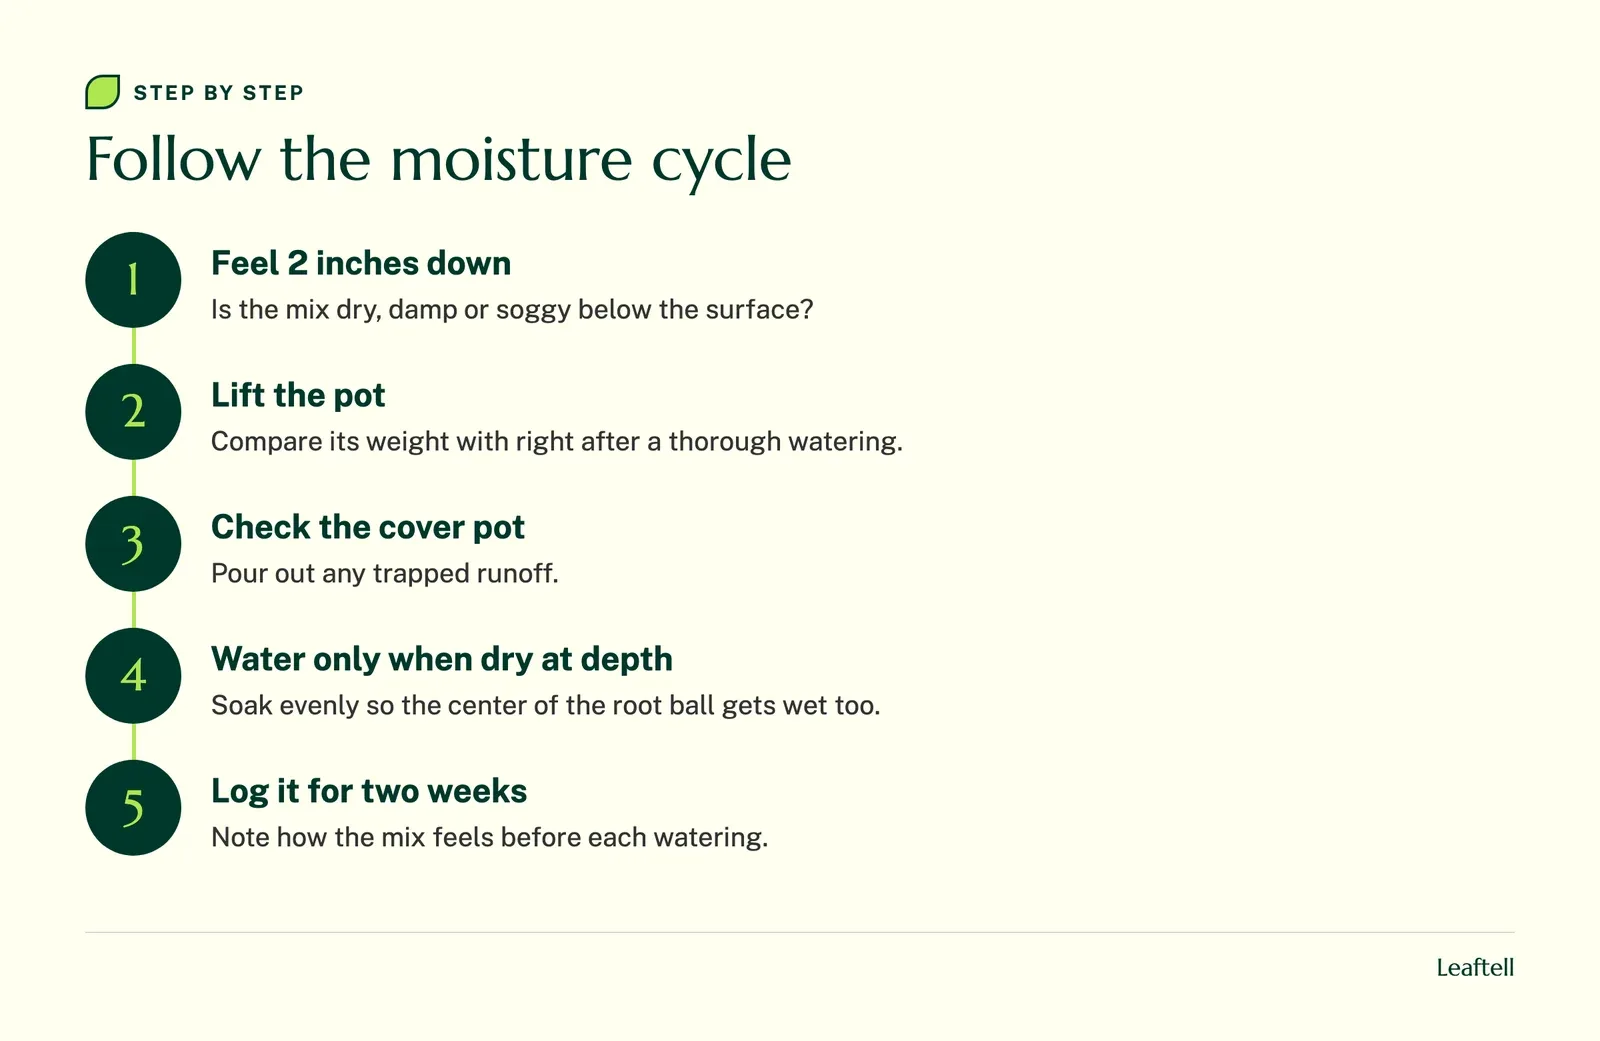
A wet surface and a dry center can coexist after a quick splash. Use the approach in checking whether soil is wet or dry: feel below the surface, lift the pot, and factor in what the species needs. A leafy tropical plant and a water-storing succulent should not share one watering rule just because both have brown tips. Write down what the mix feels like before each watering for the next two weeks.
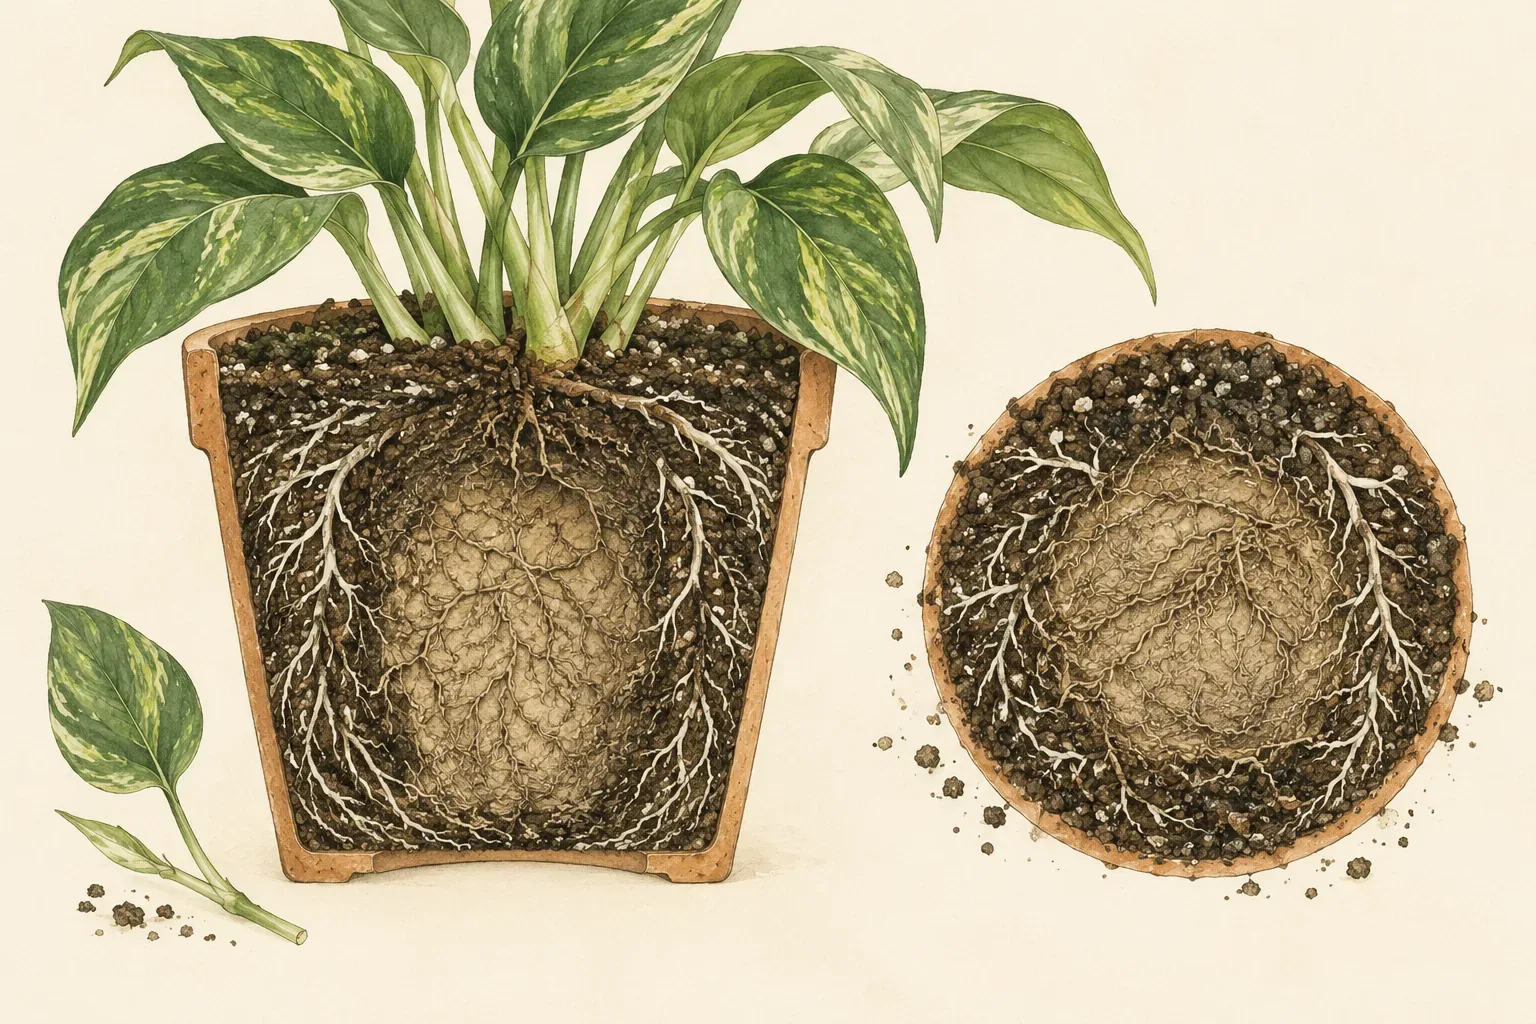
If tips brown while the pot stays wet, read overwatered plant symptoms. Stressed roots can starve the leaves of water even when the pot is full of it. If the mix keeps going bone dry, make your checks more consistent before you touch fertilizer or start spraying. Change one thing, and leave the old brown edge in place so you can see whether browning keeps creeping into green tissue.
Plant leaves turning brown at tips: salts, fertilizer and water
When plant leaves keep turning brown at the tips under otherwise decent care, look at what goes into the pot. A pale crust on the mix, the drainage holes or the pot rim is worth recording. It is evidence, not proof of one particular chemical problem, because water minerals and leftover fertilizer look alike.
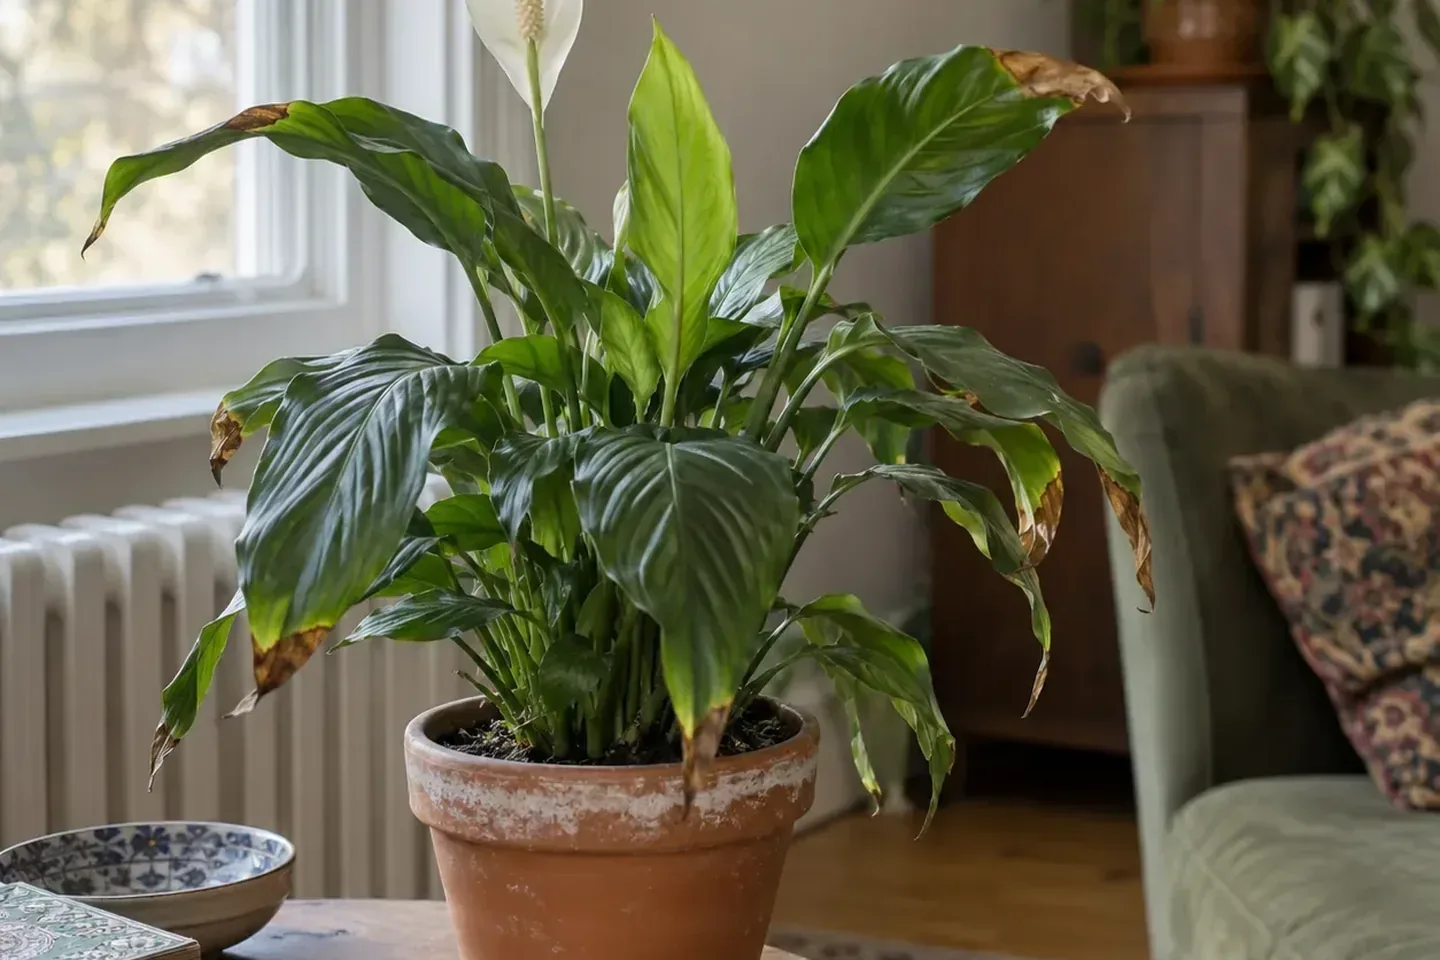
Ask whether a new potting mix already contained fertilizer, and whether someone else in the house also feeds the plant. Stop extra feeding while unexplained damage is still spreading. If you suspect salts, get advice that fits the plant and mix before choosing between careful flushing and repotting. Pouring lots of water through a pot that cannot drain makes a root problem worse, and damaged roots need a different plan from a healthy root ball with a bit of surface crust.
Water varies from place to place, so do not assume leaving tap water out overnight removes everything dissolved in it. If one sensitive species keeps getting brown tips in good conditions, ask a local extension service about your water. Keep fertilizer away from pets and children, follow the label when you start again, and never combine feeds, tonics and kitchen ingredients to cover every possible deficiency. Keep the packaging so the real ingredients stay on record.
Plant leaves turning brown near heaters, vents and hot windows
Move the plant out of direct airflow first, while keeping it in suitable light. A leaf beside a radiator can sit in a dry warm draft even when the room feels comfortable to you, and an air conditioning vent creates its own stress.
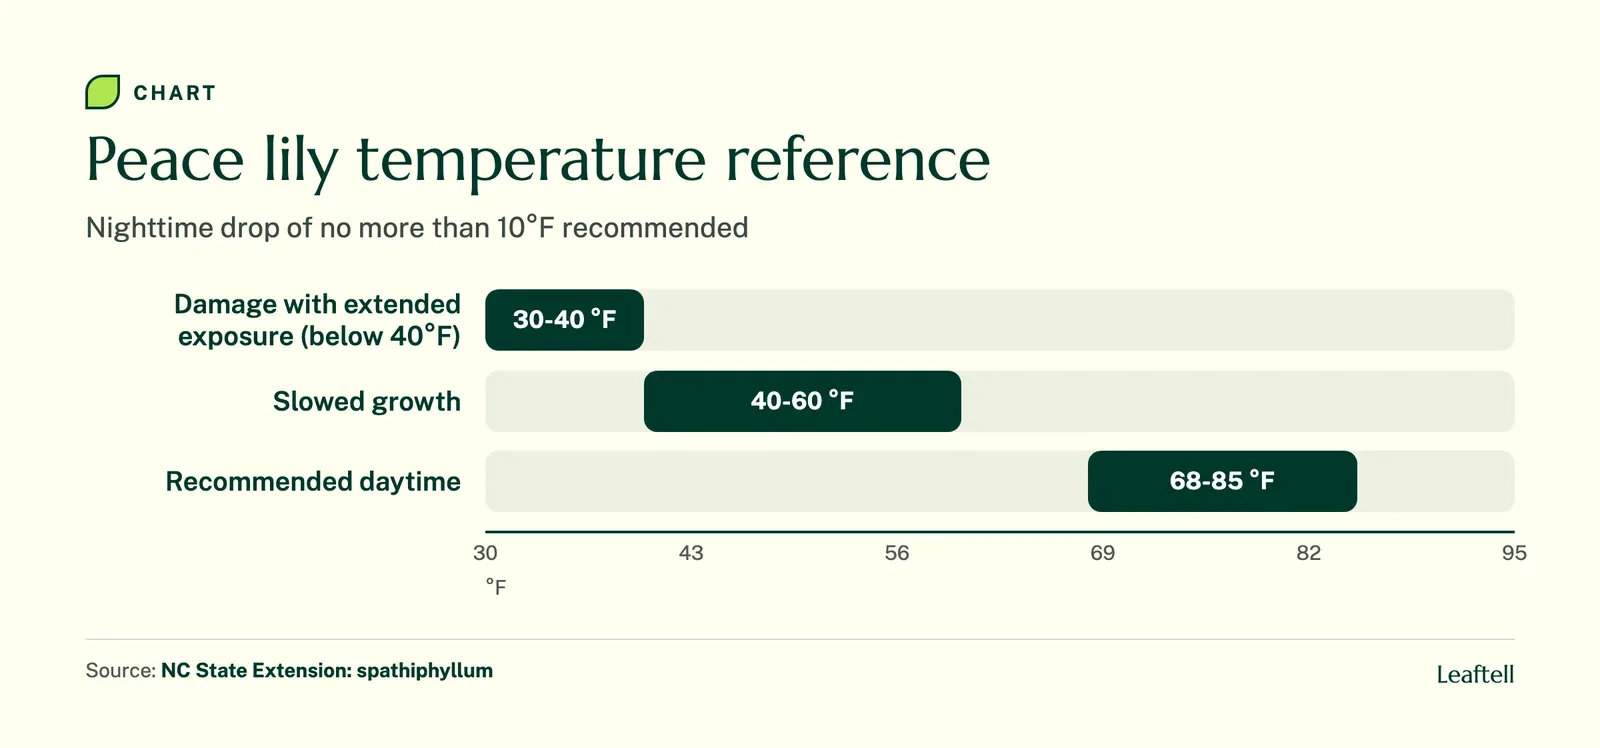
A sensitive tropical such as a peace lily shows how specific the comfort zone can be. The NC State Extension plant profile recommends daytime temperatures of 68-85°F with a nighttime drop of no more than 10°F, reports slowed growth at 40-60°F and damage after extended time below 40°F. The peace lily leaves turning yellow guide covers that plant in more depth.
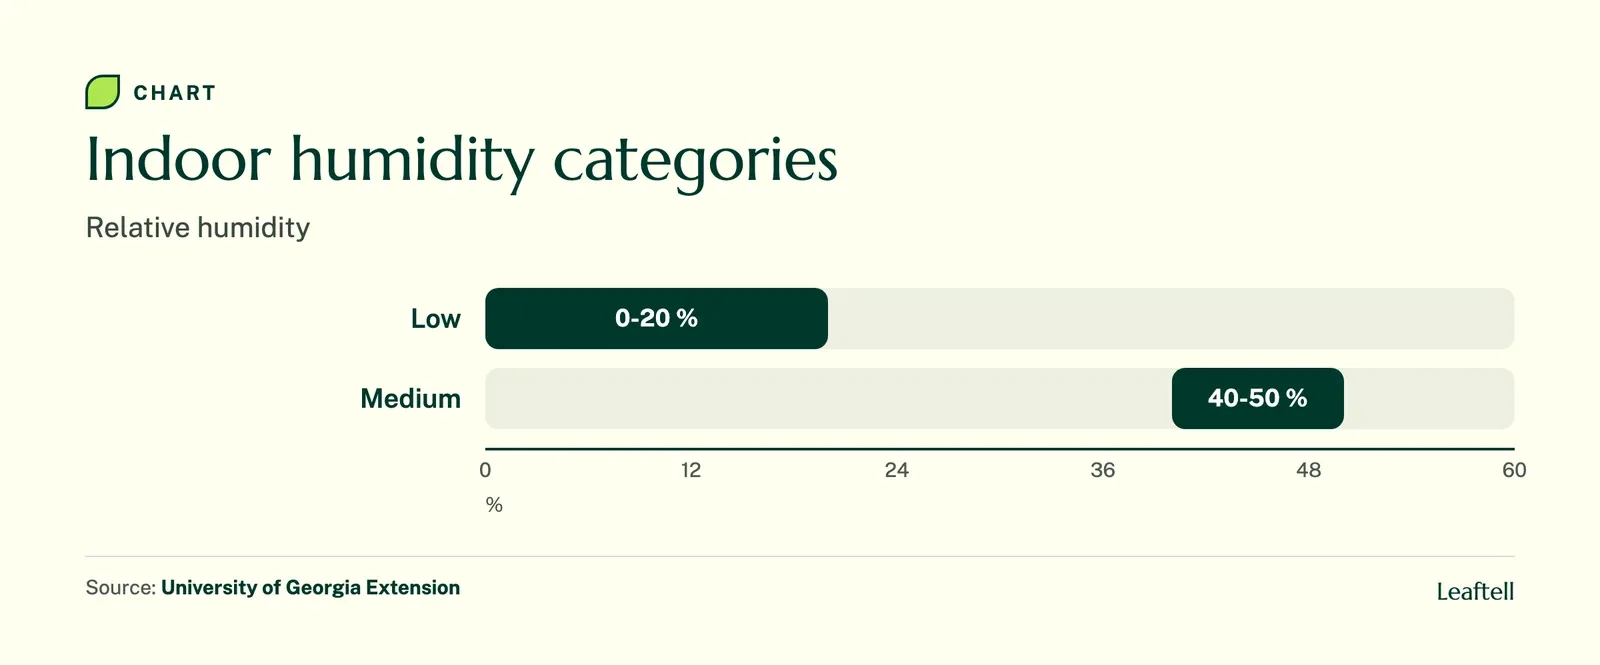
Air moisture plays in too. The University of Georgia Extension calls 40-50% relative humidity medium and anything below 20% low. A spot right next to a heater can sit drier than the rest of the room.
A hot window can cause larger bleached or brown patches, especially after an abrupt move from a shaded room. If the damage is concentrated on the exposed side, review how to read your plant's light and introduce brighter spots gradually. Do not shuffle the plant between windows every day, because then nothing you see can be read.
Routine misting is not a dependable fix for brown tips. It wets some leaves for a short time without changing the room. Think placement, root moisture and species needs first. For contrast, a thick-leaved water-storing plant handles all this very differently from a thin-leaved tropical, as snake plant care shows.
Mistakes that make brown tips on leaves worse
These are the common moves that turn a few brown tips into a bigger problem.
- Watering more often by reflex. If the pot already stays wet, you add root stress, which browns more tips.
- Feeding to "fix" the browning. Extra fertilizer can add to salt buildup, the very thing that may be causing it.
- Flushing a pot with no drainage. The water has nowhere to go, so the roots sit in it.
- Misting instead of moving. The leaf stays next to the heater, and the browning continues.
- Cutting deep into green tissue. Each fresh cut edge can brown again, so you keep trimming the same leaf shorter.
- Baking soda or other home brews. There is no established revival benefit, and baking soda adds salts.
Should I cut the brown tips of my plants?
You can cut brown tips off for looks, but it is optional and does not fix the cause. Use clean scissors, follow the leaf's natural shape, and leave a thin line of brown rather than cutting into green tissue.
Leaving that narrow brown edge avoids opening fresh green tissue that can brown again. A leaf with only a small damaged tip still feeds the plant, so removing the whole leaf is usually unnecessary.
How to trim brown tips and stop new browning
- Photograph and mark the leaf
Take a photo before cutting and note which leaves you trimmed, so new damage is not confused with old.
- Check moisture at depth
Feel 2 inches down and lift the pot so you know which side of the moisture swing you are on.
- Check the pot rim and feeding history
Look for crust and list every fertilizer added, including slow-release feed in the mix.
- Move the plant out of drafts
Keep it away from heaters, vents and hot glass while keeping suitable light.
- Trim along the leaf shape
Cut dry tissue with clean scissors, leaving a thin brown edge above the green.
- Compare the newest leaf on day 14
Judge success by whether new leaves open with clean edges.
On day 3, check the cut edge and the root-zone moisture. On day 7, compare untrimmed leaves against your photos. On day 14, look at whether the newest leaf has intact margins.
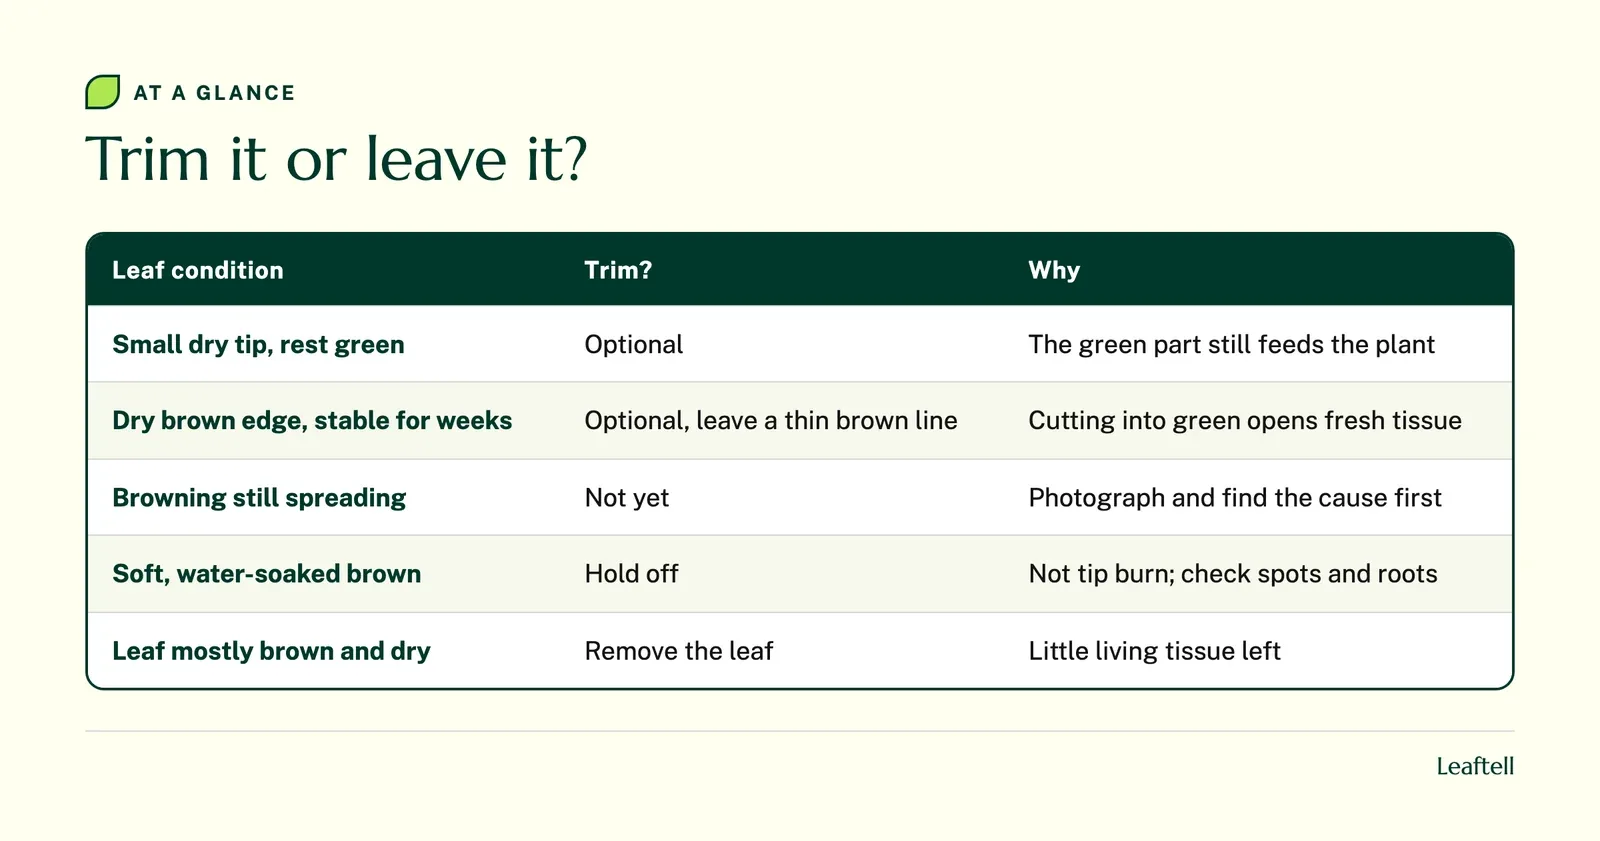
If browning spreads fast, turns soft, or comes with wider collapse, put the scissors down and work through the full plant problems checklist. A tip problem should not become the explanation for every symptom that follows. Pick up trimmings promptly and keep them away from children and pets; toxicity varies by plant, so check the ASPCA list.
When to get help: if the pattern is still unexplained after a careful moisture and placement review, take your photos and watering notes to a local extension service. The RHS guidance on leaf damage on houseplants is a good reference while you wait.
Brown tips on leaves: fix the cycle, then judge new growth
Check the pot first: moisture 2 inches down, trapped water and any crust on the rim. Then move the plant out of drafts and harsh sun, stop extra feeding while you investigate, and change one thing at a time. Trim old tips if they bother you, leaving a thin brown edge. Success is the newest leaf opening clean, not the old tips disappearing.
Sources
Check your growing conditions with the plant watering calculator.
Frequently asked questions
Uneven moisture, fertilizer salts, harsh exposure and dry warm air can all contribute. Review when it started and check the pot before assuming humidity is the only cause.
Trimming is optional and only for looks. Use clean scissors, avoid cutting into healthy green tissue, and look into why the tips browned in the first place.
No, dead brown tissue stays brown. The plant can still recover if enough living tissue remains, so watch whether new growth comes in clean and the damage stops spreading.
Crisp tissue can follow drying out, heat, strong sun or root damage that limits water uptake. Check the soil and the position of the affected leaves together.
Water when a root-zone check says the plant needs it, not on a fixed day. The right interval depends on species, light, temperature, mix and pot size.
Misting is not a dependable fix. It wets leaves briefly without changing room conditions, so moving the plant away from heaters and vents usually matters more.
No general revival benefit is established for adding baking soda to a sick houseplant. It can add salts to the mix and cannot restore dead tissue.
Share article
About the author

Keep checking your plant
Plant care reference
Indoor plant care
Build a routine around your plant, light and potting mix.
Plant care reference
Why is my plant dying
Trace leaf and root symptoms before choosing a care change.
Plant care reference
Pothos plant care
Choose a growing spot and prune a trailing pothos for fuller growth.
Plant care reference
How to fix root rot
Inspect root firmness and drainage, then decide whether to repot.