Spider Mites on Plants: Confirm, Clean and Track for 14 Days
Filip Leszczyński 16 October 2026 11 min read
In this article
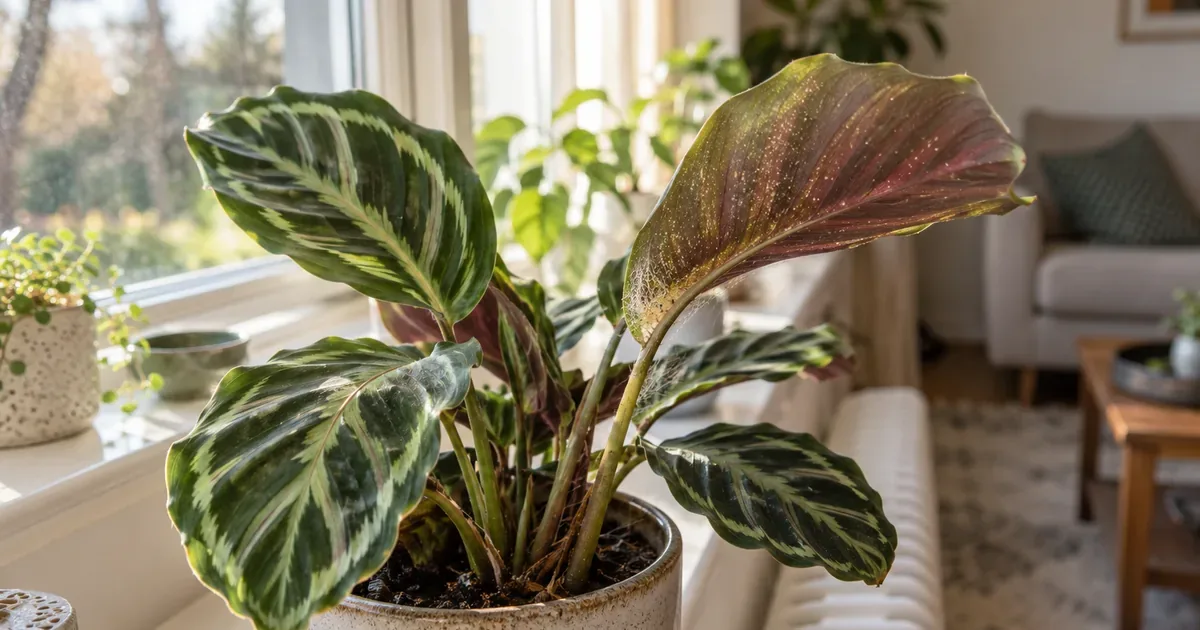
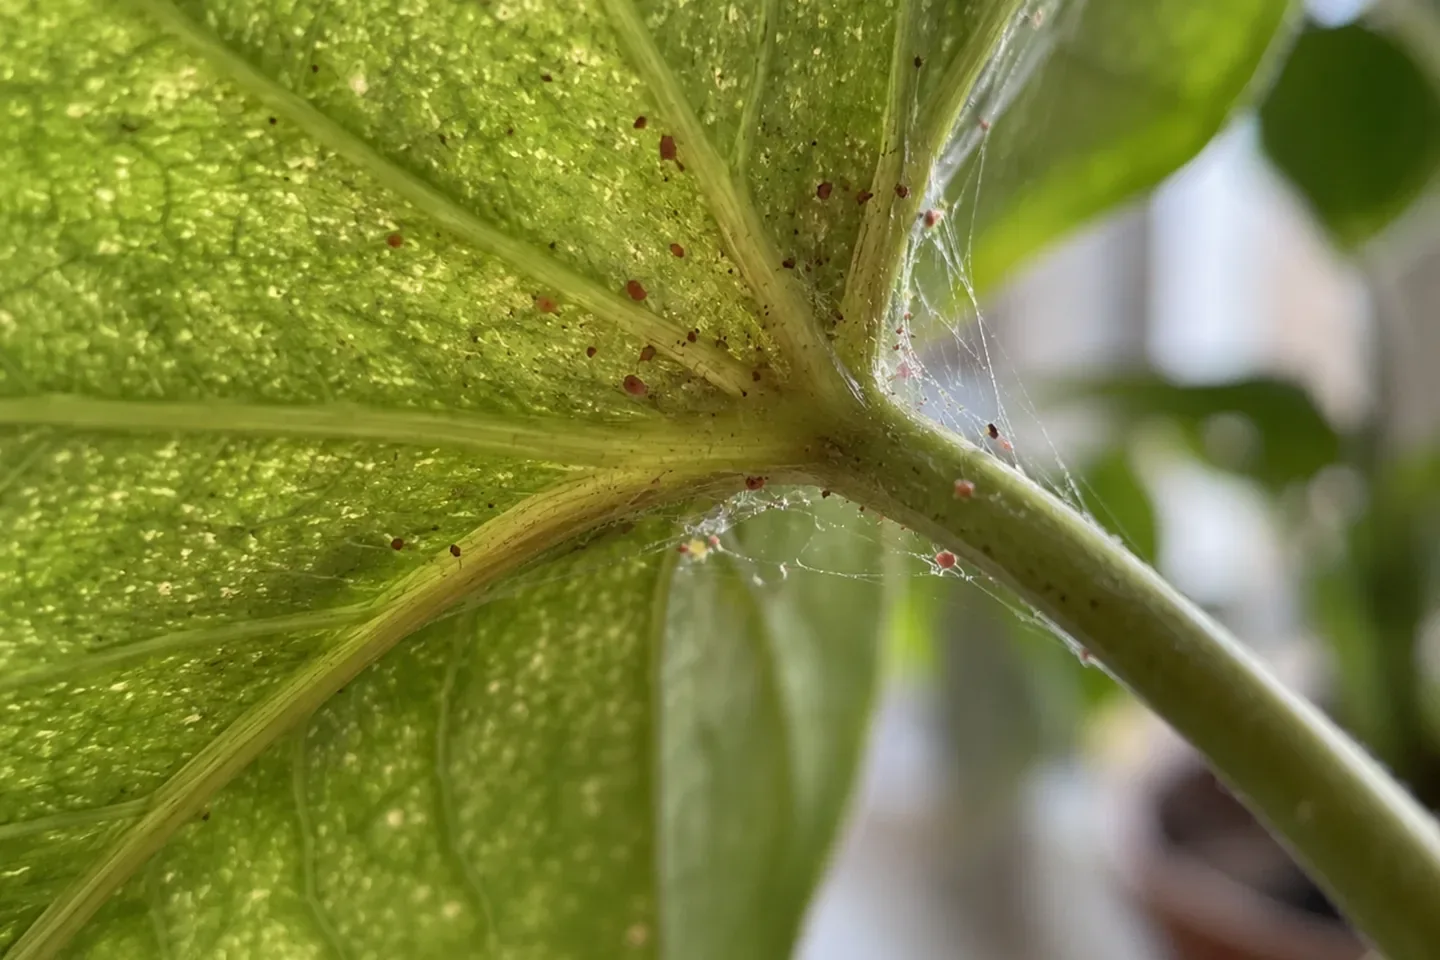
Spider mites on plants show up as fine pale speckles on the top of a leaf, tiny moving dots on the underside and thin silk in the leaf joints. Isolate the plant, rinse or wipe the undersides, then judge progress by fresh damage on clean leaves, because the old speckles never go away.
That last point is where most people go wrong. A stippled leaf stays stippled after every mite on it is gone. If you wait for it to look normal again, you will keep treating a plant that may already be clean. Track live mites and new damage instead.
You also cannot confirm mites from a photo of pale dots. You need a hand lens and the underside of a leaf. Below: what to look for, how to clean without soaking the roots, when a labeled product makes sense, and a 14-day check-in plan.
Early signs of spider mites: stippling, bronzing and fine silk
The early signs of spider mites are tiny pale dots scattered across the upper leaf, with the mites themselves underneath. Fine webbing in leaf joints is the second clue. You want the damage and the mite before you act.
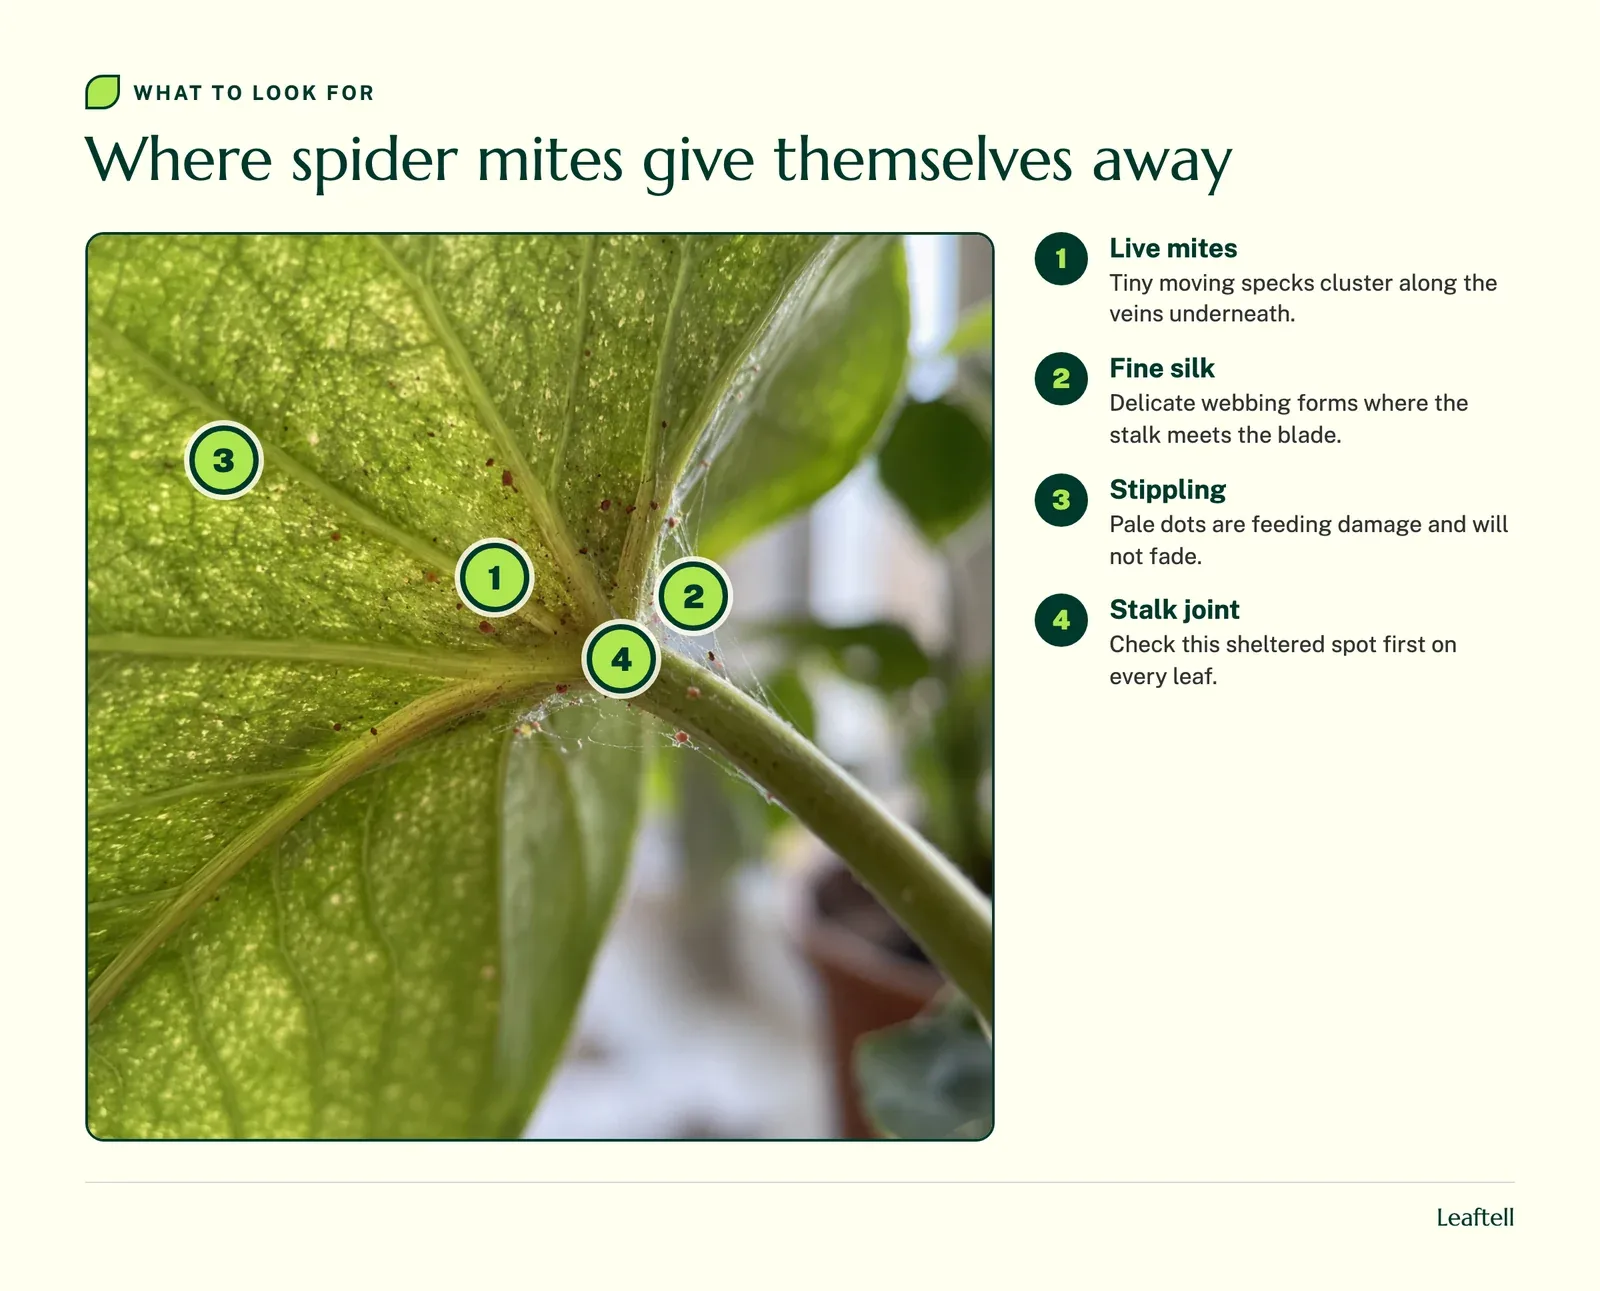
Turn over several leaves and run a hand lens along the veins and the spot where the stalk meets the blade. That is where mites and their traces collect. UC IPM lists stippled foliage and fine webbing as the classic spider mite signs. A heavily fed leaf can look dull or bronzed, but bronzing on its own does not prove mites.
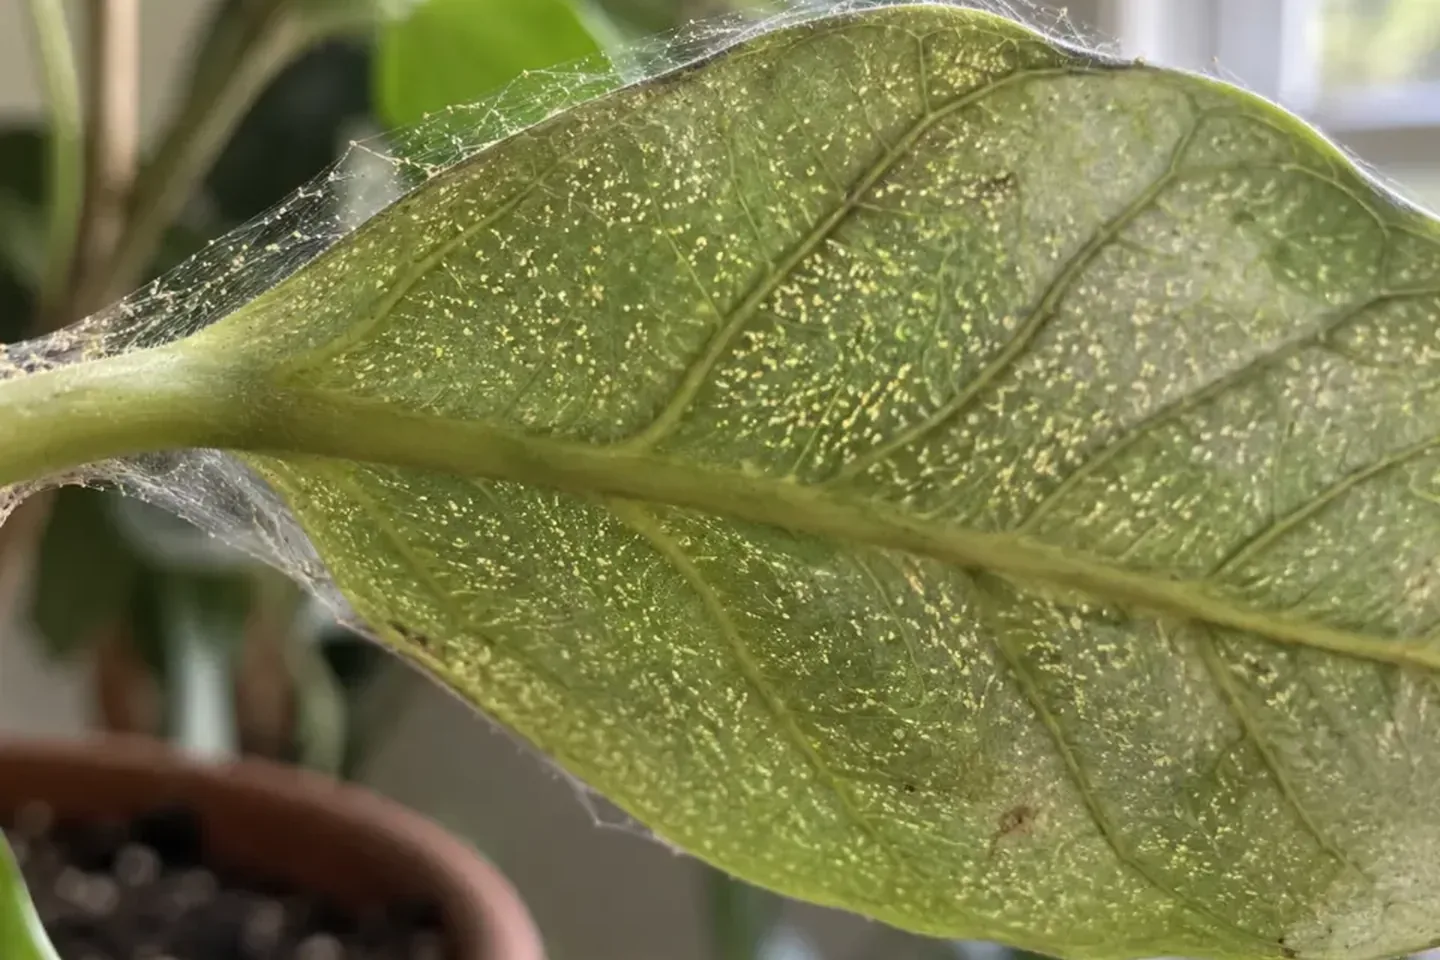
Try the paper test. Hold a sheet of white paper under a suspect leaf and tap the leaf gently. Specks that start walking deserve a closer look with the lens. Specks that sit still are probably dust.
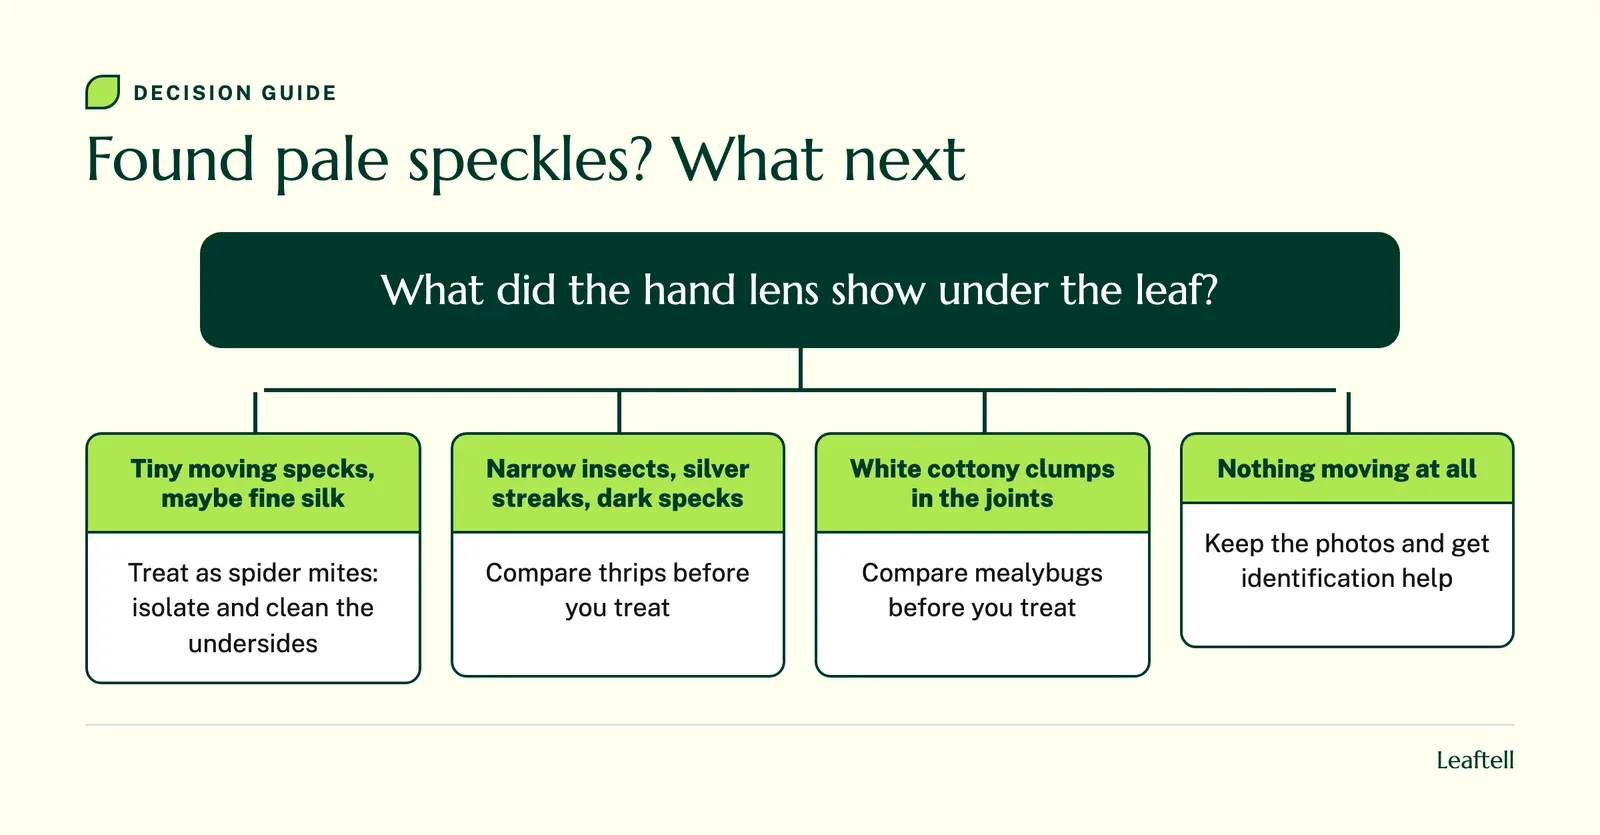
Not every web is a pest. A house spider's web with no leaf damage around it is different evidence. If you see silvery streaks with dark specks rather than fine stippling, compare thrips damage. Cottony white clumps at the joints point to mealybugs instead, and a white coating you can rub off fits powdery mildew better.
Photograph the top, the underside and any silk separately before you clean anything. Those three pictures are your baseline. If you cannot find a single mite after a careful search, keep the photos and get identification help. Pale dots in a blurry picture are not enough reason to spray every plant in the room.
| What you see | Most likely | What to check next |
|---|---|---|
| Fine pale dots on top, moving specks below | Spider mites | Hand lens on the underside, paper tap test |
| Silk between leaf and stalk, plus stippling | Spider mites, heavier population | Neighboring plants that touch it |
| Silver streaks with tiny dark specks | Thrips | Narrow insects in leaf folds and flowers |
| White cottony clumps in joints | Mealybugs | Bodies under the wax, pot rim |
| A web with no leaf damage nearby | A house spider | Nothing, unless damage appears |
How to get rid of spider mites: start with cleaning
To get rid of spider mites, separate the plant so no leaf touches a neighbor, then rinse or wipe the leaf undersides gently while supporting each leaf. Cleaning lowers the visible population fast. It does not prove every hidden stage is gone, so follow-up checks are part of the treatment.
Pick an isolation spot with light and temperature that suit the species. Then look hard at the plants that stood right next to it, since those are the ones most likely to have picked up mites.
How to clean spider mites off a houseplant
- Move it away from the others
Put the plant where its leaves touch nothing else, in light that still suits the species. Check the plants that stood beside it.
- Protect the root ball
Tip the pot on its side or cover the mix loosely so rinse water runs off the leaves, not into wet soil.
- Rinse or wipe the undersides
Support each leaf and rinse or wipe both sides, spending most of your time underneath where mites live. Skip this on species that dislike wet or handled foliage.
- Clear the debris and the cloth
Pick up fallen leaves, let the plant and the work area dry, and wash the cloth or tools before you touch another plant.
- Write down what you did
Note the date and which leaves you cleaned, then search the same spots again on day 3.
Do not carry a dripping pot through your collection, and do not let a plant that already sits in wet mix get a second problem while you clean its leaves. For climbers, monstera care shows how a moss pole or support keeps leaf surfaces reachable, which makes the underside work much easier.
How to get rid of spider mites for good: fix heat, dryness and water stress
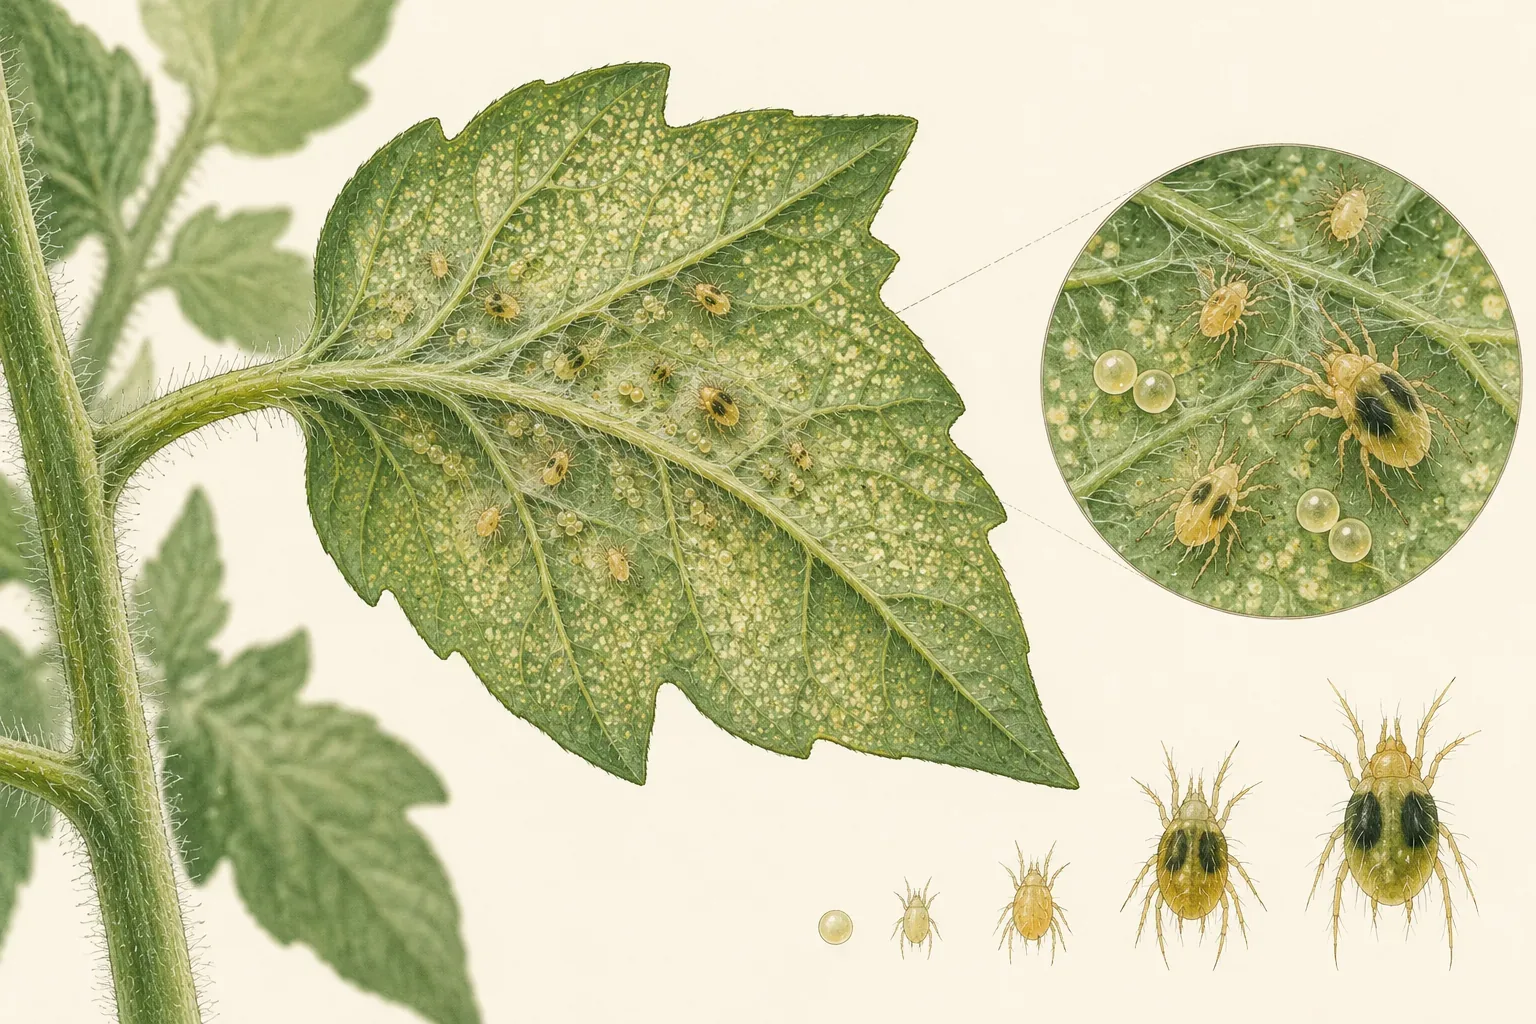
Spider mites keep coming back on plants that sit in warm, dry air, so move the plant out of a radiator or vent blast while keeping its light. Warmth also speeds the mites up. The RHS gives about 12 days at 70°F for the two-spotted spider mite to develop under its stated conditions.
That number explains why one cleaning is never the end. It is not a household treatment interval, though. Your room, your mite species and the mix of life stages will differ.
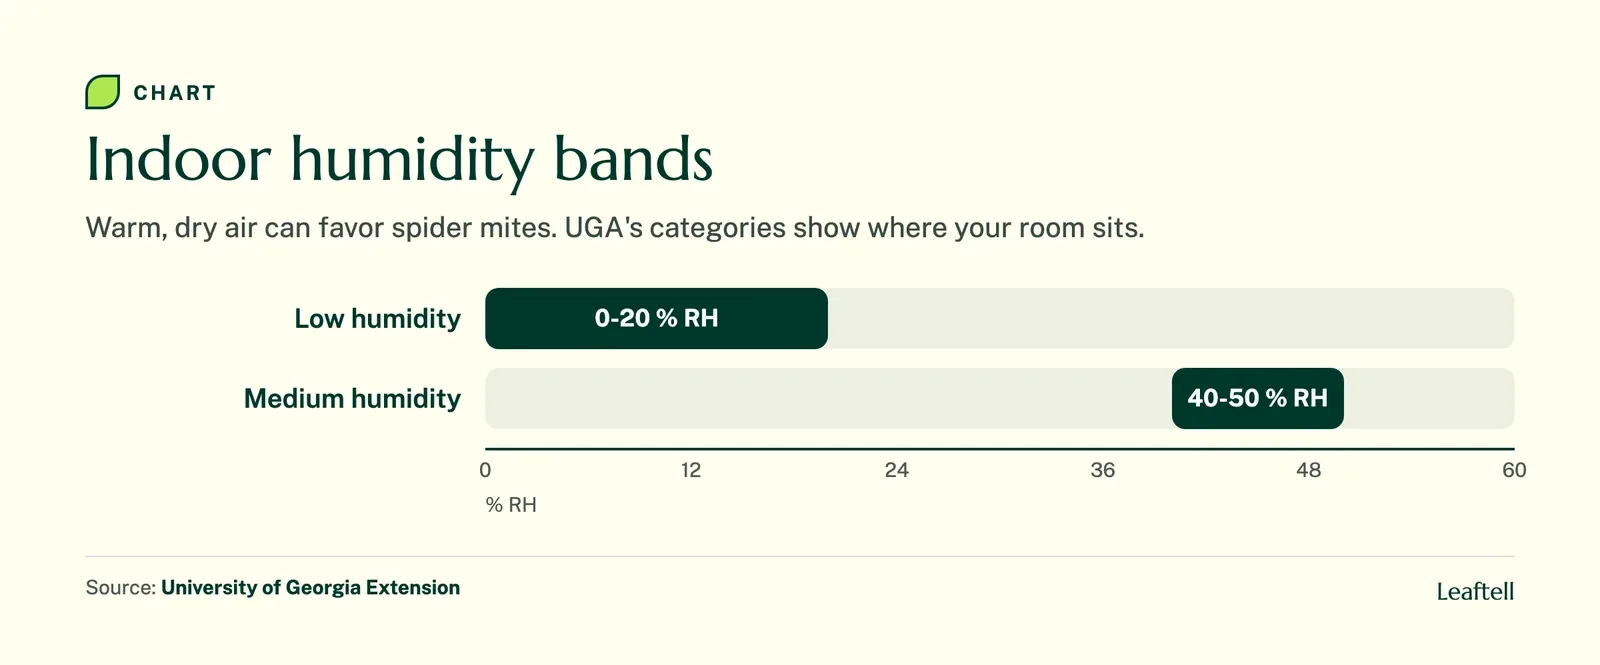
The University of Georgia calls indoor humidity below 20% low and 40-50% medium. Its example at 70°F shows leaves losing more water at 10% humidity than at 50%. A plant next to forced-air heat can be stressed by dry air and mites at the same time.
Misting is not mite control. A wet leaf surface tells you nothing about the roots, and spraying foliage every day is not a plan. Check the pot on its own schedule with the finger and weight test for soil moisture. And do not fix the heat problem by pushing the plant into deep shade, where its pot stays wet for days.
Spider mite spray: product classes and precautions
Reach for a spider mite spray only when isolation and cleaning are not controlling a confirmed infestation. Horticultural oils and insecticidal soaps are the usual product classes, but only when the label names mites and your plant. Follow the label every time.
A general bug spray is not automatically a mite product. Mites are not insects, so a container that says it controls "bugs" may do nothing to them. Read the label for sensitive plants, temperature limits, a test-patch instruction and repeat timing. Never mix two products to make something stronger.
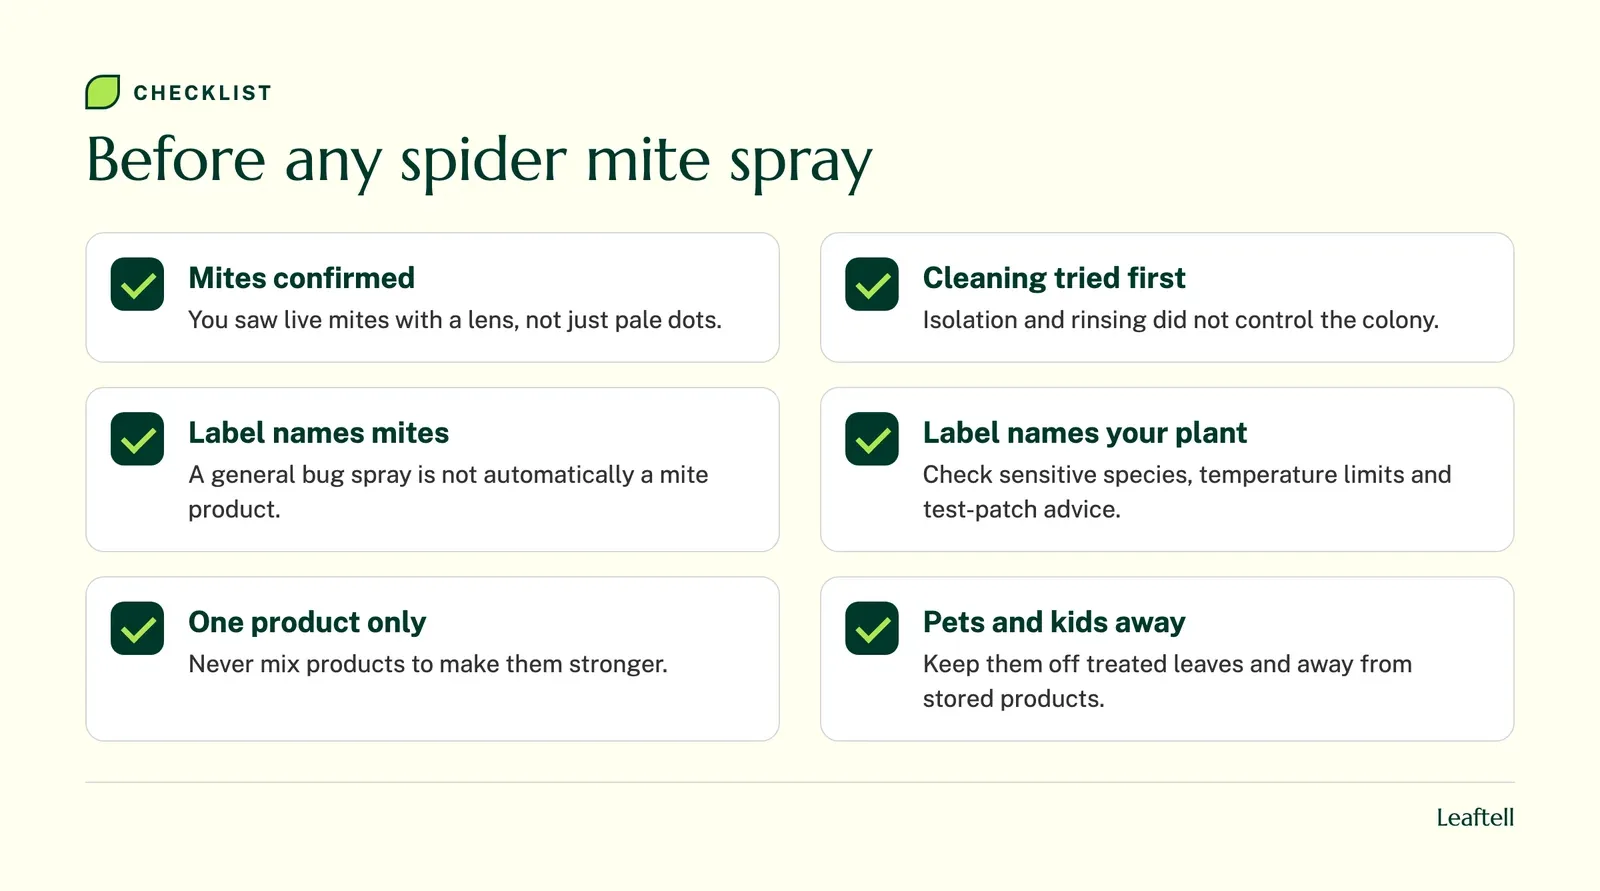
Treatment injury leaves its own marks, which makes the original problem harder to read. Keep the label, write down every application, and do not spray a stressed plant in hot direct sun unless the directions allow it.
Keep children and pets away from the products, the treatment area and treated leaves, as the label directs. Check the plant itself on the ASPCA toxic plant list, because a toxic plant is a risk even with no spray involved. If a pet or child may have been exposed, call a vet or poison service with both the plant name and the product name.
Spider mite treatment mistakes and what they cost
The costliest mistake is treating the old speckles. They never turn green again, so every extra round of spray aimed at them adds leaf injury and expense without killing a single mite.
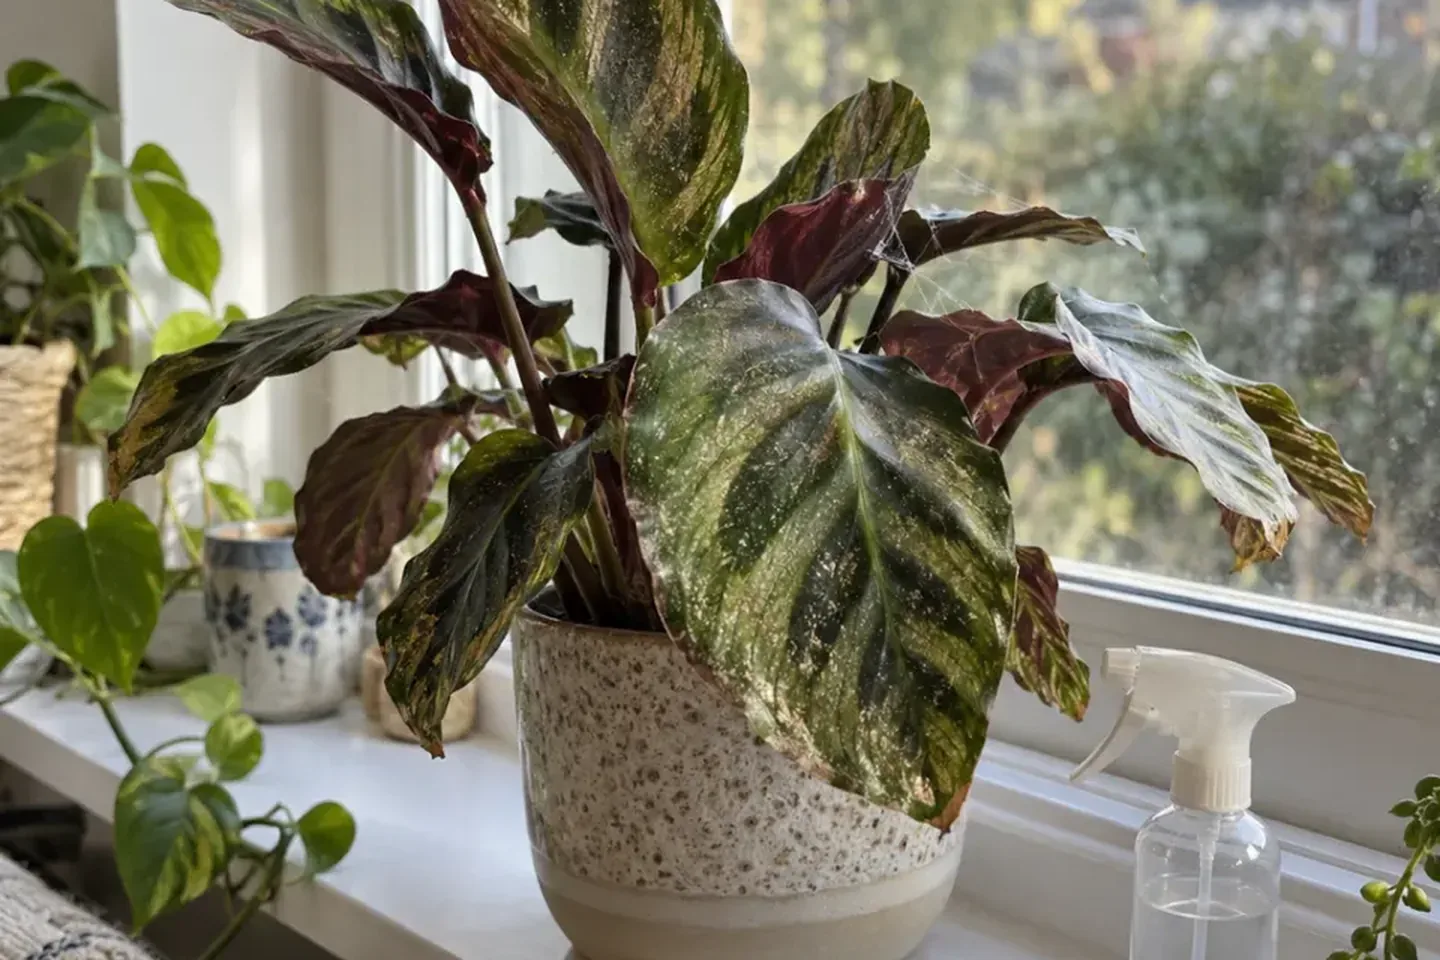
- Spraying on a guess. Pale dots without a confirmed mite can be thrips, mildew or spray residue. You lose a week and stress the plant.
- Polishing only the tops. The mites live underneath. A shiny top surface hides a thriving colony below.
- Soaking the roots while rinsing. Now you have mites and wet mix. Read the root rot guide if the base turns soft afterward.
- Using vinegar or dish soap. Both can burn leaves, and neither is a mite plan.
- Ending isolation too early. A clean-looking plant back in a crowded shelf can reseed the whole collection.
Spider mites on plants treatment: a 14-day check-in plan
Spider mites on plants treatment works best on a fixed inspection plan: mark a few reference leaves and check the same undersides on day 1, 3, 7 and 14. You are counting live mites and looking for fresh stippling on leaves that were clean at the start.
| Check-in | Where to look | What counts as progress |
|---|---|---|
| Day 1 | Leaf undersides and any silk | Photos taken, stippled leaves listed, mites counted if visible |
| Day 3 | Sheltered veins after cleaning | Fewer or no live mites in the same careful search |
| Day 7 | A leaf that was clean on day 1 | No fresh stippling, even if old scars remain |
| Day 14 | Growing tip and neighboring plants | No spread before you end isolation |
These dates are check-ins, not a spray schedule. Any product follows its own label. Badly damaged leaves may still drop during this time. Our guide to leaves falling off helps you log those losses without reading every fallen leaf as a new outbreak. If sticky residue shows up, that points to a different sap feeder, and this sticky leaves explainer shows where to look.
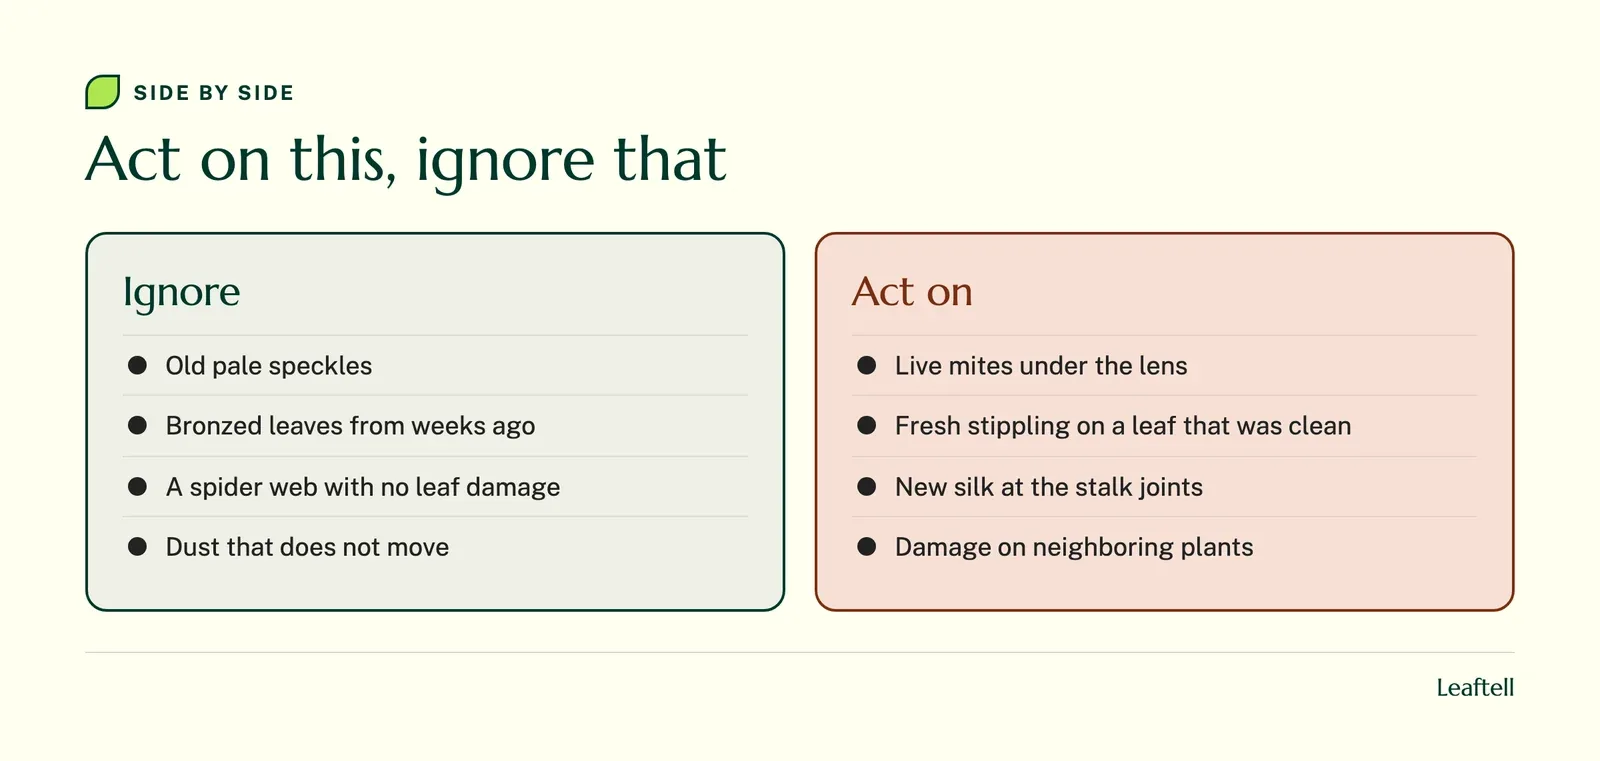
The bottom line: follow new damage, not old speckles
Isolate, clean the undersides, fix hot dry air, and judge the plant only by live mites and fresh stippling on leaves that were clean when you started. Use a labeled oil or soap only for a confirmed infestation that cleaning did not control.
Get help when repeated careful searches find no mites but the plant keeps declining, when damage spreads quickly across the collection, or when the base starts to collapse. A local extension office can confirm the pest from a sample. For a badly weakened plant with a heavy colony, letting it go can protect the rest of your plants better than months of repeat treatments. If the evidence stops fitting mites, start again from the plant problems overview, or check your stippled leaves in Leaftell using what you have seen and photographed.
Sources
Check your growing conditions with the plant watering calculator.
Frequently asked questions
Start with isolation and a gentle rinse or wipe of the leaf undersides. If a confirmed infestation keeps going, a horticultural oil or insecticidal soap labeled for mites and your plant is the next step. Follow the label and never mix products.
Do not use vinegar on foliage. It can burn leaves and it is not a reliable way to manage mites.
Dish soap is not the same as a labeled insecticidal soap and can injure leaves. Use plain water for physical cleaning, or a product made and labeled for mites on that plant.
An established colony usually persists and spreads to neighbors if you do nothing. Isolation, cleaning and repeat inspections work far better than waiting.
Many indoor plants can get them, and no common species is immune. Plants in warm, dry spots near heaters or vents deserve the closest look.
Old speckles will stay, so ignore them. When repeated searches of the same marked leaves find no live mites and leaves that were clean stay clean through your day 14 check, you can end isolation.
Yes. They move between leaves that touch and on hands, cloths and tools, so keep the plant apart and wash what you used before handling others.
Share article
About the author

Keep checking your plant
Plant care reference
Indoor plant care
Build a routine around your plant, light and potting mix.
Plant care reference
Why is my plant dying
Trace leaf and root symptoms before choosing a care change.
Plant care reference
Pothos plant care
Choose a growing spot and prune a trailing pothos for fuller growth.
Plant care reference
How to fix root rot
Inspect root firmness and drainage, then decide whether to repot.