Leaf Spot Disease: 5 Checks Before You Spray Anything
Filip Leszczyński 16 October 2026 11 min read
In this article
Leaf spot disease is one cause of spots on leaves, but insects, sunburn and physical injury leave marks that look very similar. So before you treat anything, record the spots' shape and where they are, isolate the plant, keep the leaves dry, and watch whether new spots appear on clean leaves.
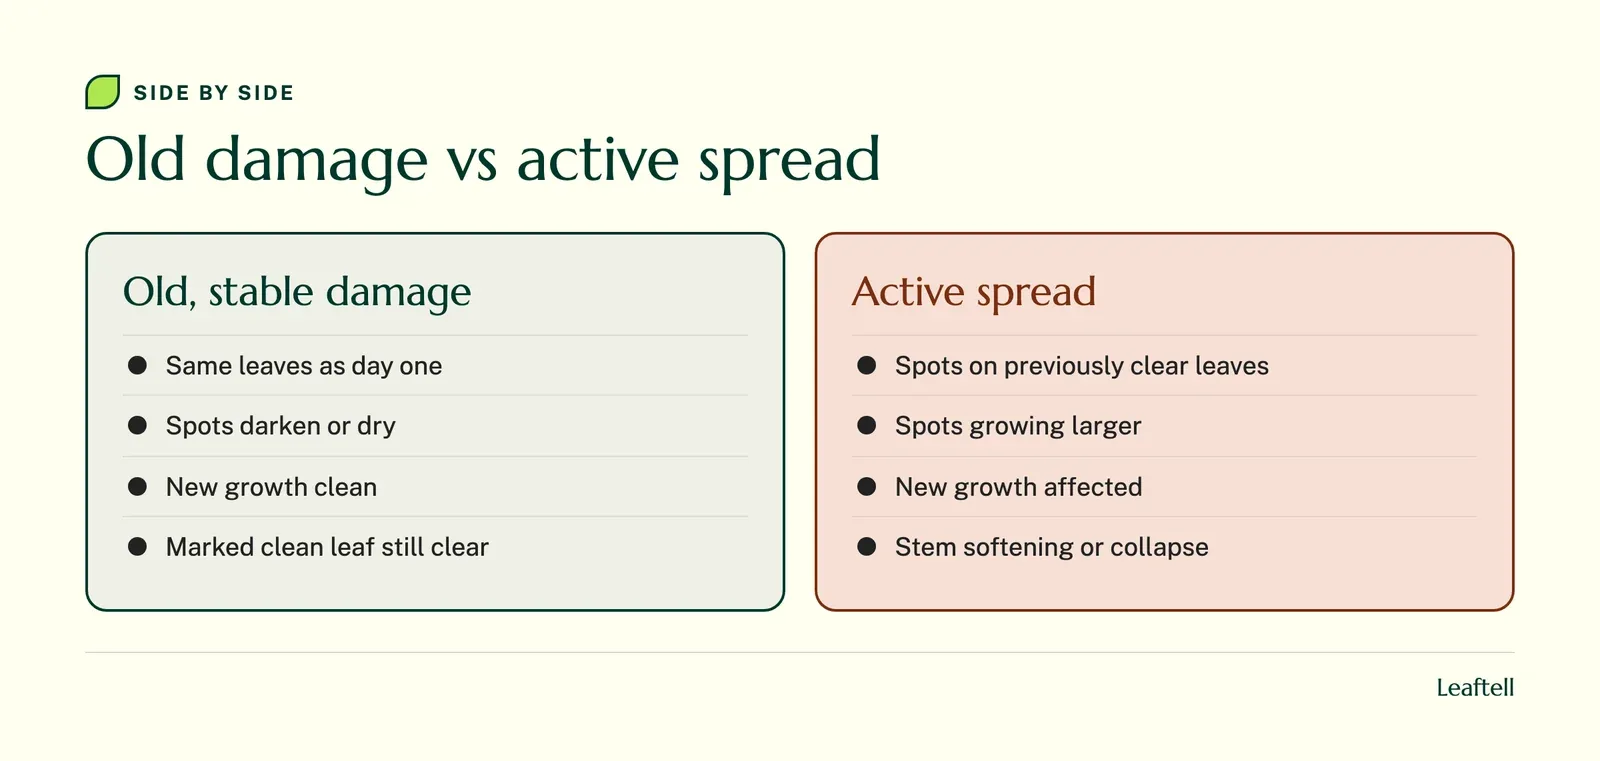
That last check is the one that matters. An old spot that darkens is not news; a fresh spot on a leaf that was clear three days ago is. Most people spray based on how the worst leaf looks, which is the least useful leaf to judge by.
No photo, however sharp, can tell you whether a mark is spreading or what you sprayed last month. Those answers come from your notes.
Brown spots on leaves: record the pattern first
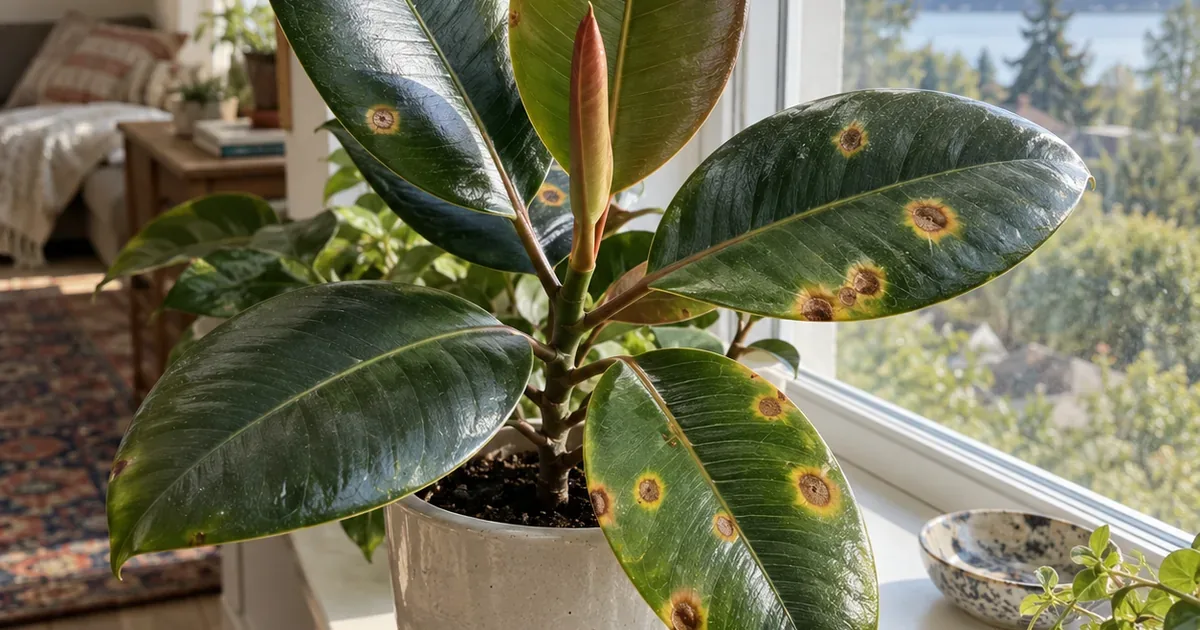
Brown spots on leaves can come from fungi, bacteria, pests, sun or handling damage, and a picture alone rarely tells them apart. Start by recording shape, location and count, so you can tell an old injury from something that is spreading.
Pick one representative leaf. Photograph the whole leaf, then one spot up close. Note whether the marks are round, angular, ringed, pale in the center or surrounded by yellow tissue. Those details help anyone you ask, but none of them is a lab diagnosis; different injuries look alike once the damaged tissue dries.
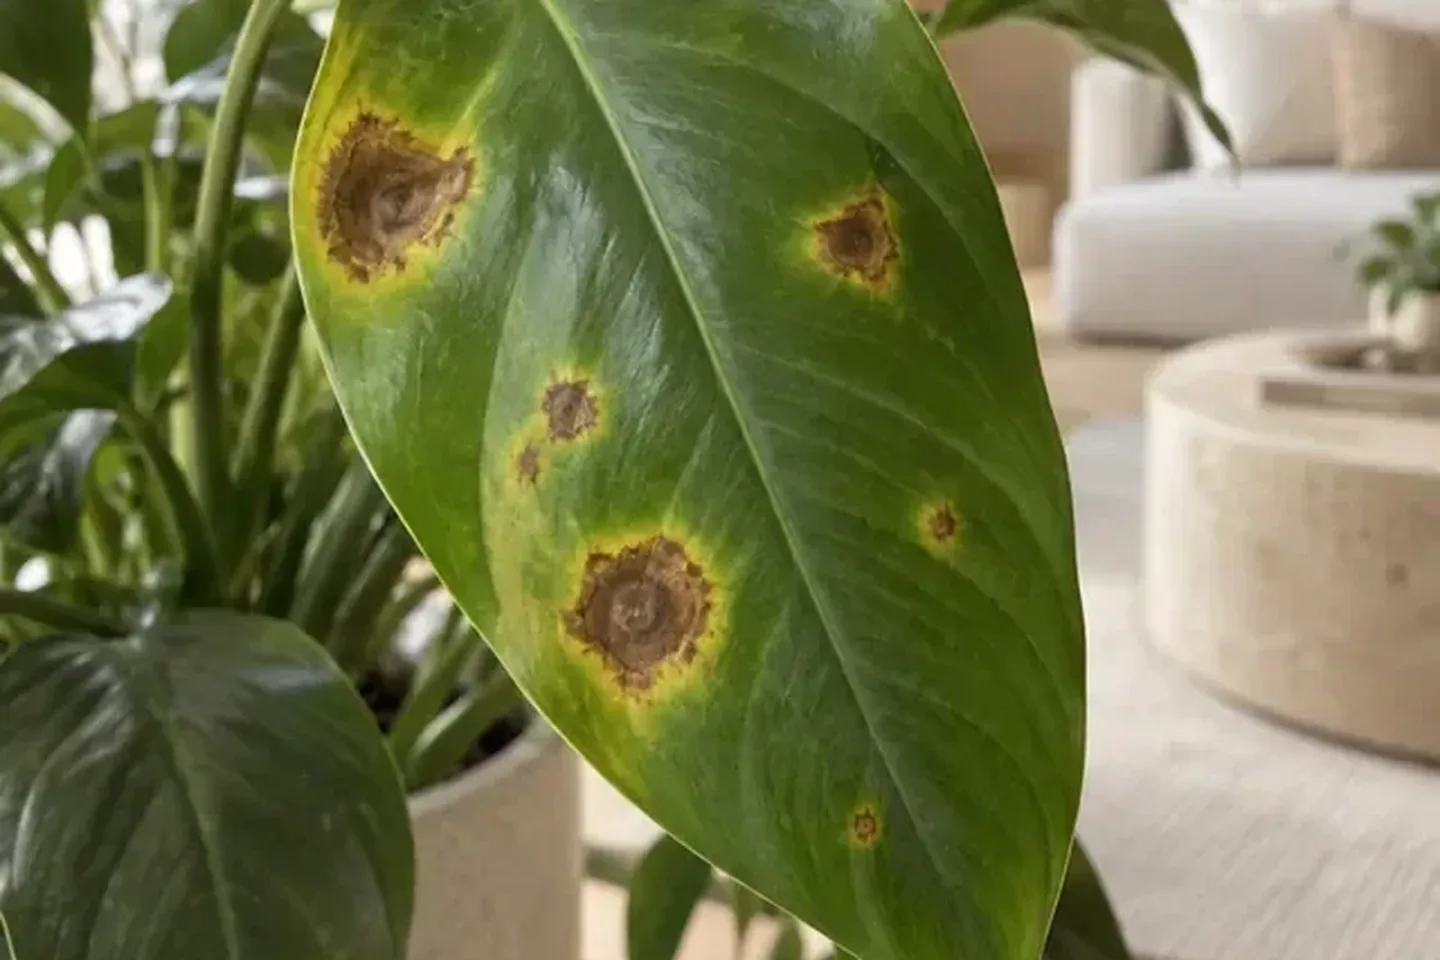
Then check where the oldest spots are. Lower leaves near splashing soil, leaves pressed against hot window glass and leaves rubbing on a shelf each suggest different questions. Count the affected leaves on day one and pick an unmarked leaf to revisit. That measures spread far better than photographing the worst leaf again and again.
| What you see | What it suggests checking | What to do next |
|---|---|---|
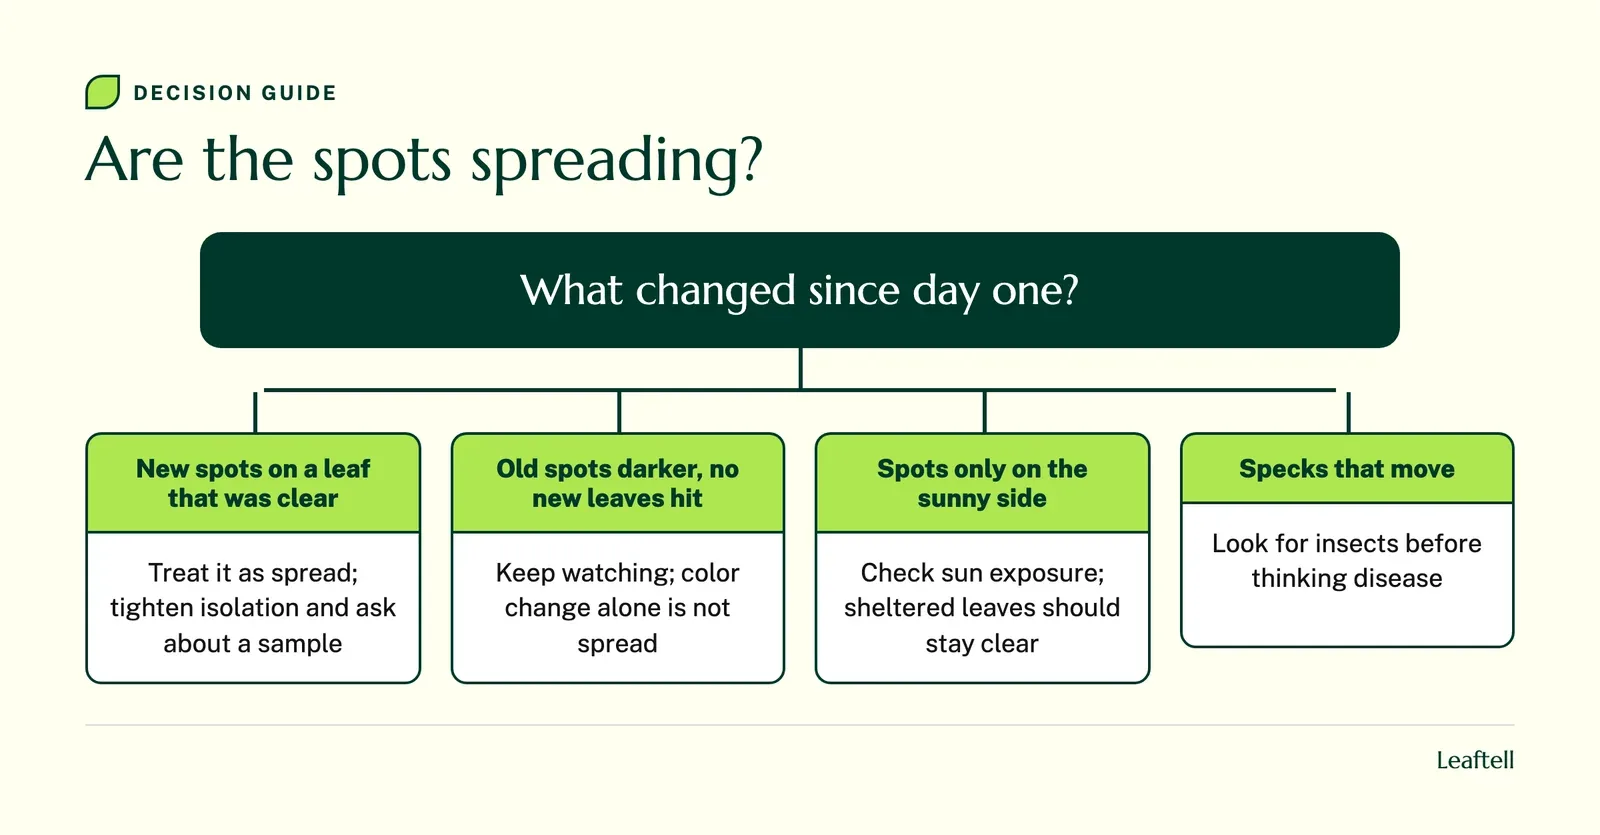
| Spots only on the window-facing side | Recent strong sun exposure | Check whether sheltered leaves stay clear |
| Silvery tissue with tiny black specks | Thrips feeding | Look for narrow insects that move |
| New spots on a clear leaf by day 3 | Active spread | Tighten isolation and ask about a sample |
| Old spots darker by day 7, no new leaves hit | Old damage changing color | Keep watching; this alone is not spread |
| Browning that follows leaf edges and tips | Edge damage, not separate lesions | Compare with brown tip causes |
Observation checklist for leaf spot disease. Review dates are suggested check-ins, not watering or treatment intervals.
If the damage runs along the edges rather than forming separate spots, brown leaf tips is the better guide. Take every photo in the same daylight, with dry leaves. Glare on glossy foliage can fake pale patches, and wet leaves make ordinary marks look darker.
Black spots on leaves: check the underside
Black spots on leaves may be a surface deposit, insect damage or a true lesion through the tissue. Turn the leaf over and look at the underside, the midrib and the nearby stem with a hand lens before you decide.
Tiny dark dots can come with insect feeding, while a larger fixed lesion goes through the leaf. Try to tell whether something sits on top of the surface or is a damaged area inside it. Do not scrape hard; that makes a new injury and wipes out the evidence.
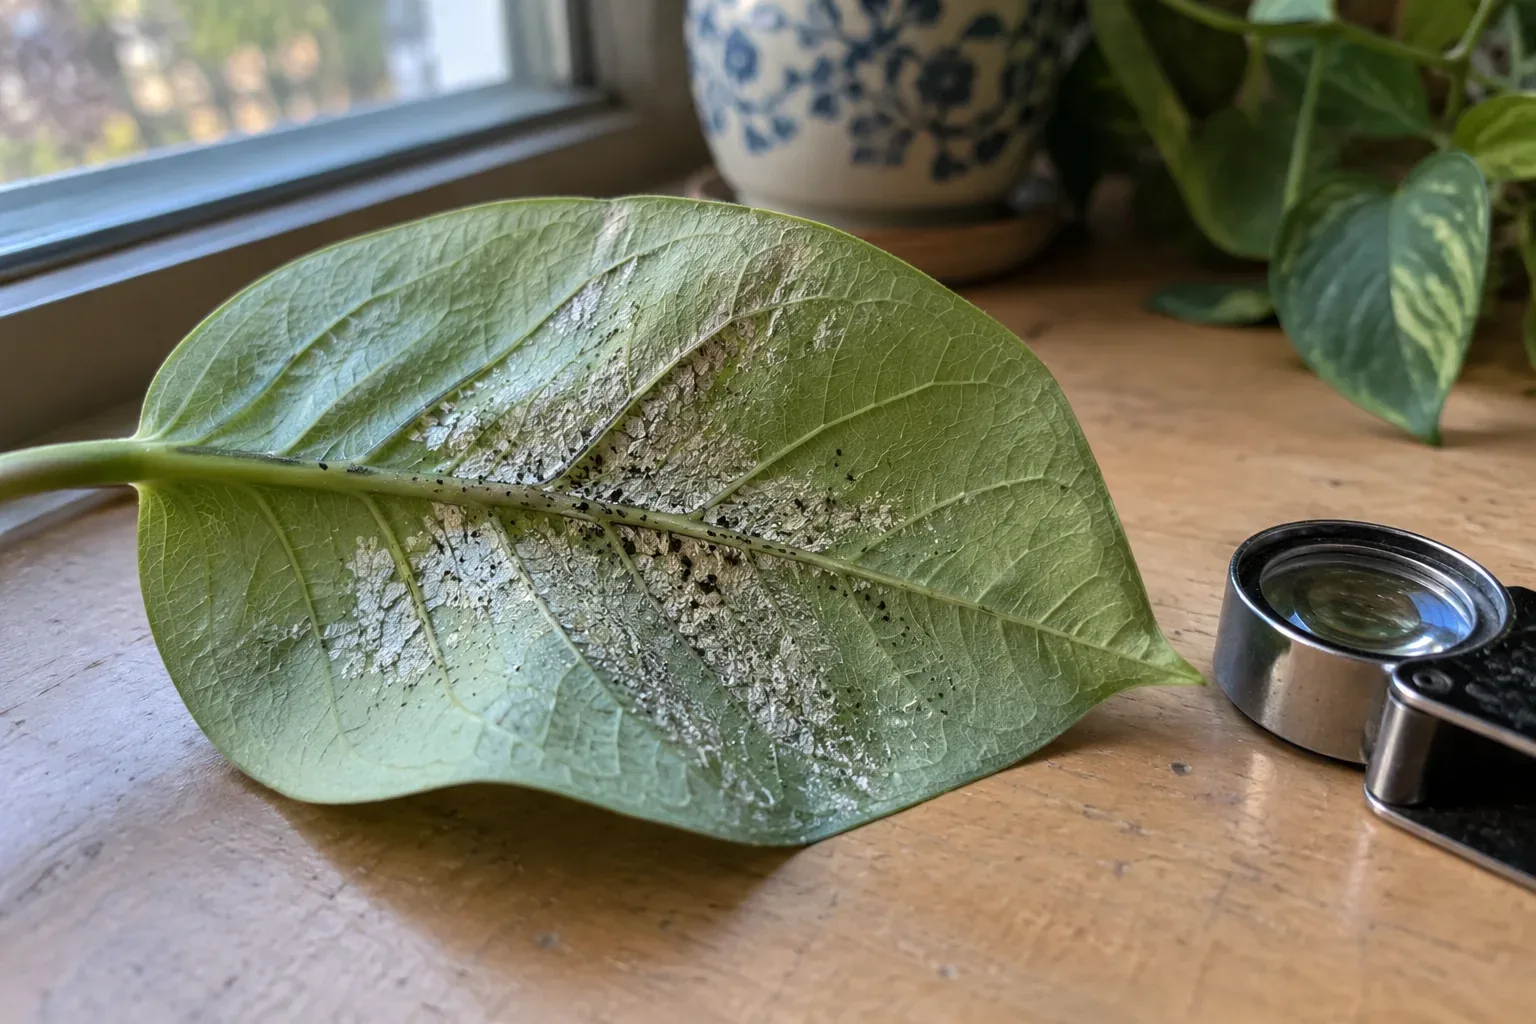
Some patterns point to a different guide. Silvery scarring with pepper-like specks means comparing thrips damage, as the RHS guide to leaf damage on houseplants also describes. Raised bumps that do not move along the stems call for scale insects. A white powdery coating is a separate problem covered in powdery mildew on plants. Shiny sticky deposits with dark coating are better read with sticky leaves on plants. More than one cause can be present at once, so one insect does not explain every spot.
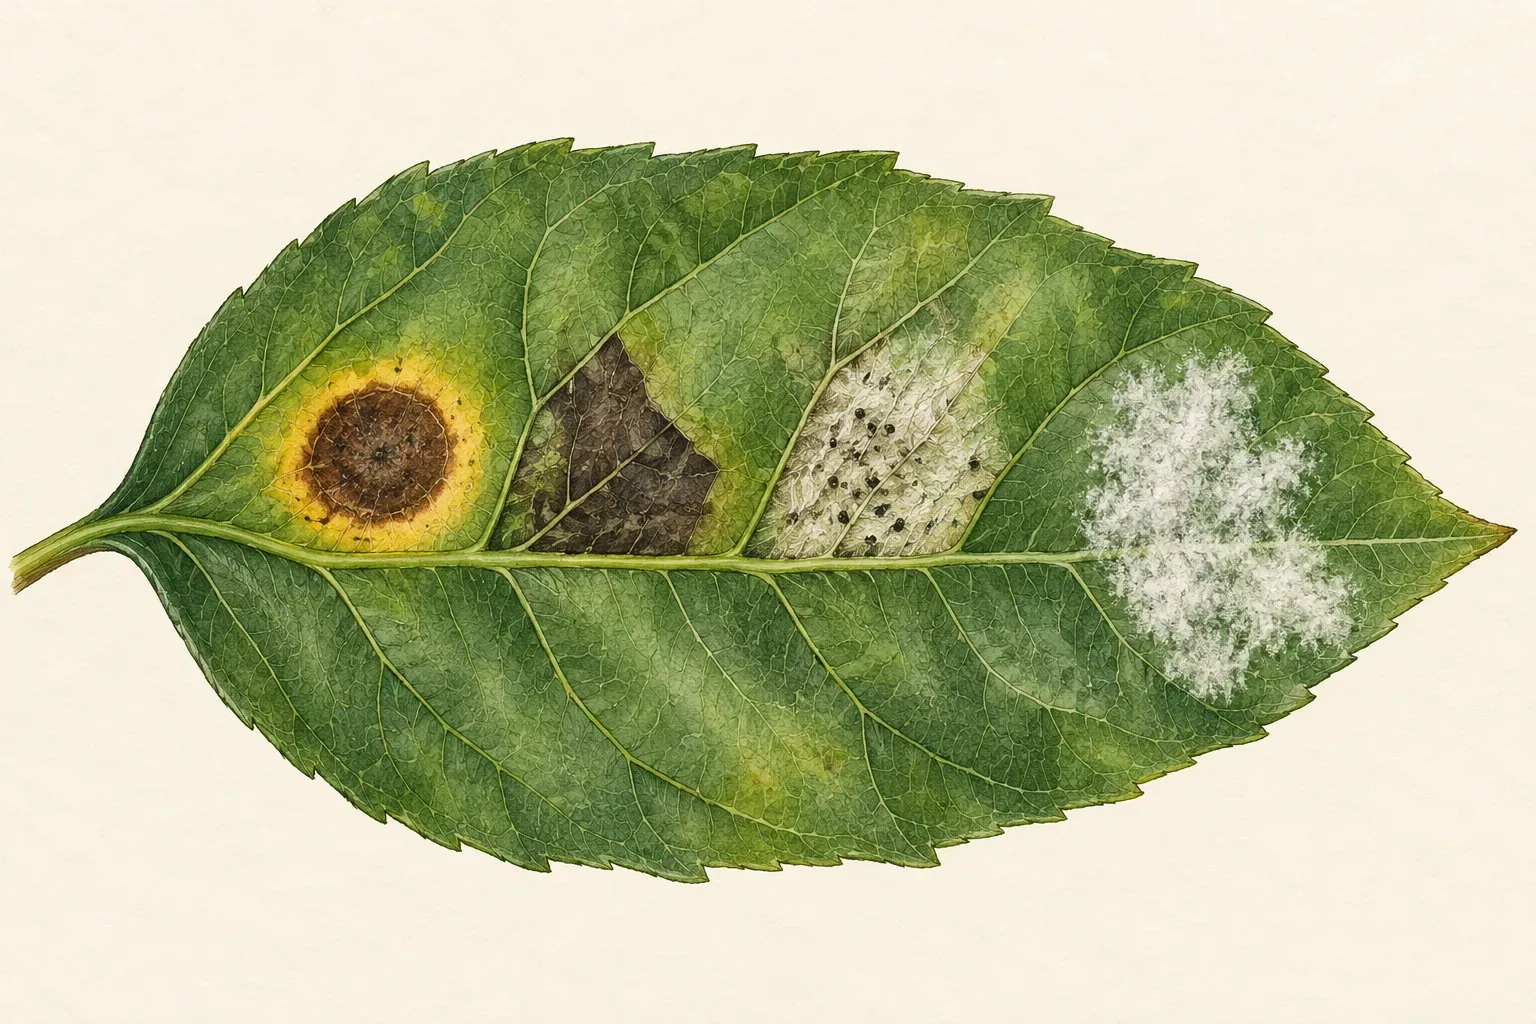
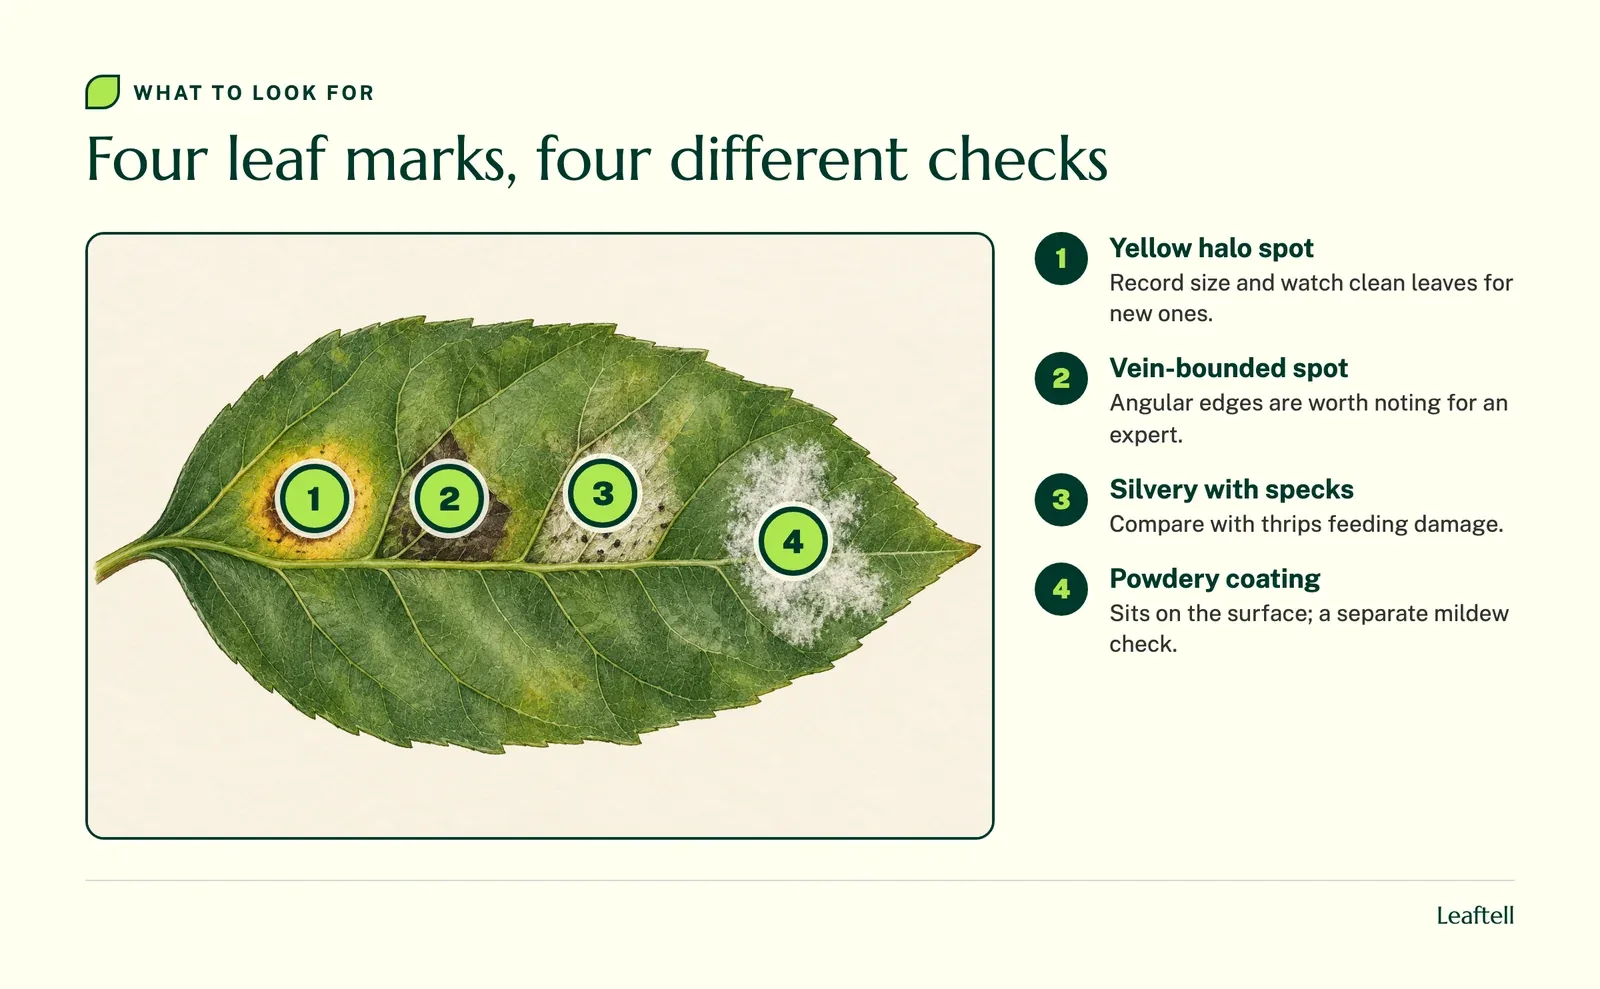
Photograph anything that seems to move, with a coin or ruler in frame for scale. Never pick an insecticide because a dark speck showed up in a photo. If you cannot identify what you see, isolate the plant and ask your local extension service which sample would help. Leave the photographed leaf on the plant when you can, so you can compare it later.
Bacterial leaf spot: how to reduce spread at home
You can slow a possible bacterial leaf spot without knowing the cause yet: separate the plant, keep the leaves dry, and clear away debris. These steps cut one route of spread and harm nothing if the spots turn out to be something else.
On tomatoes, University of Maryland Extension describes bacterial spot and speck lesions as 1/8 inch or smaller, which is one reason size helps when you ask for an identification. The tomato plant disease guide covers garden crops in detail.
How to contain leaf spots while you investigate
- Isolate the plant
Move it away from close neighbors so leaves do not touch and no dripping foliage passes over other pots.
- Water the mix, not the leaves
Pour onto the potting mix and stop routinely wetting every leaf.
- Clear fallen debris
Remove dropped leaves from the pot surface and the shelf around it.
- Remove only badly damaged leaves
Use clean tools, bag the material right away, and clean the tools again before touching another plant. Keep most of the green tissue.
- Mark a clean leaf to watch
Tie a loose tag on a nearby support next to an unmarked leaf, not on the leaf itself, and check it after three days.
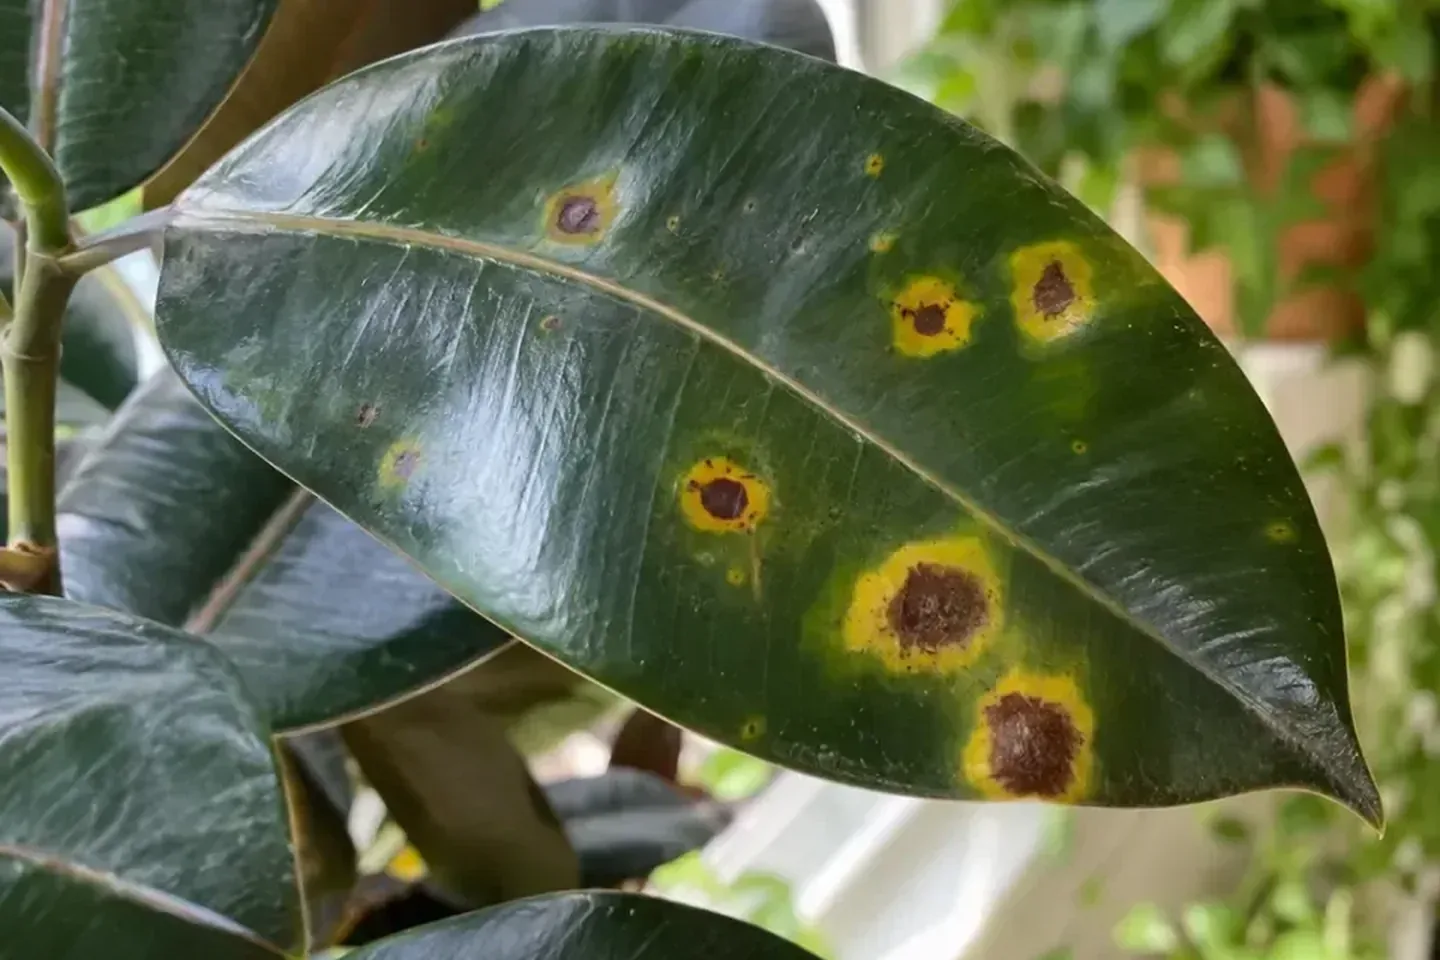
Do not strip most of the healthy foliage to make the plant look spotless. Remaining green leaves still feed the plant, and heavy pruning adds stress. Improve air movement and spacing, but do not park the plant in the direct blast of a fan or heater. Keep drainage water and used cloths away from other pots until you know more.
Leaf spot disease treatment: when testing matters
The right leaf spot disease treatment depends on the cause, and a photo often cannot separate fungal, bacterial and noninfectious damage. When spots keep spreading, a local diagnostic service is more useful than any spray.
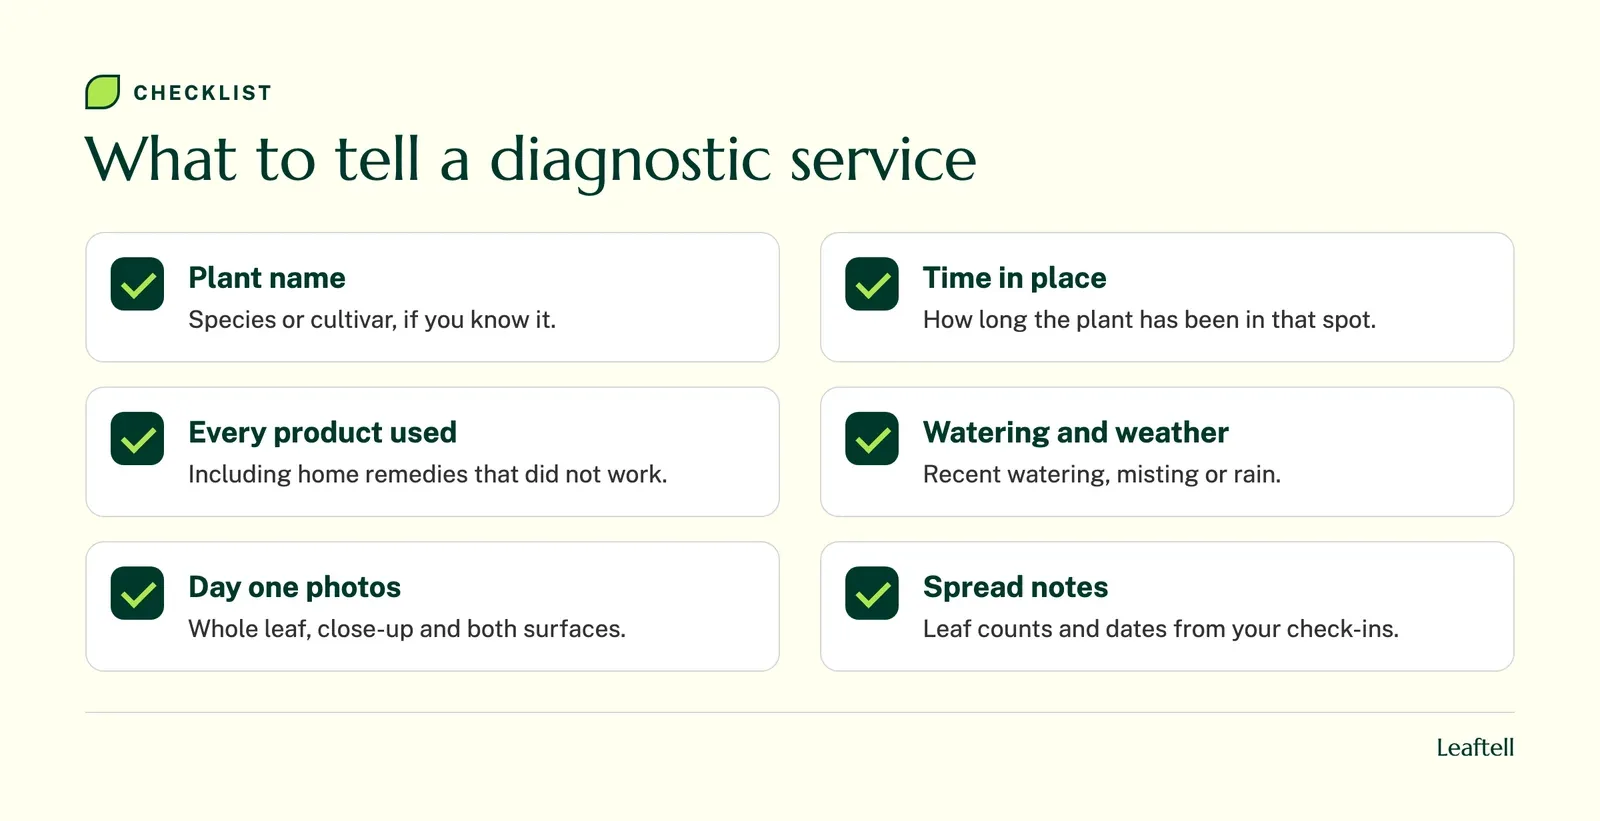
Contact the service before cutting or mailing anything. They may want fresh material, specific photos, or notes on watering and recent weather. Include the plant name if you know it, how long it has been in that spot, and every product used recently. Spray injury can look like disease, so do not leave out a home remedy that did not work. The University of Maryland Extension's indoor plant diagnosis guide follows the same order: conditions and history first, then causes.
Keep up isolation, cleanup and careful watering while you wait. If a fungicide or another treatment class turns out to be appropriate, choose one labeled for that plant, that problem and indoor use, and follow the label. Never mix products, and do not assume an outdoor product belongs in your living room. Keep children and pets away from treatments and stored supplies. The ASPCA toxic plant list helps you check the plant itself; it says nothing about pesticide safety.
For vegetable plants, this guide does not tell you whether produce is safe to eat. Ask your local extension service.
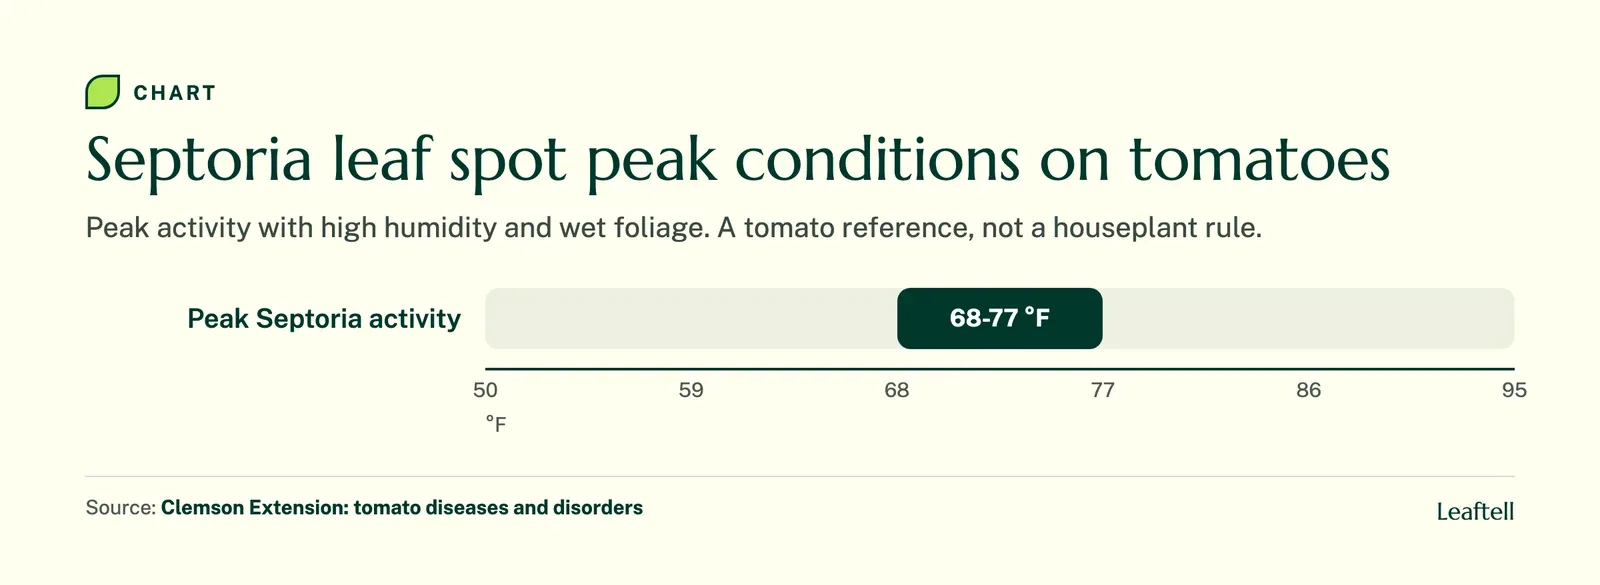
Weather matters for outdoor crops. Clemson places peak activity of Septoria leaf spot on tomatoes at 68-77°F with high humidity and wet foliage.
Leaf spot mistakes that make things worse
Most damage from leaf spots comes from the response, not the spots.
- Spraying before identifying. A product aimed at the wrong cause adds spray injury that looks like more disease. Cost: a muddled record and a stressed plant.
- Misting a spotted plant. Wet leaves help some infections spread. Cost: more lesions on clean leaves.
- Stripping healthy leaves. Removing green tissue to tidy up. Cost: less energy for recovery.
- Judging by the worst leaf. Old lesions darken as they dry. Cost: treating a problem that already stopped.
- Mixing products. Two treatments at once. Cost: real risk to you, your pets and the plant.
Spots on plant leaves: measure new damage over two weeks
Treat your first photo as a map, not a goal of perfect leaves. Old spots may darken or dry even after the cause has stopped, so the question is whether clean leaves pick up new spots.
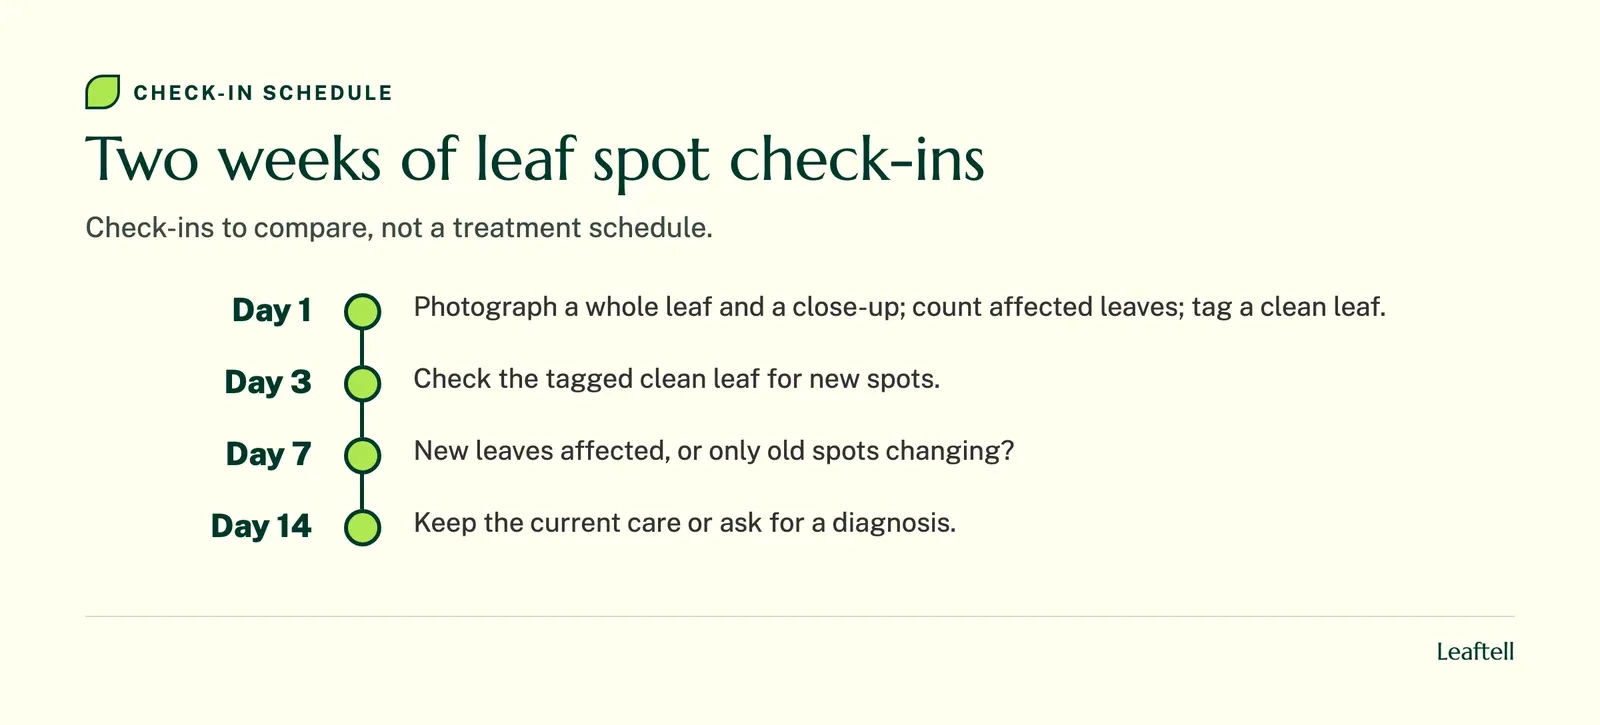
On day seven, ask whether the pattern is reaching new leaves or only changing inside old spots. On day fourteen, decide whether to keep the current care or ask for help. The schedule is a reminder to look, not a waiting period: faster decline, a soft stem or several collapsing growing points need attention sooner.
For a glossy indoor tree, fiddle leaf fig brown spots goes into species detail. If the symptoms shift into something else entirely, go back to the plant problems guide.
When to get help: contact a local extension service or diagnostic lab when spots keep appearing on clean leaves after a week of isolation and dry foliage, when new growth or the stem is affected, or when several plants show the same marks. Bring your day-one photos and your product history.
Watch the clean leaves, not the worst one
Record the pattern, look under the leaf, isolate the plant and keep the foliage dry. Then let new spots on clean leaves, not the color of old ones, decide whether you need a diagnosis. Check your leaf spots in Leaftell to choose the next thing to look at.
Sources
Check your growing conditions with the plant watering calculator.
Frequently asked questions
Fungi, bacteria, pests, environmental injury such as sunburn, and rough handling can all cause spots. Recording the pattern and the growing conditions is how you separate the likely causes.
Start by finding the cause and limiting spread: isolate the plant, keep leaves dry and remove debris. A stable old injury needs different care from a spot that keeps expanding.
There is no best spray for every leaf spot. Get a host-specific identification first, then use only a product labeled for that plant and problem, following the label.
Get identification advice, keep the leaves dry and stop debris moving between plants. Product choices depend on the confirmed problem and the host, not a universal recipe.
Pests, disease, sun damage and other growing problems can all leave yellow spots. Photograph both sides of the leaf and check whether the spots grow.
Rust-colored marks have several possible causes, including some fungal problems and physical damage. Texture, where the spots sit and the plant species matter more than color.
Only if a leaf is badly damaged. Use clean tools, bag the leaf and keep the rest of the green foliage, which the plant still needs.
Existing spots stay; damaged tissue does not turn green again. Success means no new spots on clean leaves and healthy new growth.
Share article
About the author

Keep checking your plant
Plant care reference
Indoor plant care
Build a routine around your plant, light and potting mix.
Plant care reference
Why is my plant dying
Trace leaf and root symptoms before choosing a care change.
Plant care reference
Pothos plant care
Choose a growing spot and prune a trailing pothos for fuller growth.
Plant care reference
How to fix root rot
Inspect root firmness and drainage, then decide whether to repot.