Spider Plant Leaf Tips Brown? 6 Causes and the Fix for Each
Filip Leszczyński 6 November 2026 12 min read
In this article
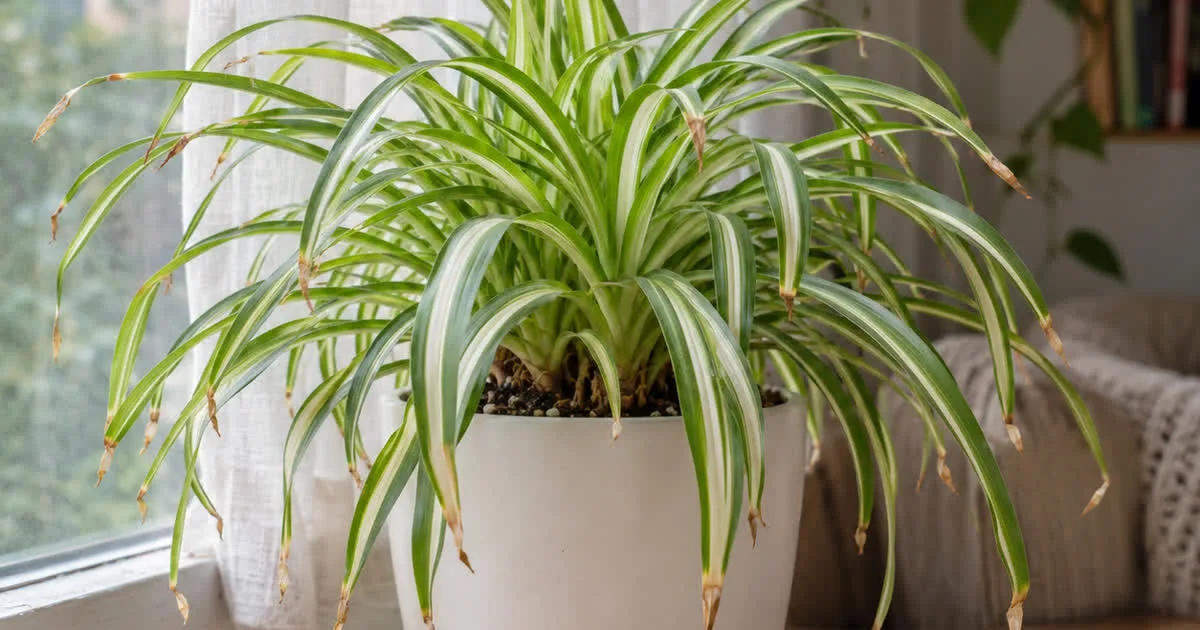
Spider plant leaf tips turn brown mostly because of what is in the water and the pot: fluoride or chlorine from tap water, fertilizer salts that build up in the mix, or soil that dries out hard between waterings. Dark, soft tips are the exception and point the other way, to soil that stays wet. The brown part will not turn green again, so the goal is clean new leaves, not perfect old ones.
Here is the part most care advice skips. A spider plant leaf is a long, narrow strap, and the tip is the end of the line for the water moving through it. Whatever that water carries in and cannot use tends to end up in the last inch of leaf. So on this plant, a brown tip is less a humidity problem and more a report on your water, your fertilizer and your pot. Read it that way and the fix gets much shorter.
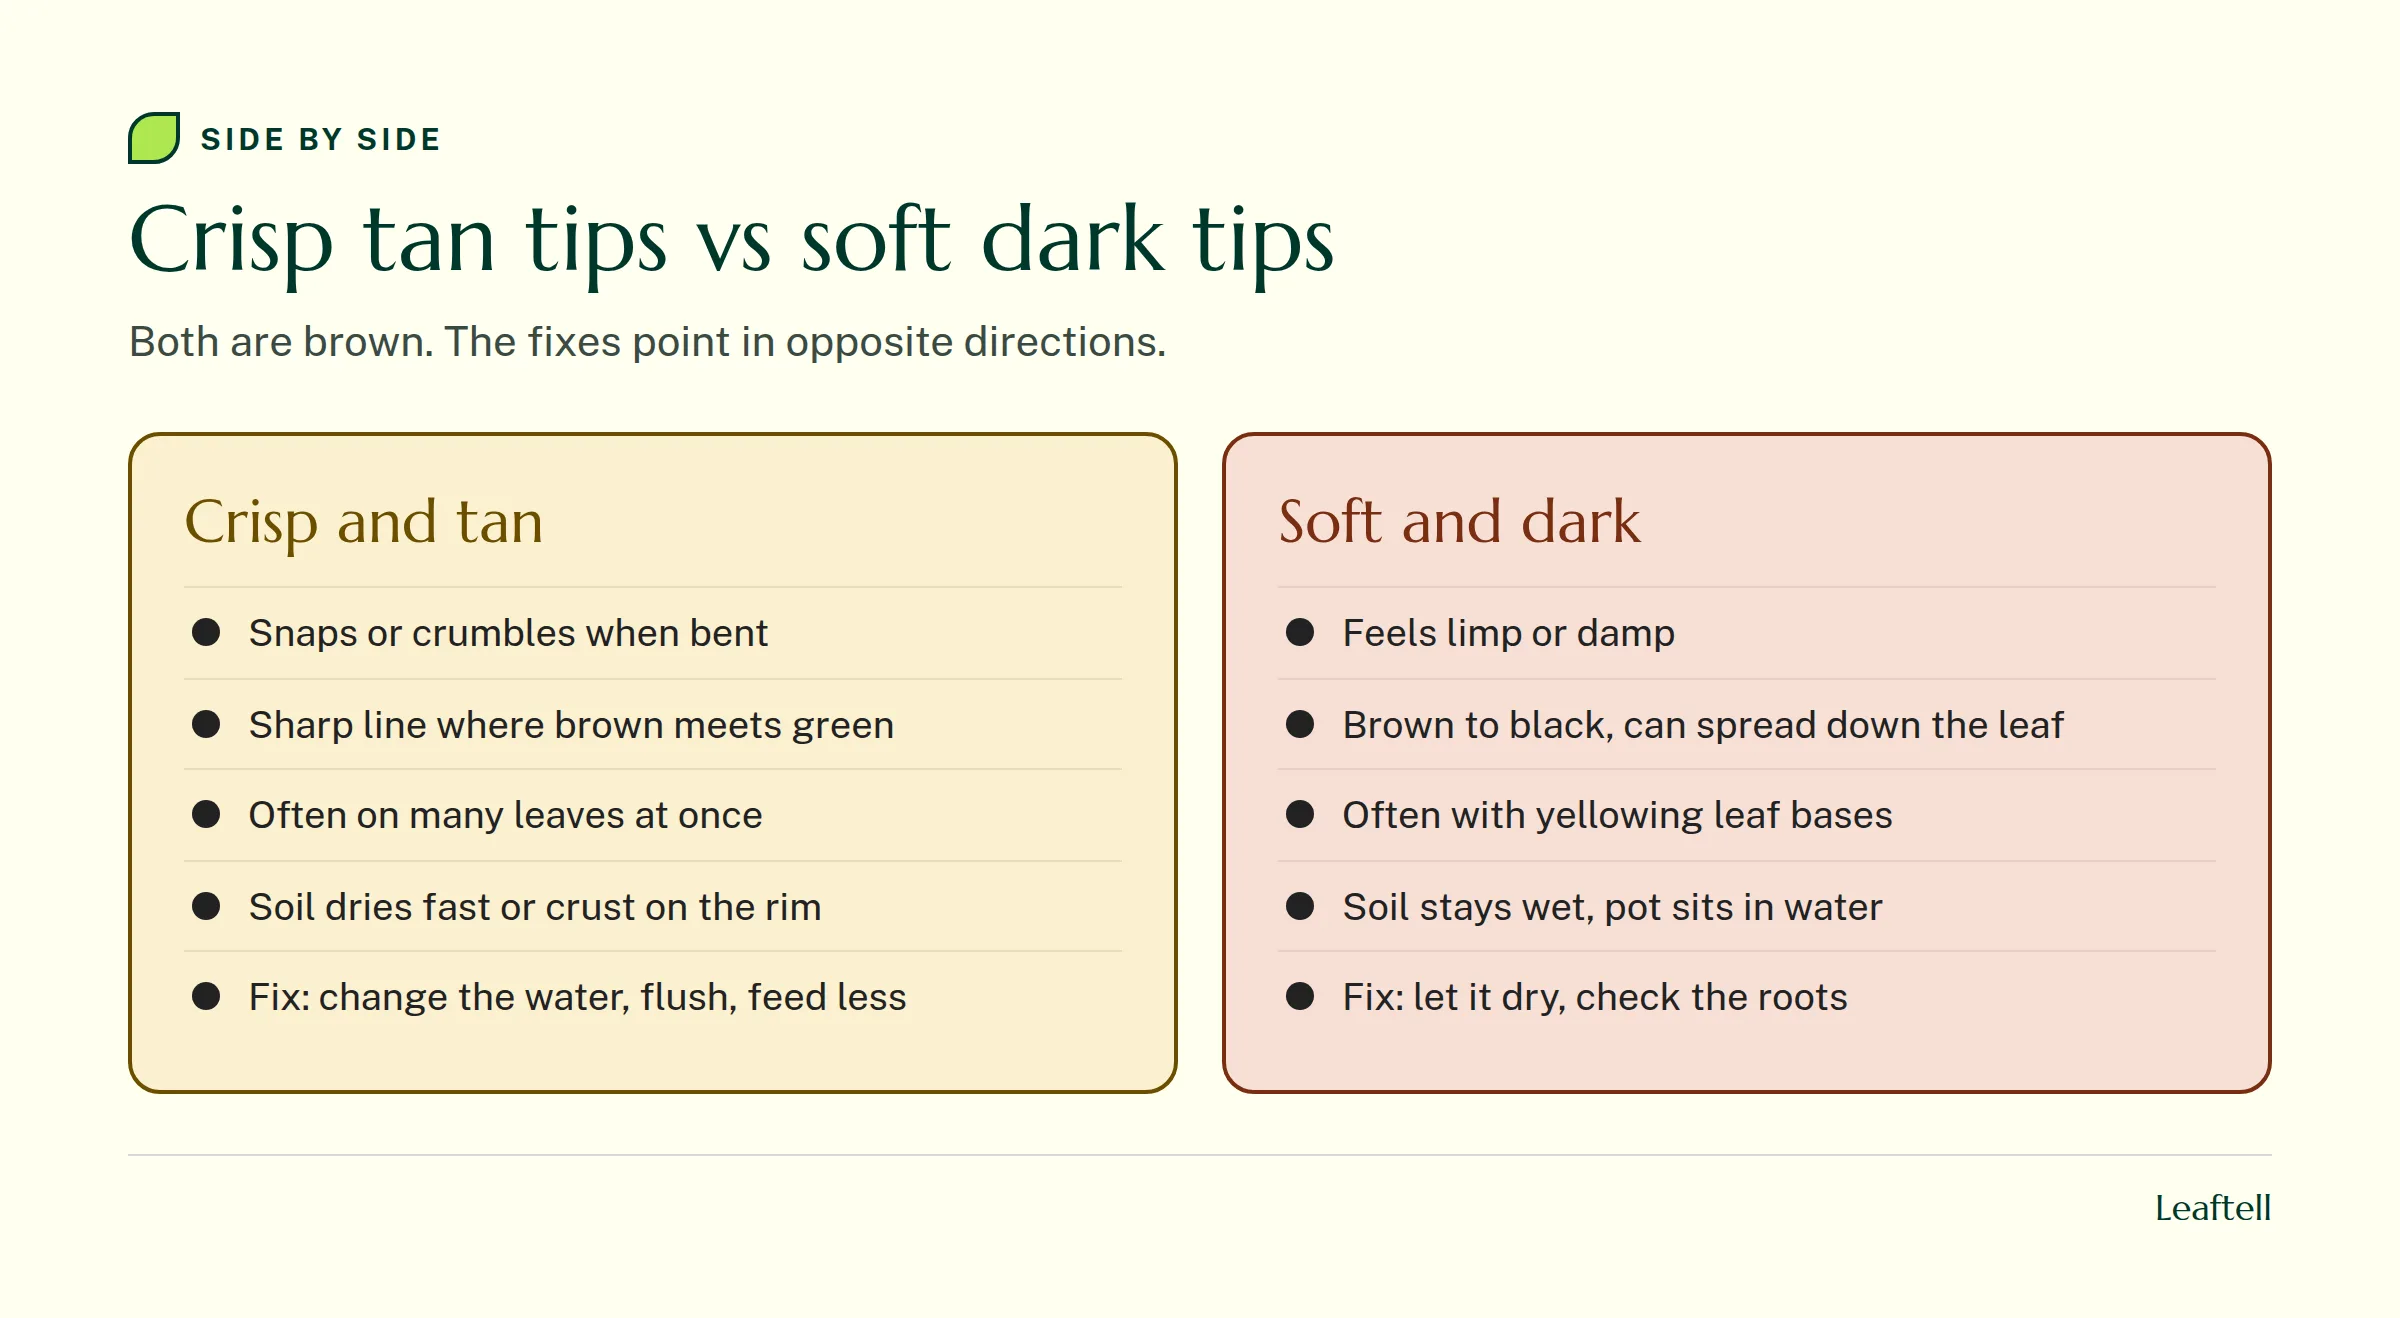
What the tip color and texture tell you
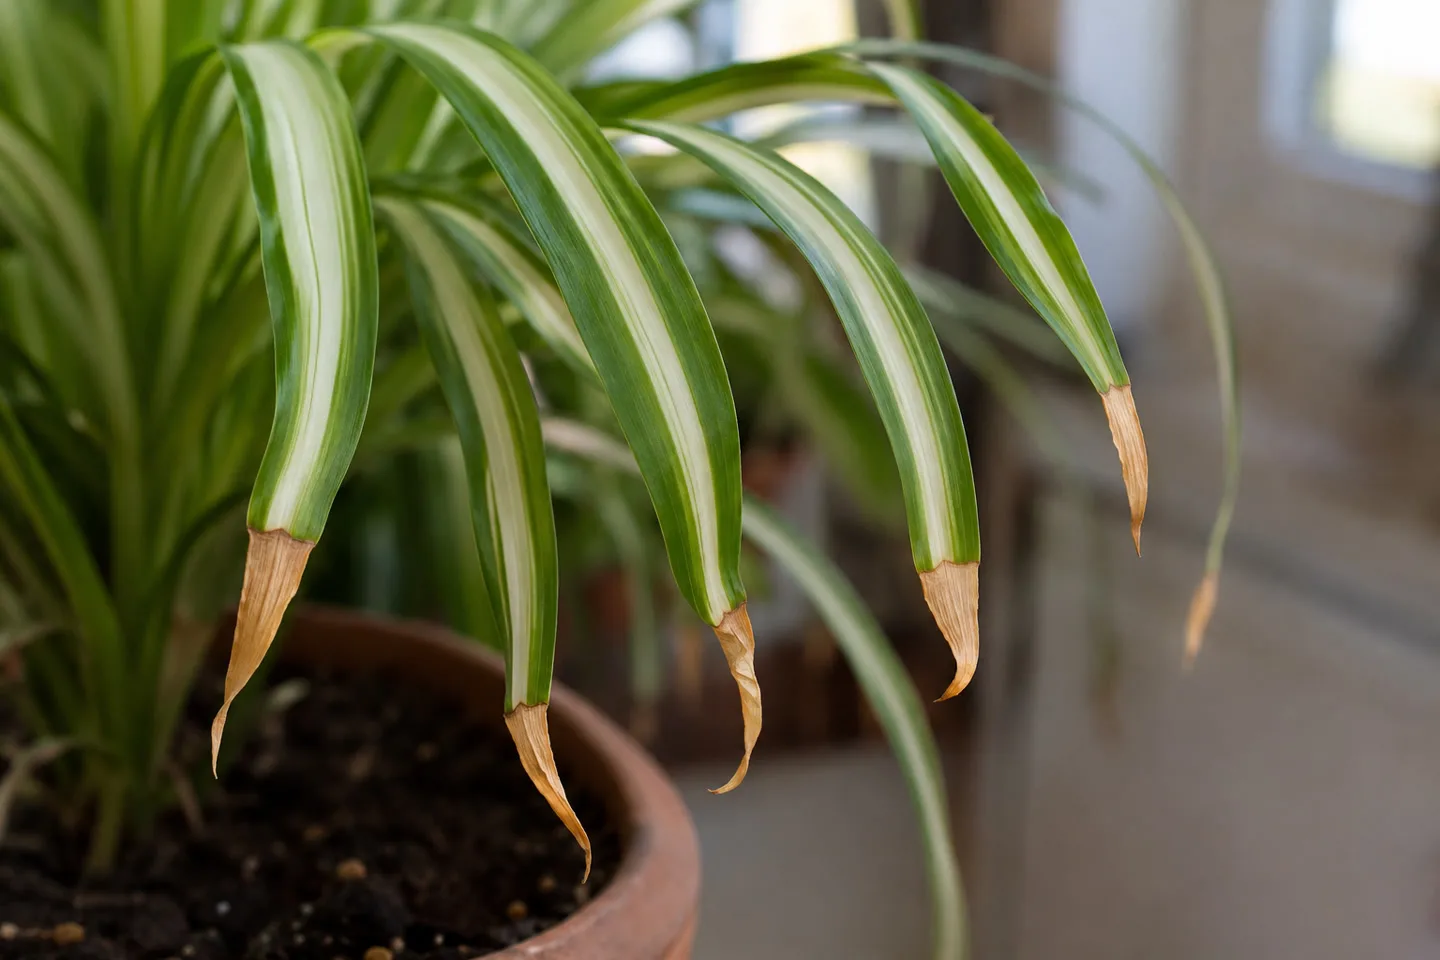
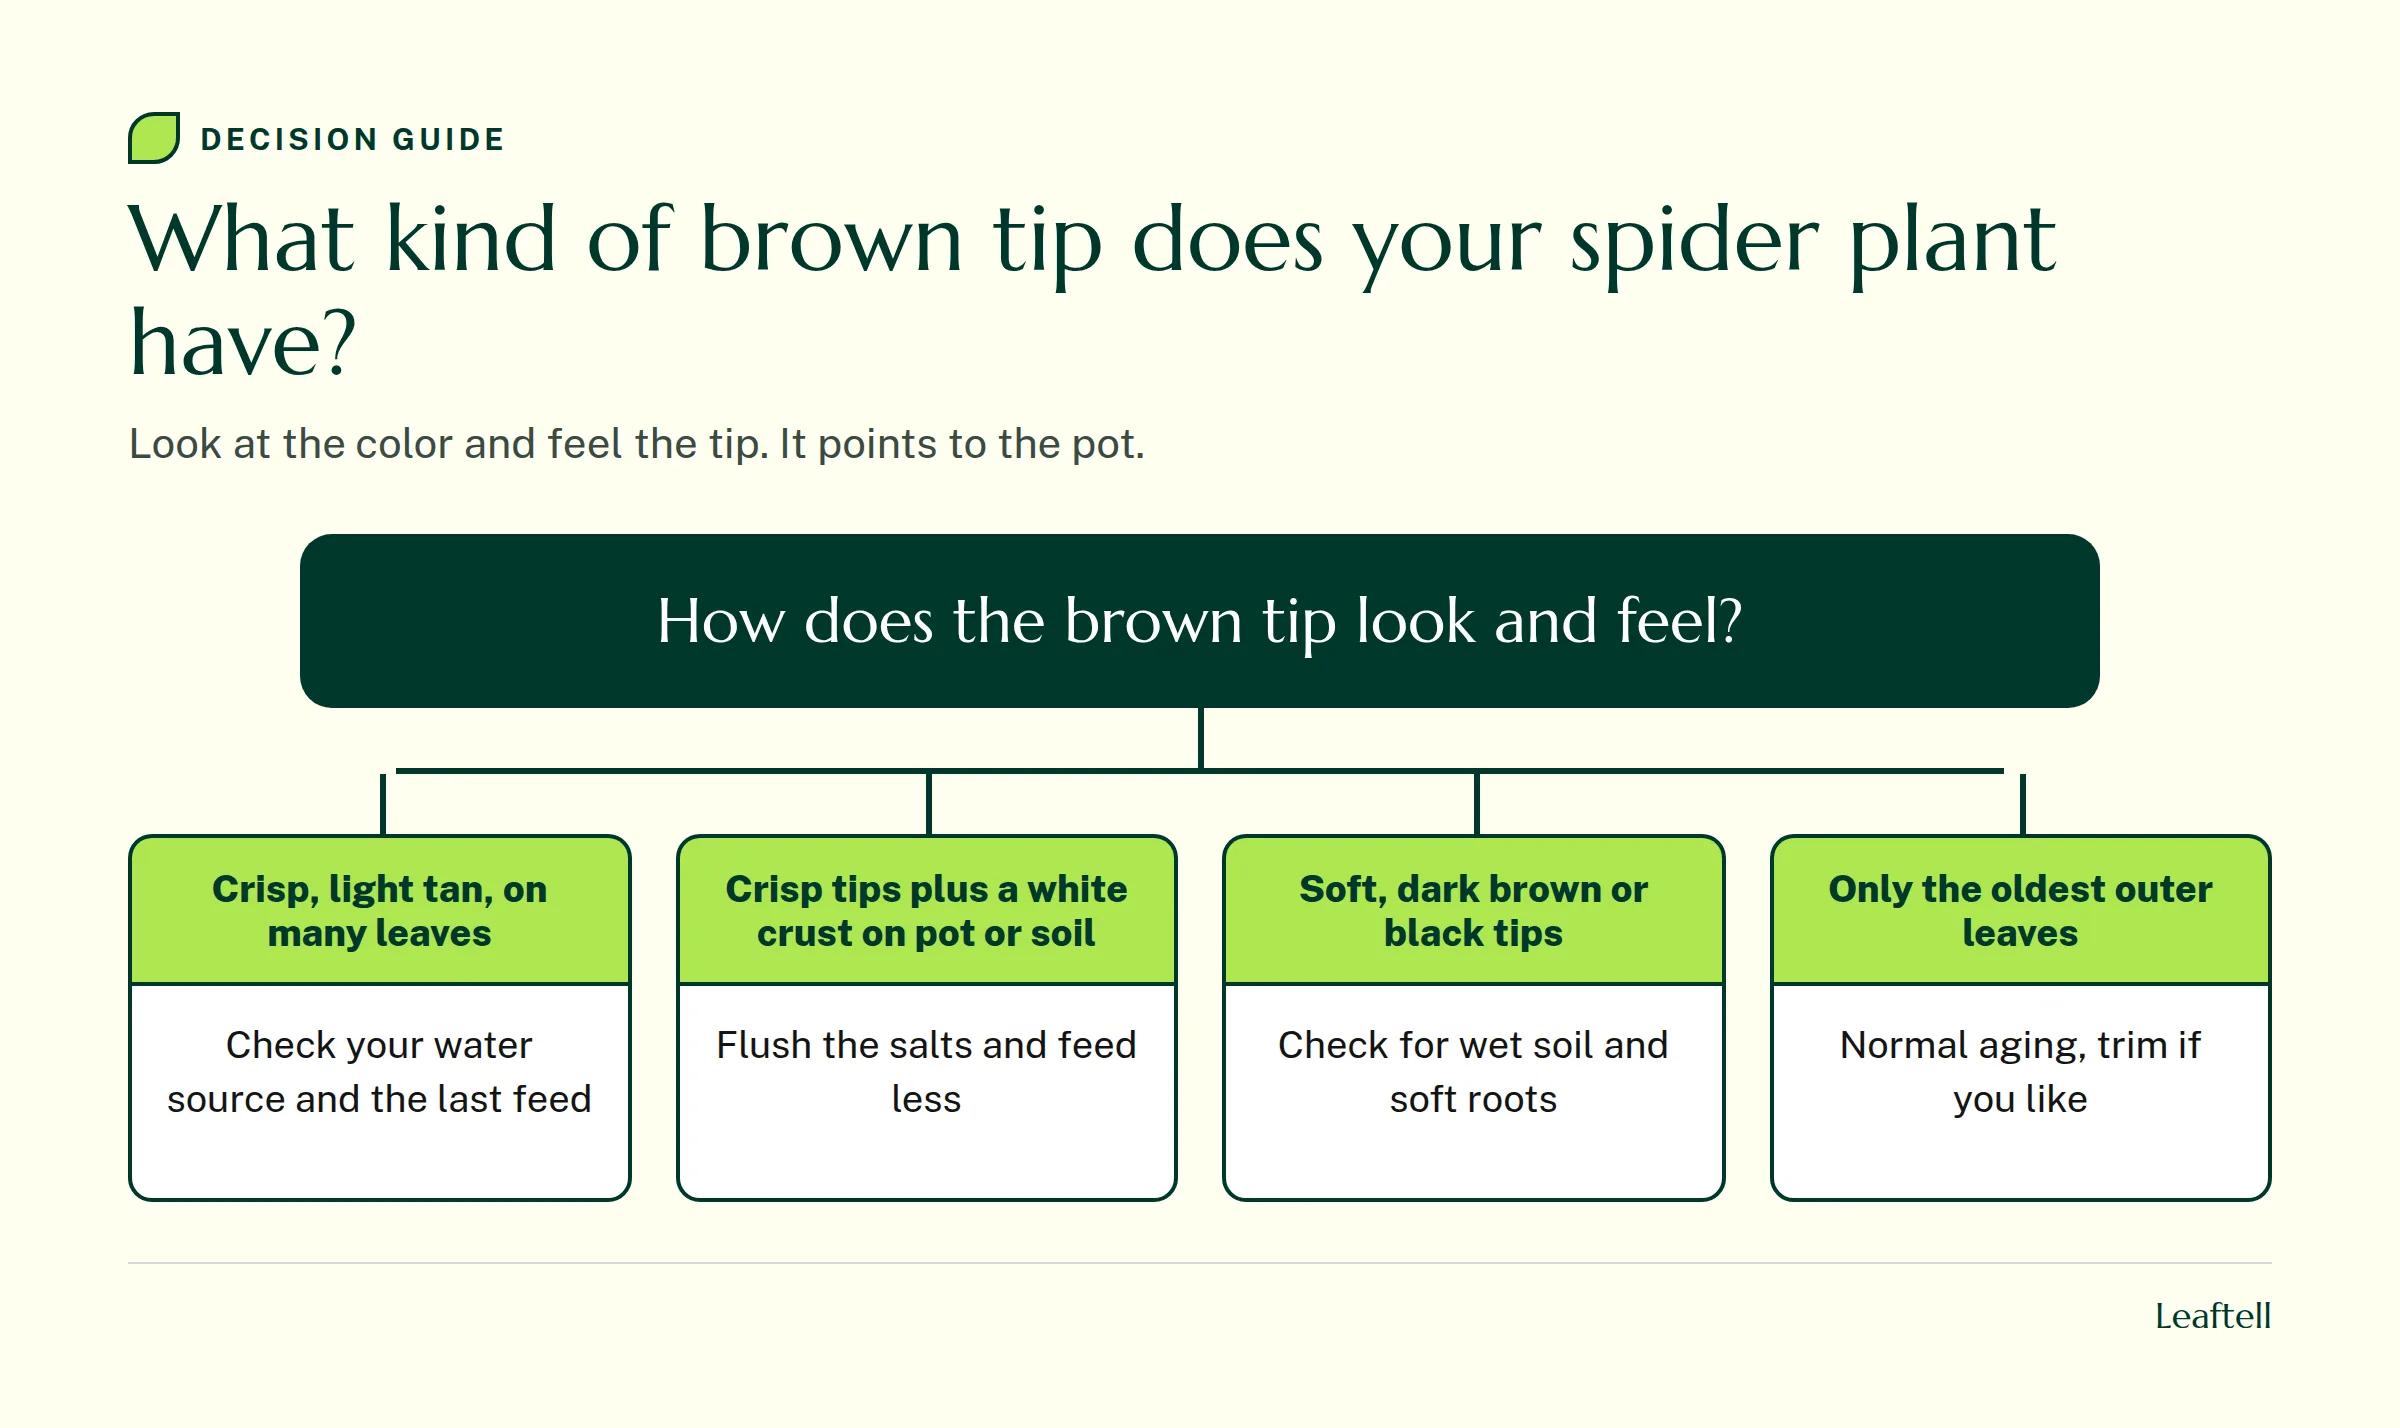
Look closely and touch a few tips before you move the plant or buy anything. The color, the texture and which leaves are affected narrow the cause down fast.
| What the tip looks like | Most likely cause | First thing to check |
|---|---|---|
| Crisp, light tan, on many leaves | Tap water chemicals or fertilizer salts | Your water source and when you last fed |
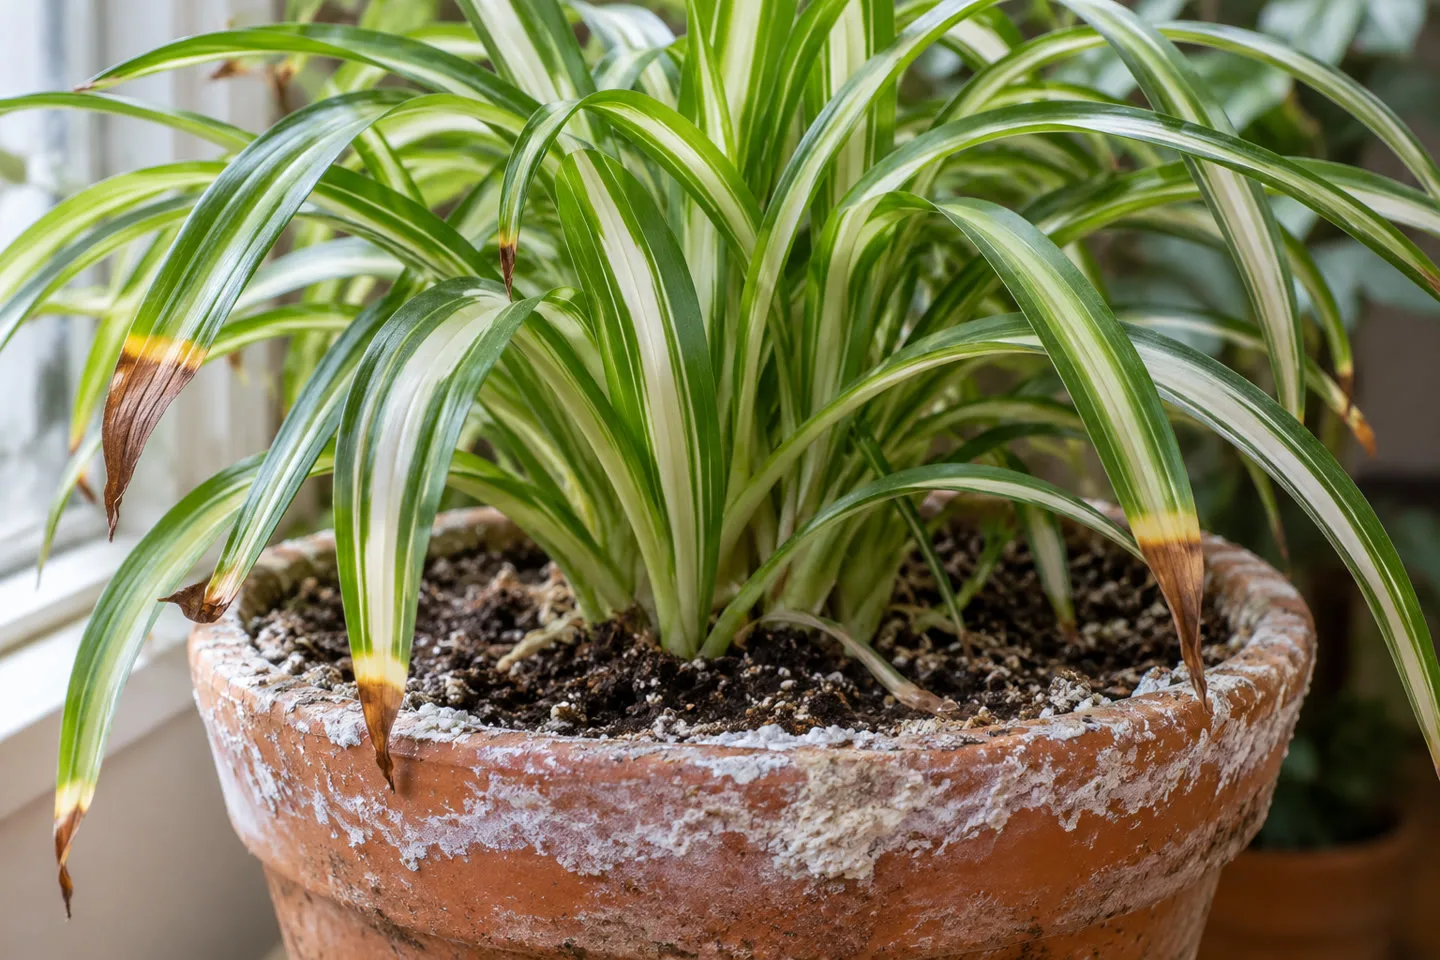
| Crisp tips plus white crust on the pot rim | Salt buildup in the mix | Flush the pot, pause feeding |
| Crisp tips, pot dries out in a day or two | Dry soil, often a root-bound plant | Lift the plant and look at the roots |
| Soft, dark brown or black tips | Soil staying wet, possible root rot | Feel the mix at depth, check the saucer |
| Only the oldest outer leaves | Normal aging | Nothing, trim if you like |
| Brown edges on the side facing a heater or vent | Dry, hot airflow | Move it out of the draft |
If you are not sure which row fits, take two photos: one close-up of a tip and one of the whole plant in its pot, soil surface visible. The second photo usually tells you more than the first.
Tap water and fertilizer salts: the usual cause
This is where most spider plant tips go brown. Wisconsin Extension names low humidity, dry soil, salt accumulation and chemicals in tap water, particularly fluoride and chlorine, as causes of tip burn, and says distilled water or rainwater helps prevent it (Wisconsin Horticulture). NC State's plant toolbox is blunter: avoid watering with tap water, because the chlorine and fluorides can cause leaf tip burn (NC State Extension).
Fertilizer adds to the same load. Wisconsin notes that feeding every three to four months is usually enough, or more often at half strength, and that excessive fertilizer may lead to tip browning. Every feed leaves some salt behind in the mix. In a small pot that is rarely flushed, it keeps building.
What to do, in order:
- Switch to distilled water or collected rainwater for the next few months. Letting tap water stand overnight may help with chlorine but does not remove dissolved fluoride.
- Flush the pot once to wash out stored salts (steps below).
- Pause fertilizer until you see clean new leaves, then go back to a diluted feed only while the plant is actively growing. Use a generic houseplant fertilizer and follow the label.
A white crust on the soil or on an unglazed clay pot is your clearest sign that salts are the issue. No crust does not rule it out, though, because fluoride damage can show with no visible deposit at all.
Crisp tips from dry soil and crowded roots
Spider plants have thick, fleshy roots that store water, which is why they shrug off a missed watering (Wisconsin Horticulture). That same root system is how they get into trouble. They grow fast, the roots fill the pot, and soon there is more root than mix. A packed pot dries out in a day or two, water runs down the sides without soaking in, and the tips pay for it.
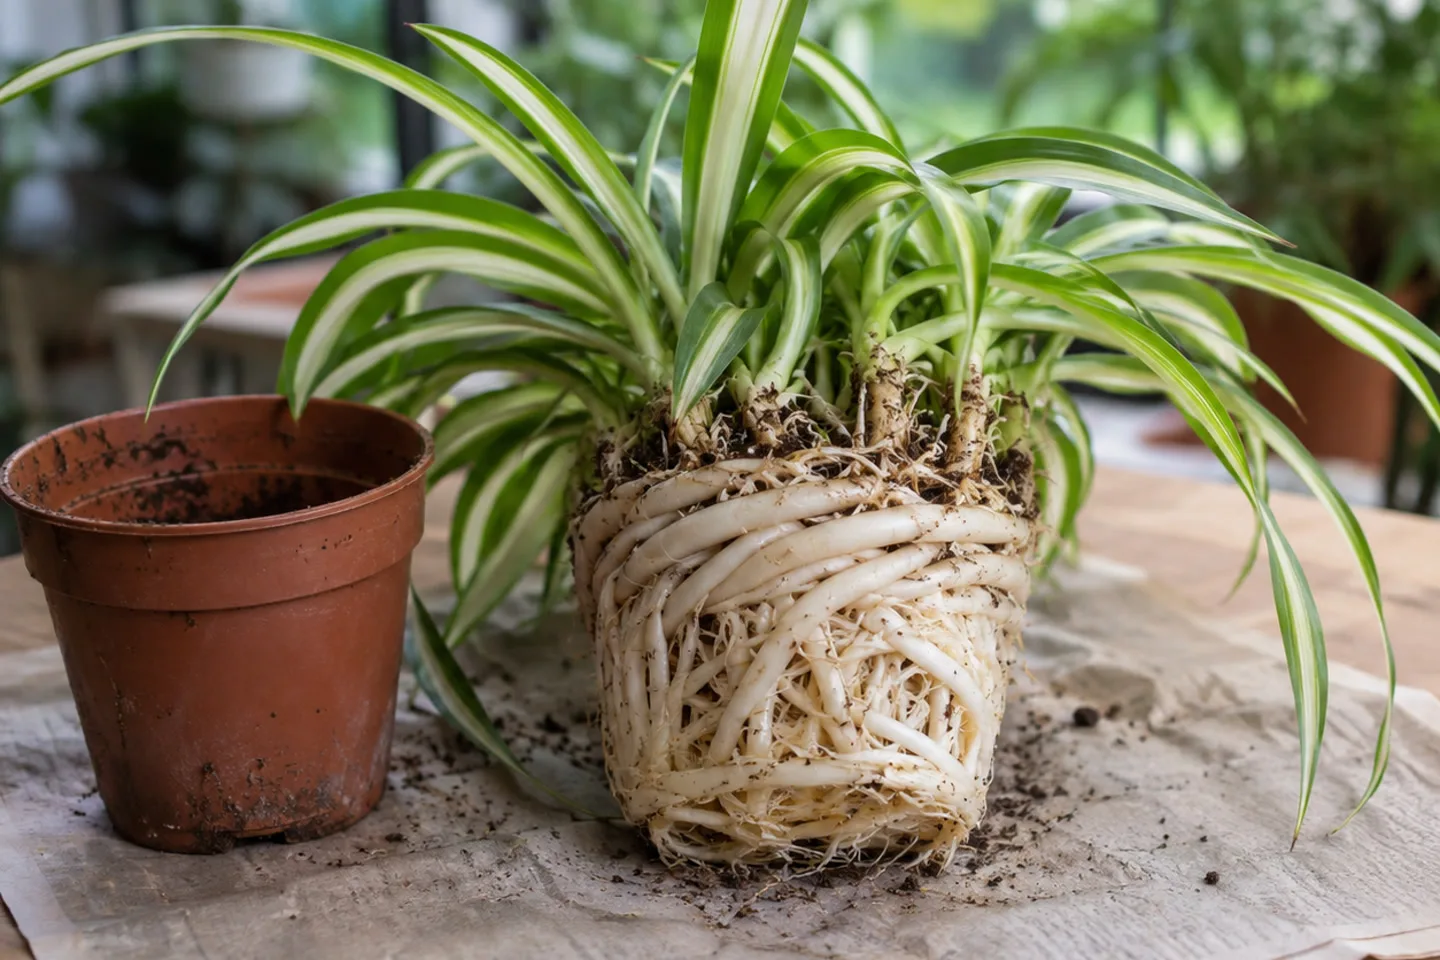
Signs that this is your case: the pot feels very light a day after watering, roots poke out of the drainage holes or lift the plant up in the pot, and water seems to rush straight through. Slide the plant out and look. If you see mostly white roots wound in the shape of the pot, move it up one pot size with fresh mix. Spider plants like being slightly snug, so a pot a couple of inches wider is plenty.
If the roots look fine, the fix is simpler: water thoroughly until it drains, then water again when the top inch or two of mix is dry. Test the mix with a finger rather than going by the calendar; our guide on checking whether soil is wet or dry shows how.
Dark, soft tips: too much water
Brown that is dark, soft or close to black, especially with yellowing at the base of the leaves, is a different problem. Wisconsin warns that overwatering or poorly drained soil can lead to root rot. Here more water, or a pebble tray, makes things worse.
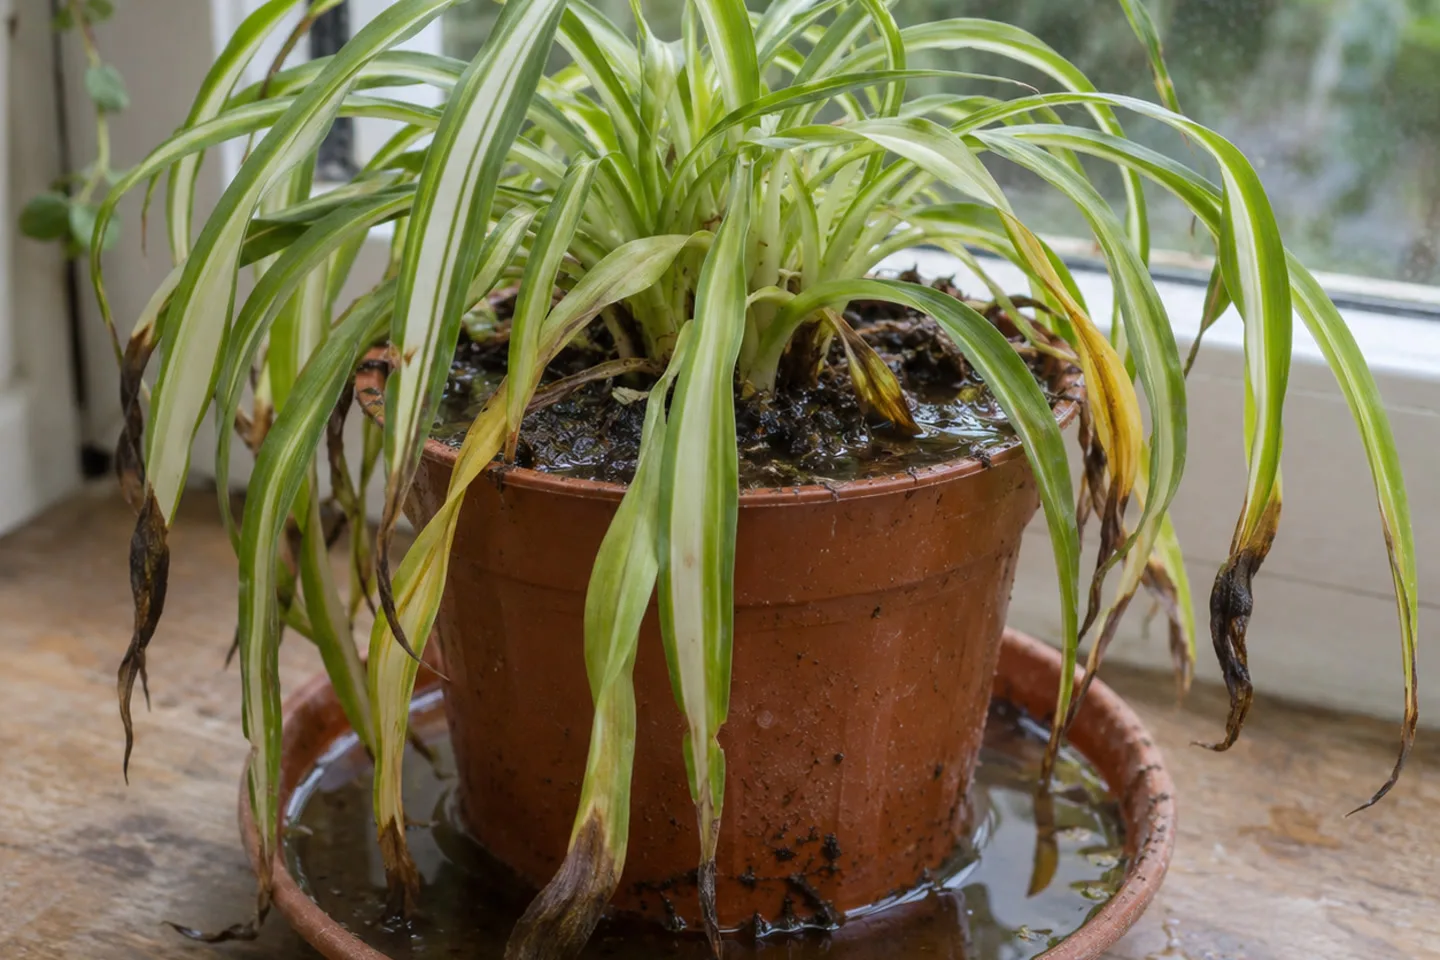
Check the pot: does the mix stay wet several days after watering? Is the pot sitting in a saucer or a cover pot that holds water? If yes, empty the saucer and let the top of the mix dry before the next watering. If the plant is floppy and the base feels loose, slide it out and look at the roots. Healthy spider plant roots are firm and white. Brown, mushy roots that pull apart mean it is time for the root rot rescue steps. For the full list of wet-soil signs, see overwatered plant symptoms.
When brown tips are normal
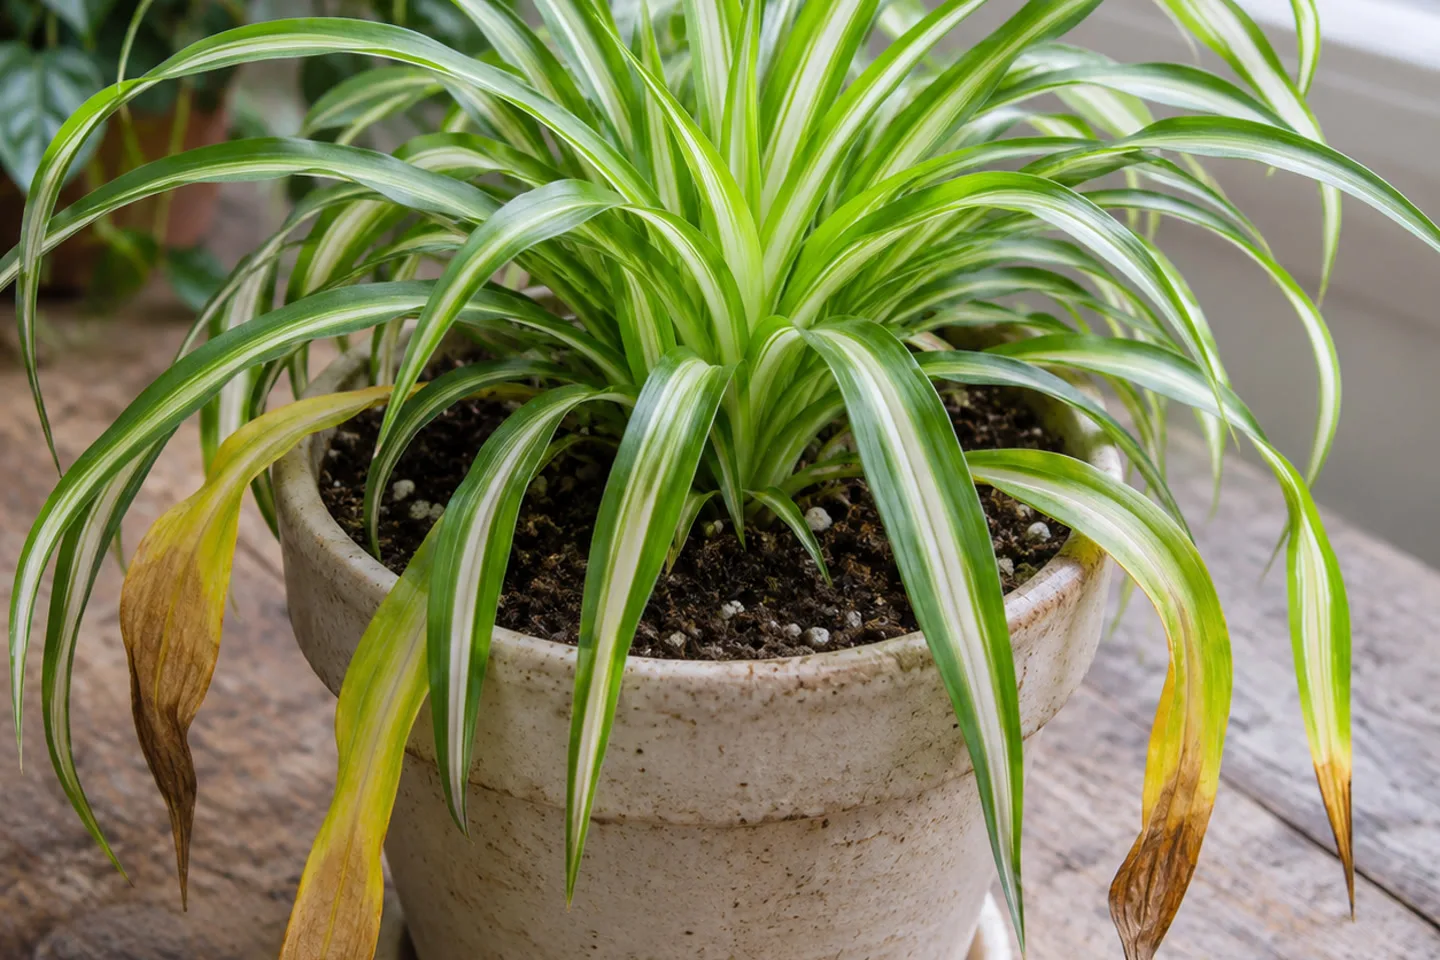
Not every brown tip needs a fix. Spider plants keep producing new leaves from the center, and the oldest outer leaves eventually yellow and brown from the tip down before they die back. If the browning is limited to a few outer leaves and the center keeps pushing out clean growth, the plant is fine. Pull off fully dead leaves and leave the rest.
A few brown tips on the babies (the small plantlets on the runners) usually follow the mother plant's water and pot conditions. Fix the mother plant first; if you want new plants anyway, the spider plant care guide covers rooting the babies.
How much does humidity matter?
Less than most care advice suggests, for this plant. Both extensions list low humidity as a possible factor, but Wisconsin also says spider plants do well with average indoor humidity. Treat dry air as the last suspect, not the first.
The exception is a plant sitting right by a heater, radiator or air vent. Warm, moving air dries one side of the plant fast, and you will often see browning mostly on the leaves facing it. Moving the plant a few feet does more than any misting routine. Light matters too: NC State says spider plants are intolerant of direct sunlight, so a plant baking in a hot south window can show dry, bleached tips. Our guide to reading your plant's light helps you judge a spot.
Match the fix to your situation
| Your situation | Most likely cause | Change this first |
|---|---|---|
| New plant, browning within a few weeks | Move stress or a change in water | Keep the spot steady, switch to distilled water |
| Same pot for two years or more | Crowded roots and stored salts | Check the roots, repot one size up, fresh mix |
| Fed often or on a schedule | Fertilizer salts | Flush the pot, pause feeding |
| Winter, heating on | Dry warm air near a heat source | Move it away from radiators and vents |
| Always moist, saucer often full | Wet roots | Let it dry, check the roots |
Change one thing at a time. If you switch water, repot and move the plant in the same week, you will never know which change mattered, and you lose the clue for next time.
Flush the pot and trim the tips
Flushing pushes stored salts out of the mix. Trimming is only cosmetic, but it makes new damage easy to spot.
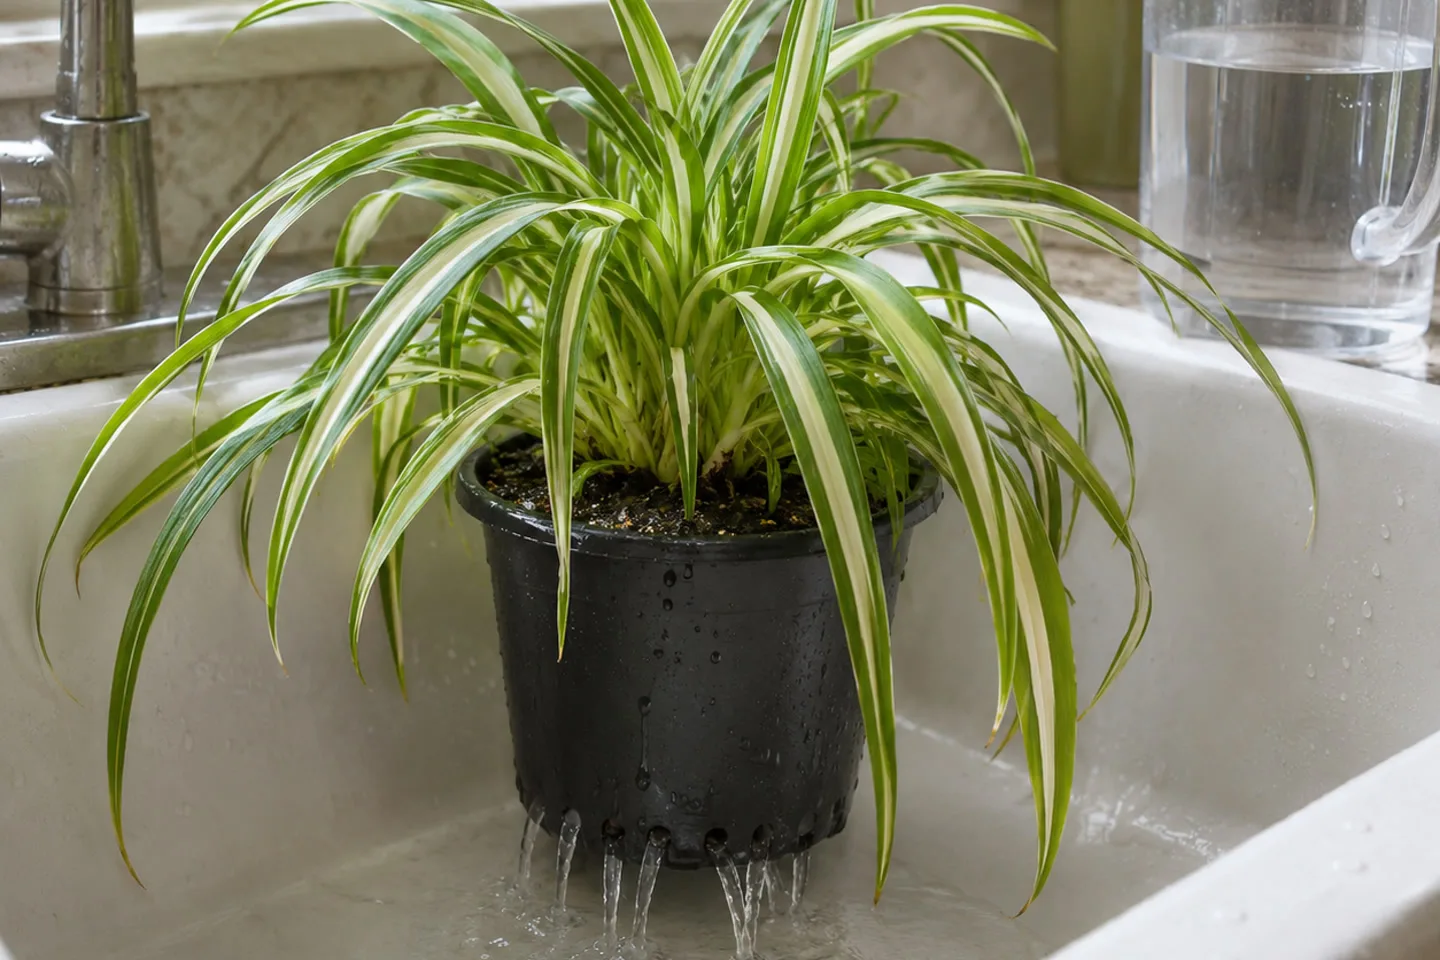
How to flush salts and trim brown spider plant tips
- Move the plant to a sink
Use a pot with drainage holes. If yours has none, flushing is not possible; repot into one that does.
- Water slowly with distilled water or rainwater
Pour slowly over the whole soil surface until water runs freely from the bottom, then keep going for a few more pours so the excess carries salts out.
- Let it drain completely
Leave the pot in the sink until dripping stops. Never return it to a saucer or cover pot with water sitting in it.
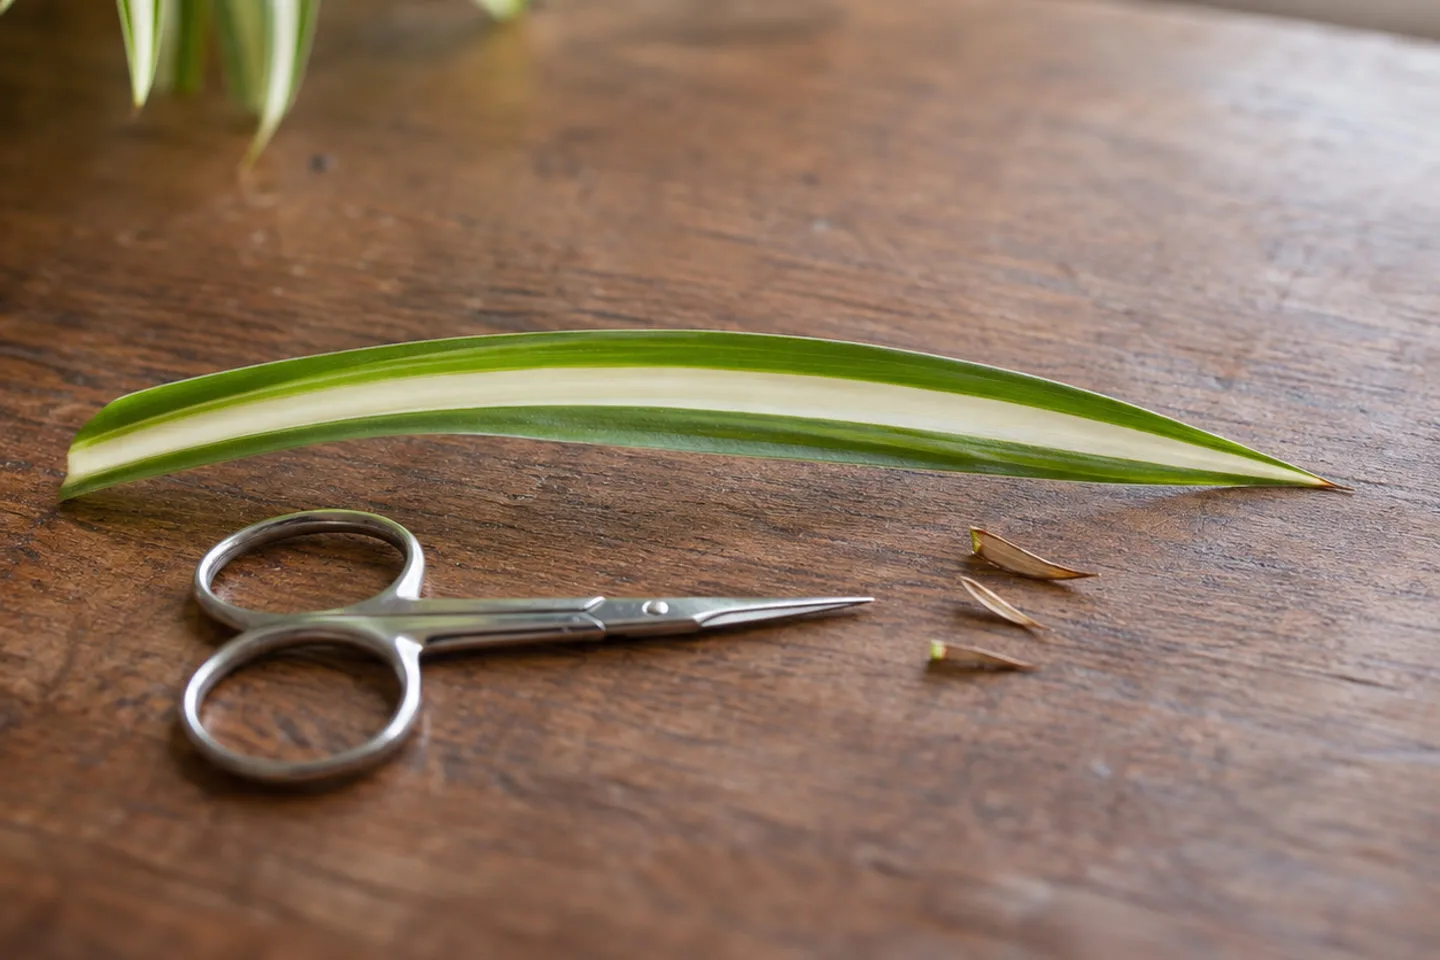
- Trim the brown ends along the leaf shape
Use clean, sharp scissors and cut at an angle that follows the pointed shape of the leaf. Leave a very thin line of brown rather than cutting into green tissue, which can start a new brown edge.
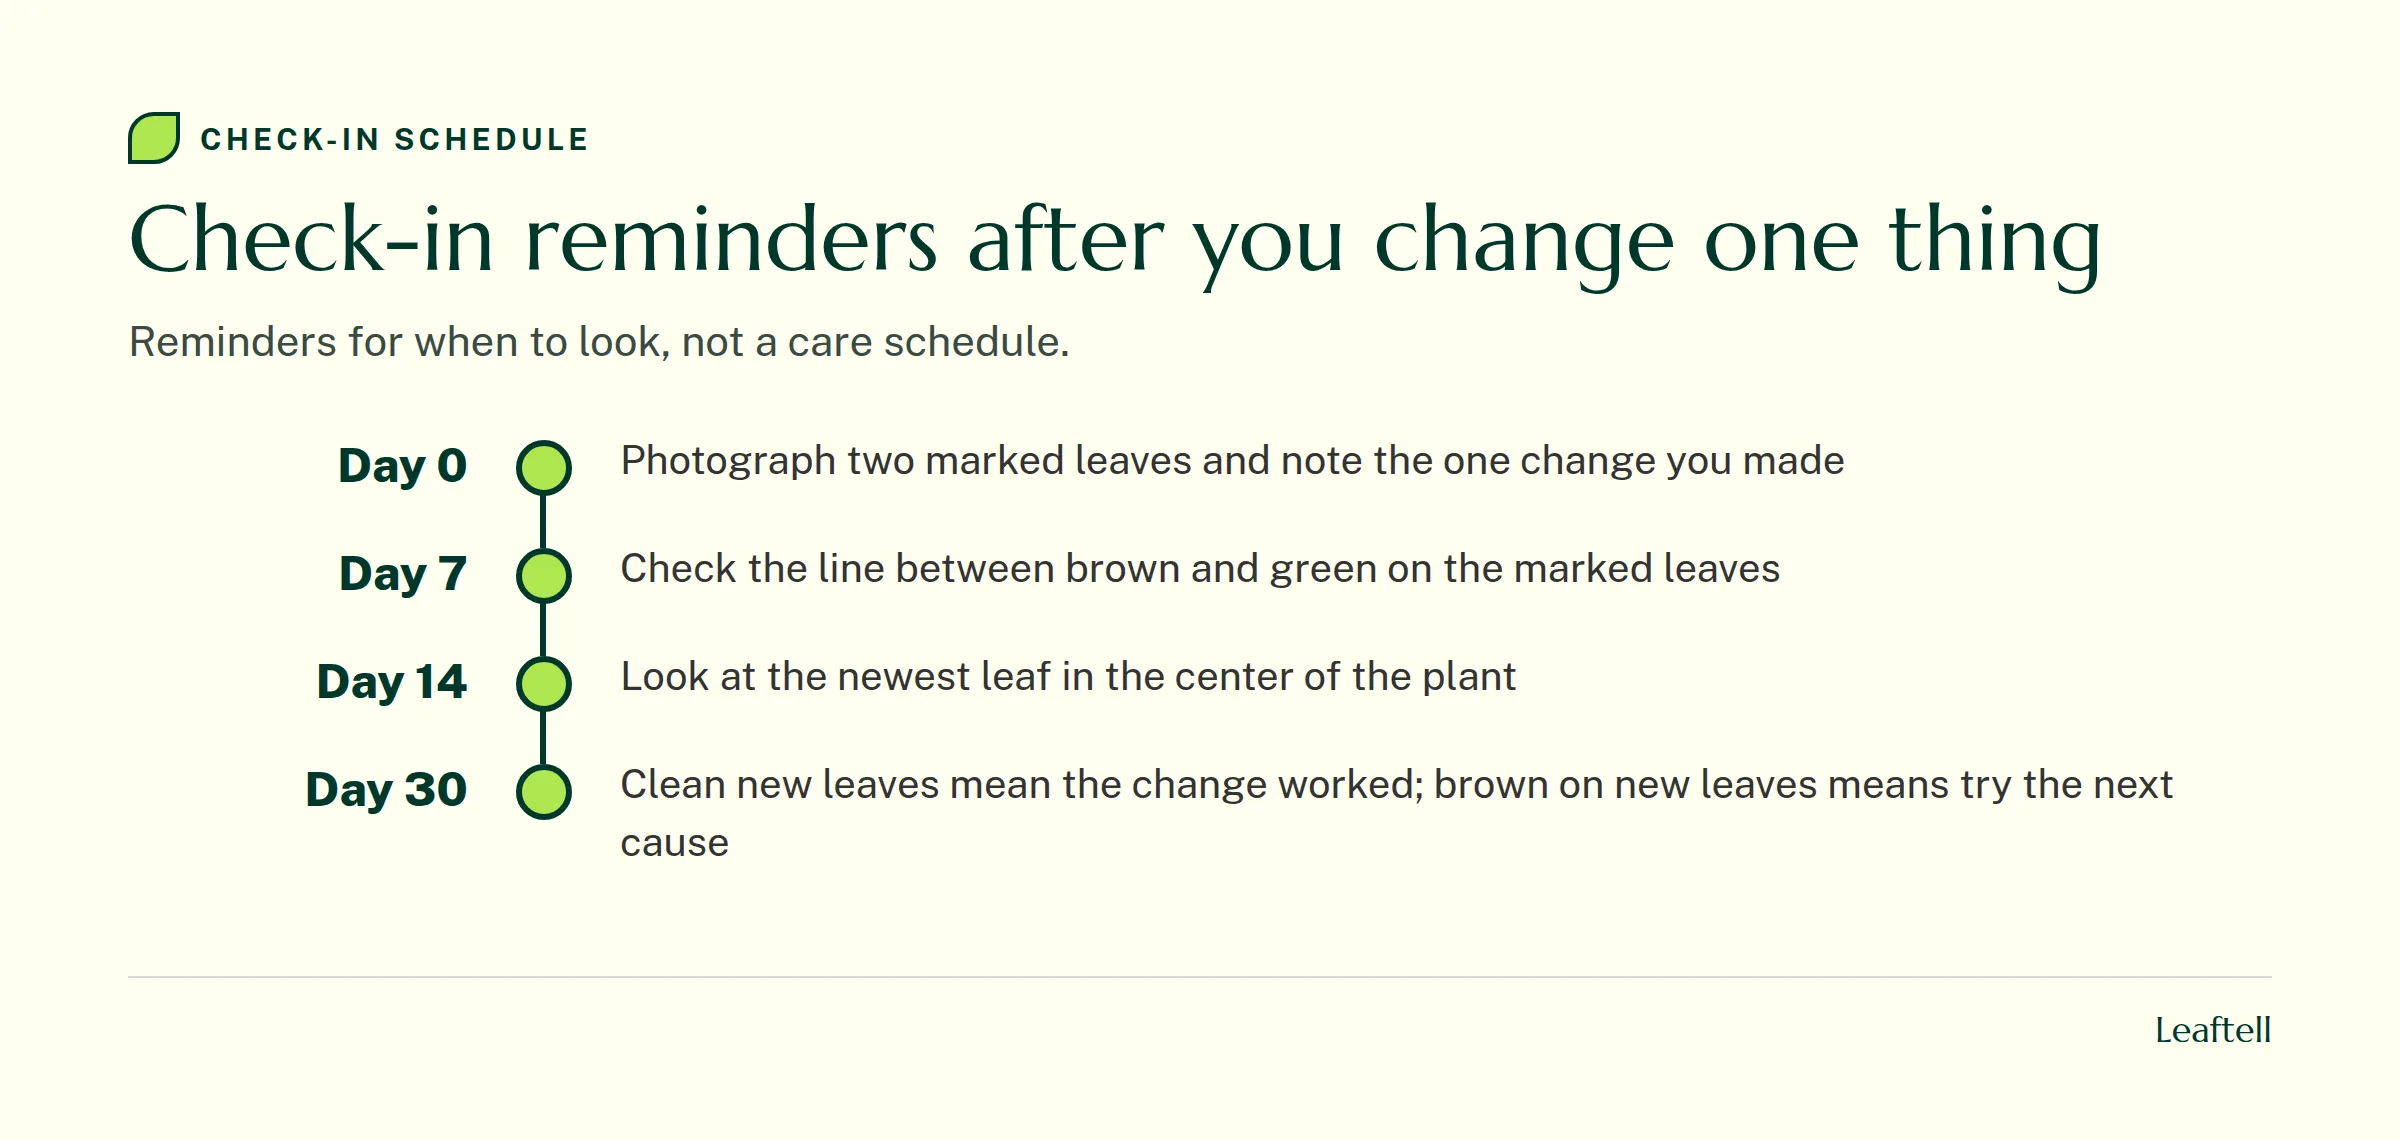
- Mark two leaves and watch the new growth
Photograph two trimmed leaves and the center of the plant, then check again on the reminders below.
How spider plants compare with other brown-tipped plants
Spider plants are one of the clearest cases of tip burn from water quality, because tap water chemicals sit near the top of the list. Other plants lean differently. With peace lily brown leaf tips, roots that dried out too far between waterings lead the list. Brown tips on monstera leaves split into crisp and soft just like these, on a much bigger leaf. The general brown tips on leaves guide helps separate tip burn from sun patches and leaf spots on any plant.
Check your spider plant in Leaftell
Most brown spider plant tips come down to the water and the pot: change the water, flush the salts, feed less and give crowded roots room. Dark, soft tips are the exception, and they need drier soil, not more care. Then stop looking at the old tips and watch the new leaves in the center. If they open clean for a month, you have found the cause.
If you are still not sure which pattern you have, photograph a tip close up and the whole plant in its pot. Leaftell asks the follow-up questions a photo cannot answer, like your water source, your last feed and how fast the pot dries.
Spider plants are listed as non-toxic to cats and dogs by the ASPCA, but keep fertilizer and the water you flush out of the pot away from pets and children.
Sources
Check your growing conditions with the plant watering calculator.
Frequently asked questions
The brown tissue will not turn green again, but the plant recovers fine. Once you fix the cause, new leaves from the center come in clean. Trim the old tips if they bother you and judge success by the new growth over the next month.
Tips turn dark brown or nearly black and feel soft, leaf bases may yellow, and the whole plant gets floppy. The soil stays wet for days and the pot may sit in water. Check the roots: firm and white is healthy, brown and mushy means root rot.
Not much. Wisconsin Extension says they do well with average indoor humidity. Dry air only becomes a real factor near a heater or vent, where you usually see browning on the side facing the airflow.
Share article
About the author

Keep checking your plant
Plant care reference
Indoor plant care
Build a routine around your plant, light and potting mix.
Plant care reference
Why is my plant dying
Trace leaf and root symptoms before choosing a care change.
Plant care reference
Pothos plant care
Choose a growing spot and prune a trailing pothos for fuller growth.
Plant care reference
How to fix root rot
Inspect root firmness and drainage, then decide whether to repot.