Peace Lily Brown Leaf Tips: 4 Causes and How to Stop Them
Filip Leszczyński 4 November 2026 12 min read
In this article
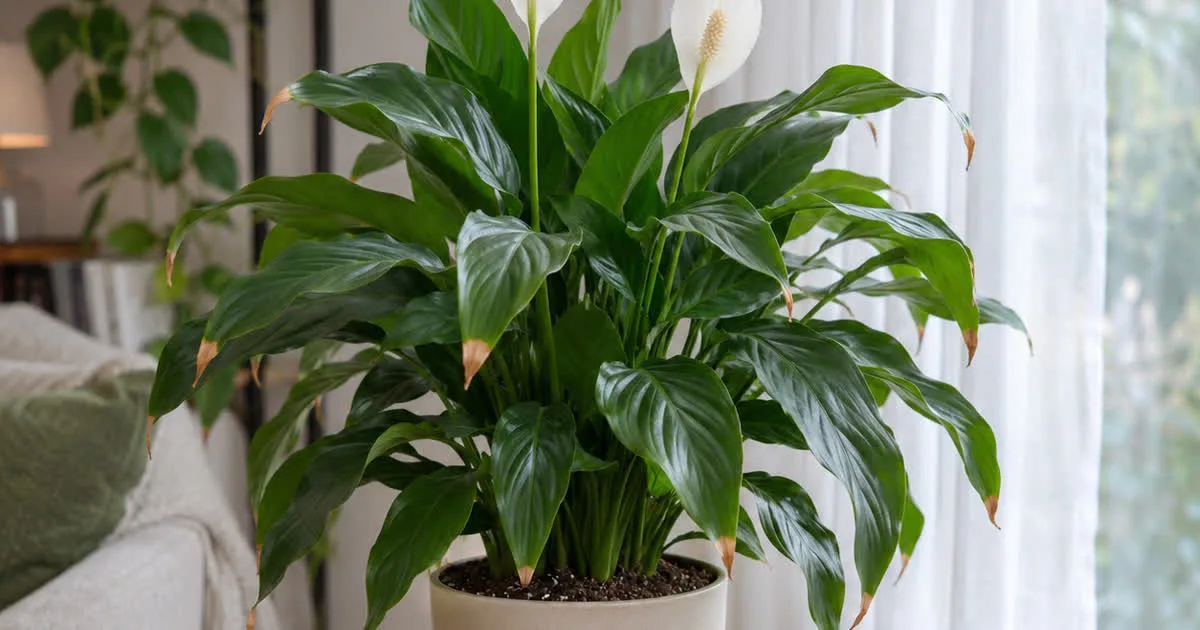
Peace lily brown leaf tips almost always start in the pot, not in the air. The usual causes are roots that dried out too far between waterings, fertilizer and mineral salts building up in the mix, or a spot with direct sun. Low humidity is real but is usually the last thing to fix, not the first.
The brown part will never turn green again. So the goal is not to save those tips. It is to find what caused them, change it, and judge your fix by the next new leaf, which takes a few weeks to open.
Read the brown before you change anything
Where the brown sits and what it feels like narrows the cause down fast. Look at three things: is it only the very tip, or the edge too? Is it crisp and papery, or soft and dark? And which leaves have it, old ones, new ones or all of them?
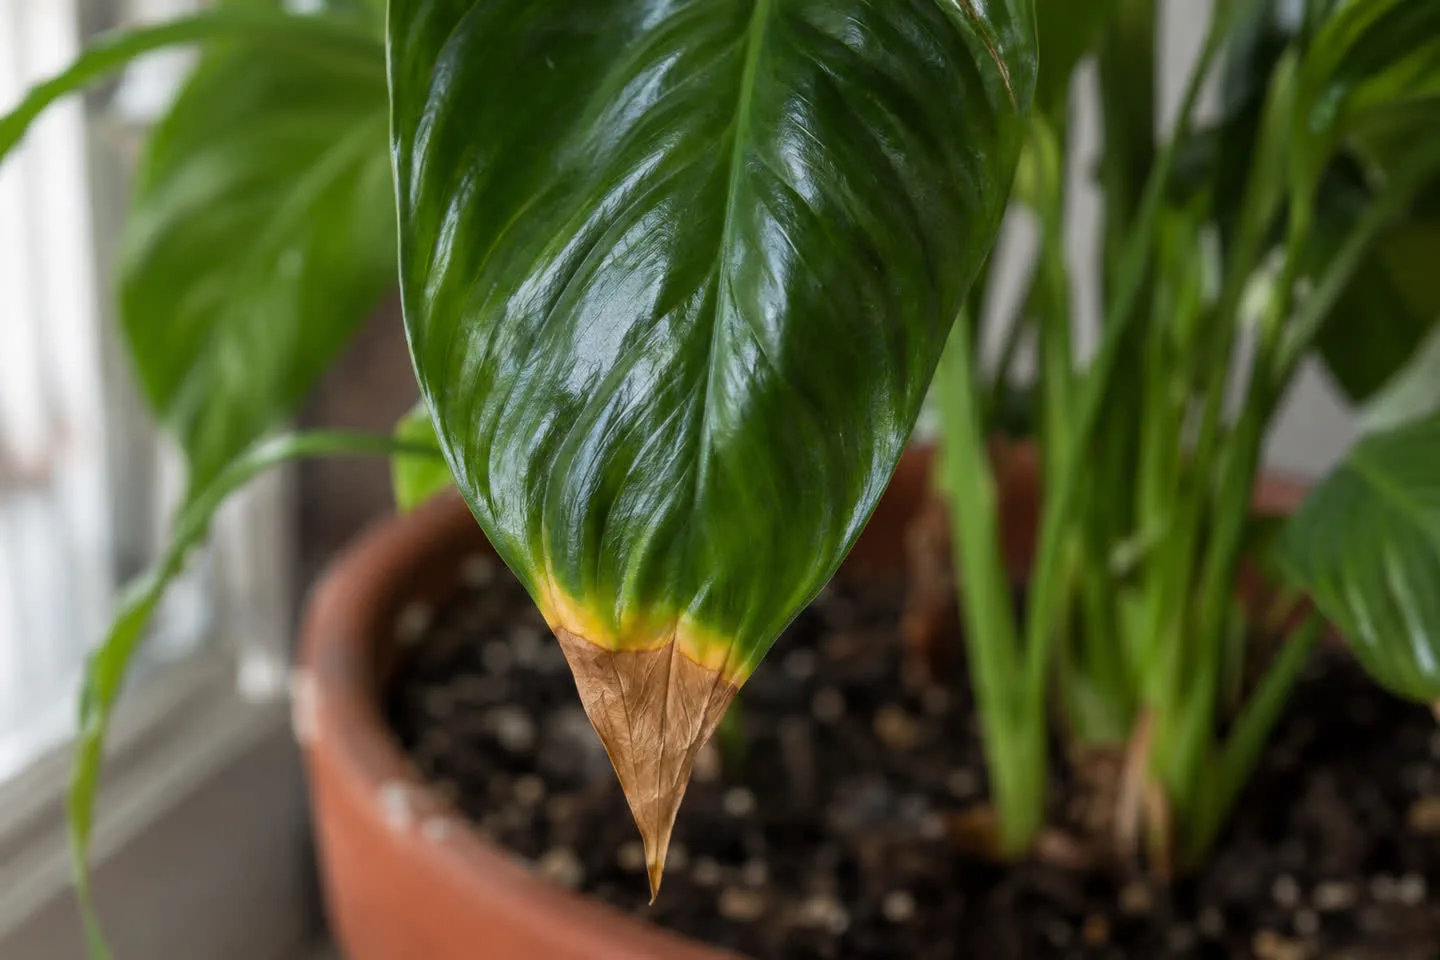
A dry, tan tip with a thin yellow band behind it is the classic pattern. NC State Extension lists the causes of brown peace lily tips as excessive direct sun, underwatering and low humidity, and adds that over-fertilizing and salt buildup burn the tips and roots too. Soft, dark brown tissue that spreads from the base of the leaf is a different problem, usually too much water, and it belongs with yellowing and rotting peace lily leaves.
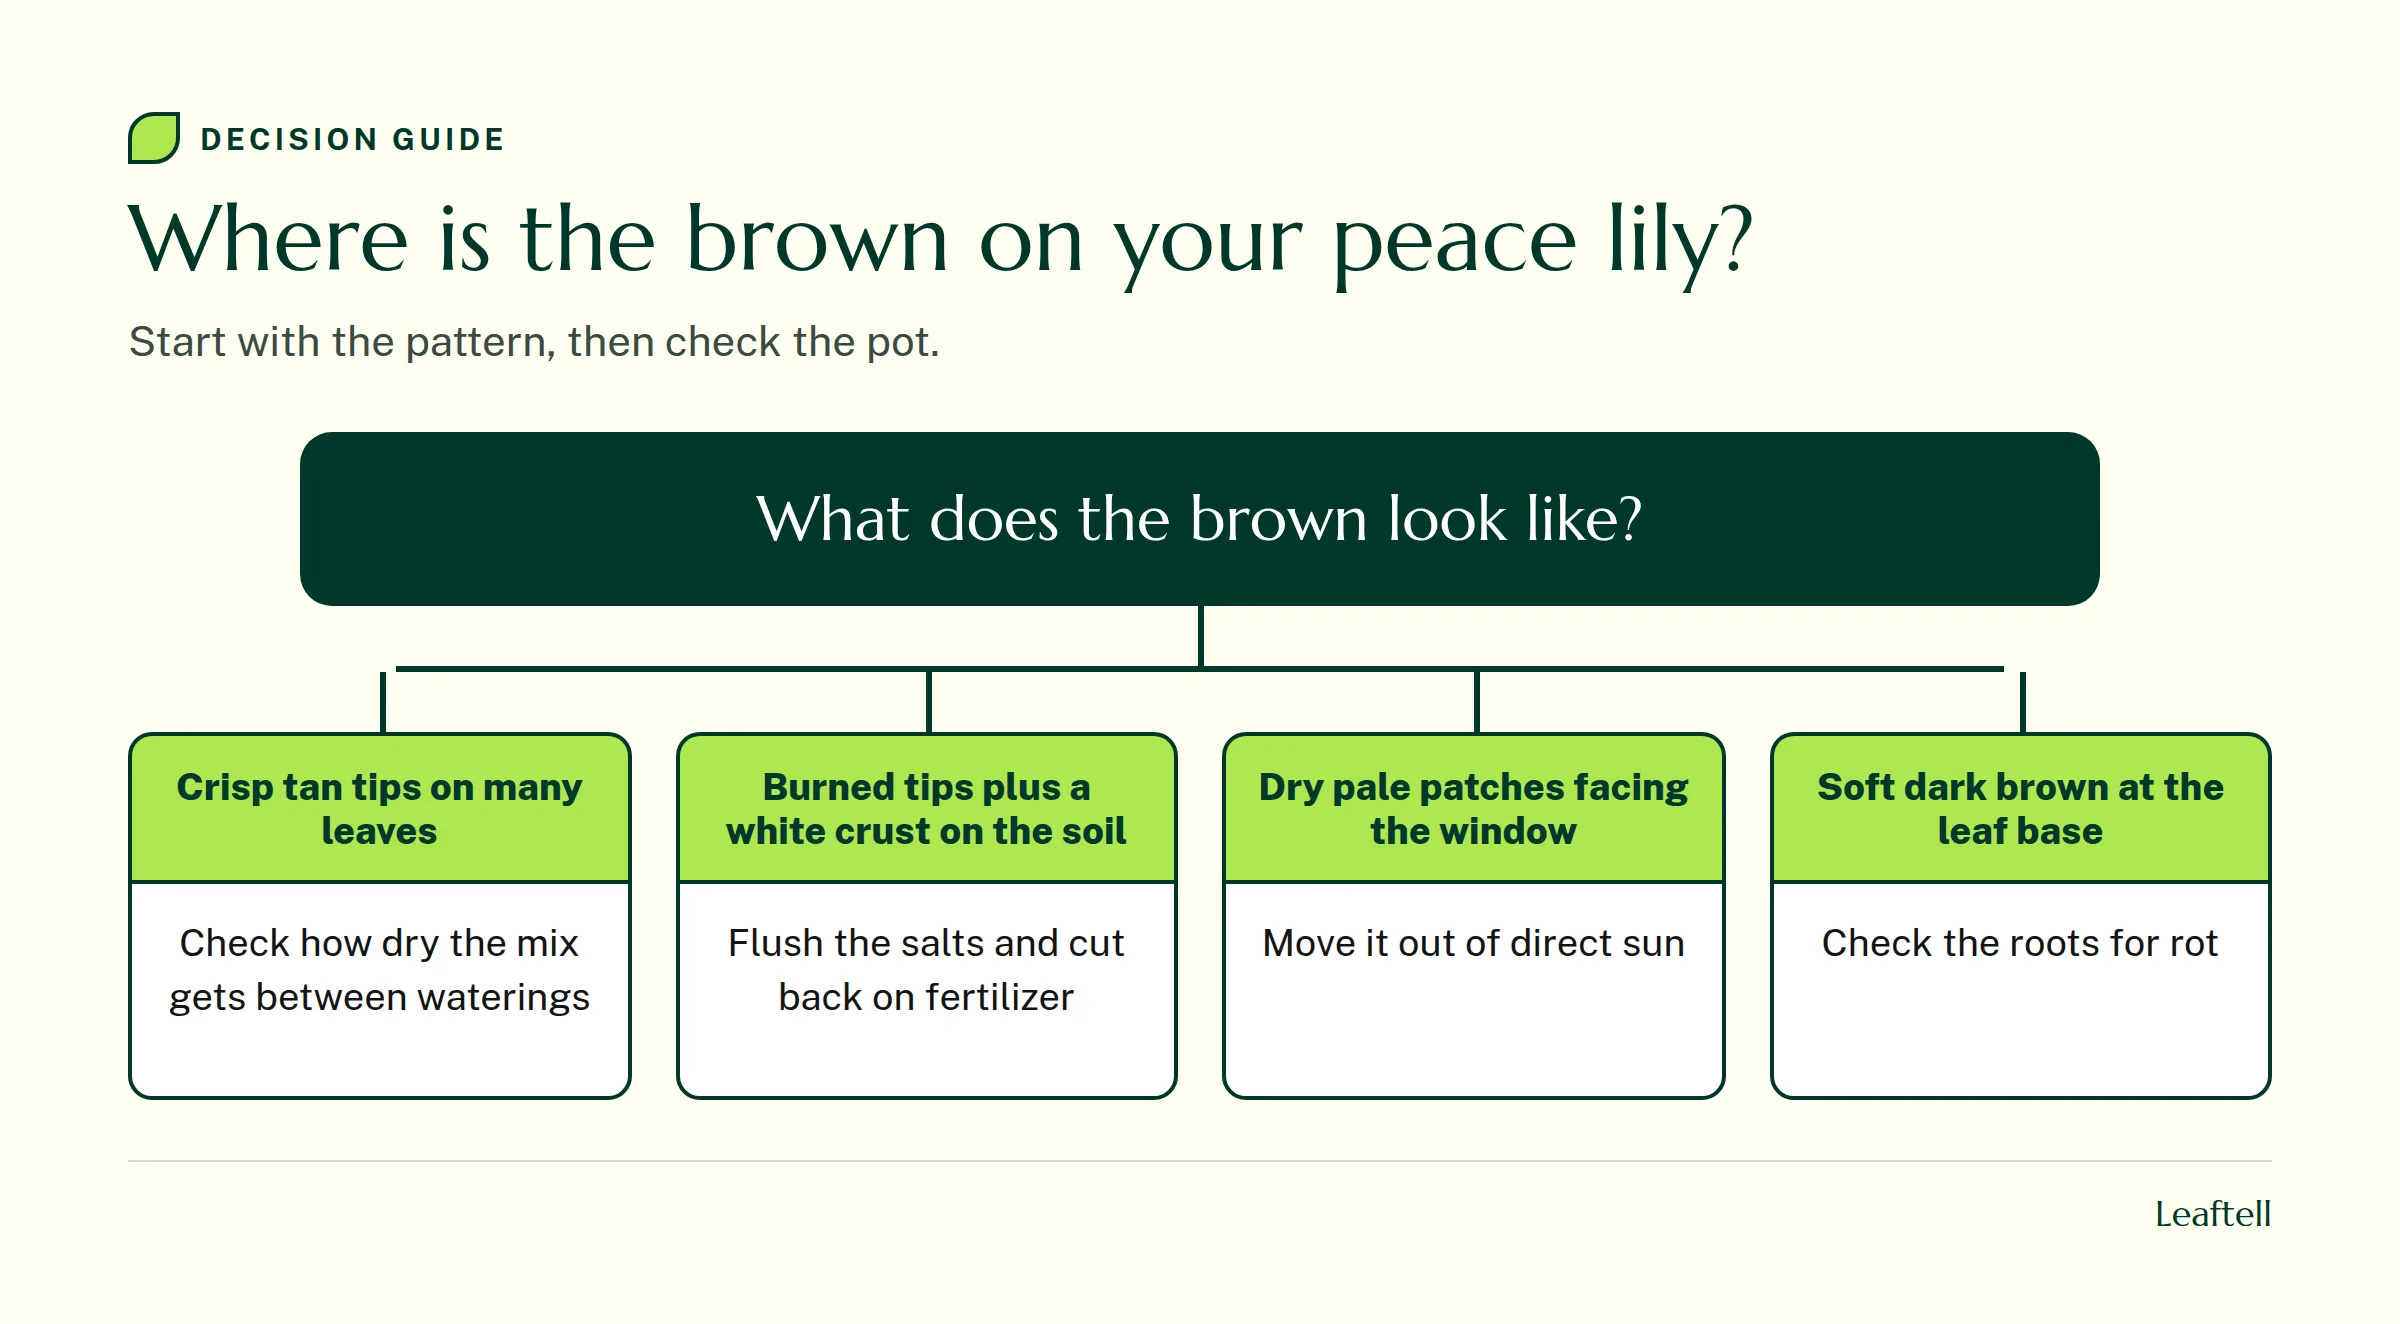
| What you see | Most likely cause | What to check first |
|---|---|---|
| Crisp tan tips on many leaves, plant wilts hard every so often | Roots drying out between waterings | How dry the mix gets before you water |
| Tips burned, white crust on the soil or pot rim | Fertilizer or mineral salts | When you last fed it and whether water drains out the bottom |
| Brown, scorched patches on the side facing the window | Direct sun | Whether sun hits the leaves for part of the day |
| Thin brown tips, plant sits by a heater or vent | Very dry, moving air | Distance from the heat source |
| Soft dark brown at the leaf base, wet soil, smell | Too much water, roots rotting | The roots, not the leaves |
Cause 1: the wilt-then-water cycle
The most common cause of brown tips on a peace lily is a habit that sounds like good advice: wait until it droops, then water. A peace lily will tell you when it is thirsty, and it bounces back within hours. But every hard wilt dries out the roots, and the leaf tips are the furthest point from those roots, so they die first.
Clemson's peace lily fact sheet says to keep the soil moist but not soggy and let it dry out slightly between waterings. It also says that if the soil dries out too far, the plant wilts and the leaves and edges turn yellow. One wilt is a warning. A plant that collapses every week will brown at the tips every week.
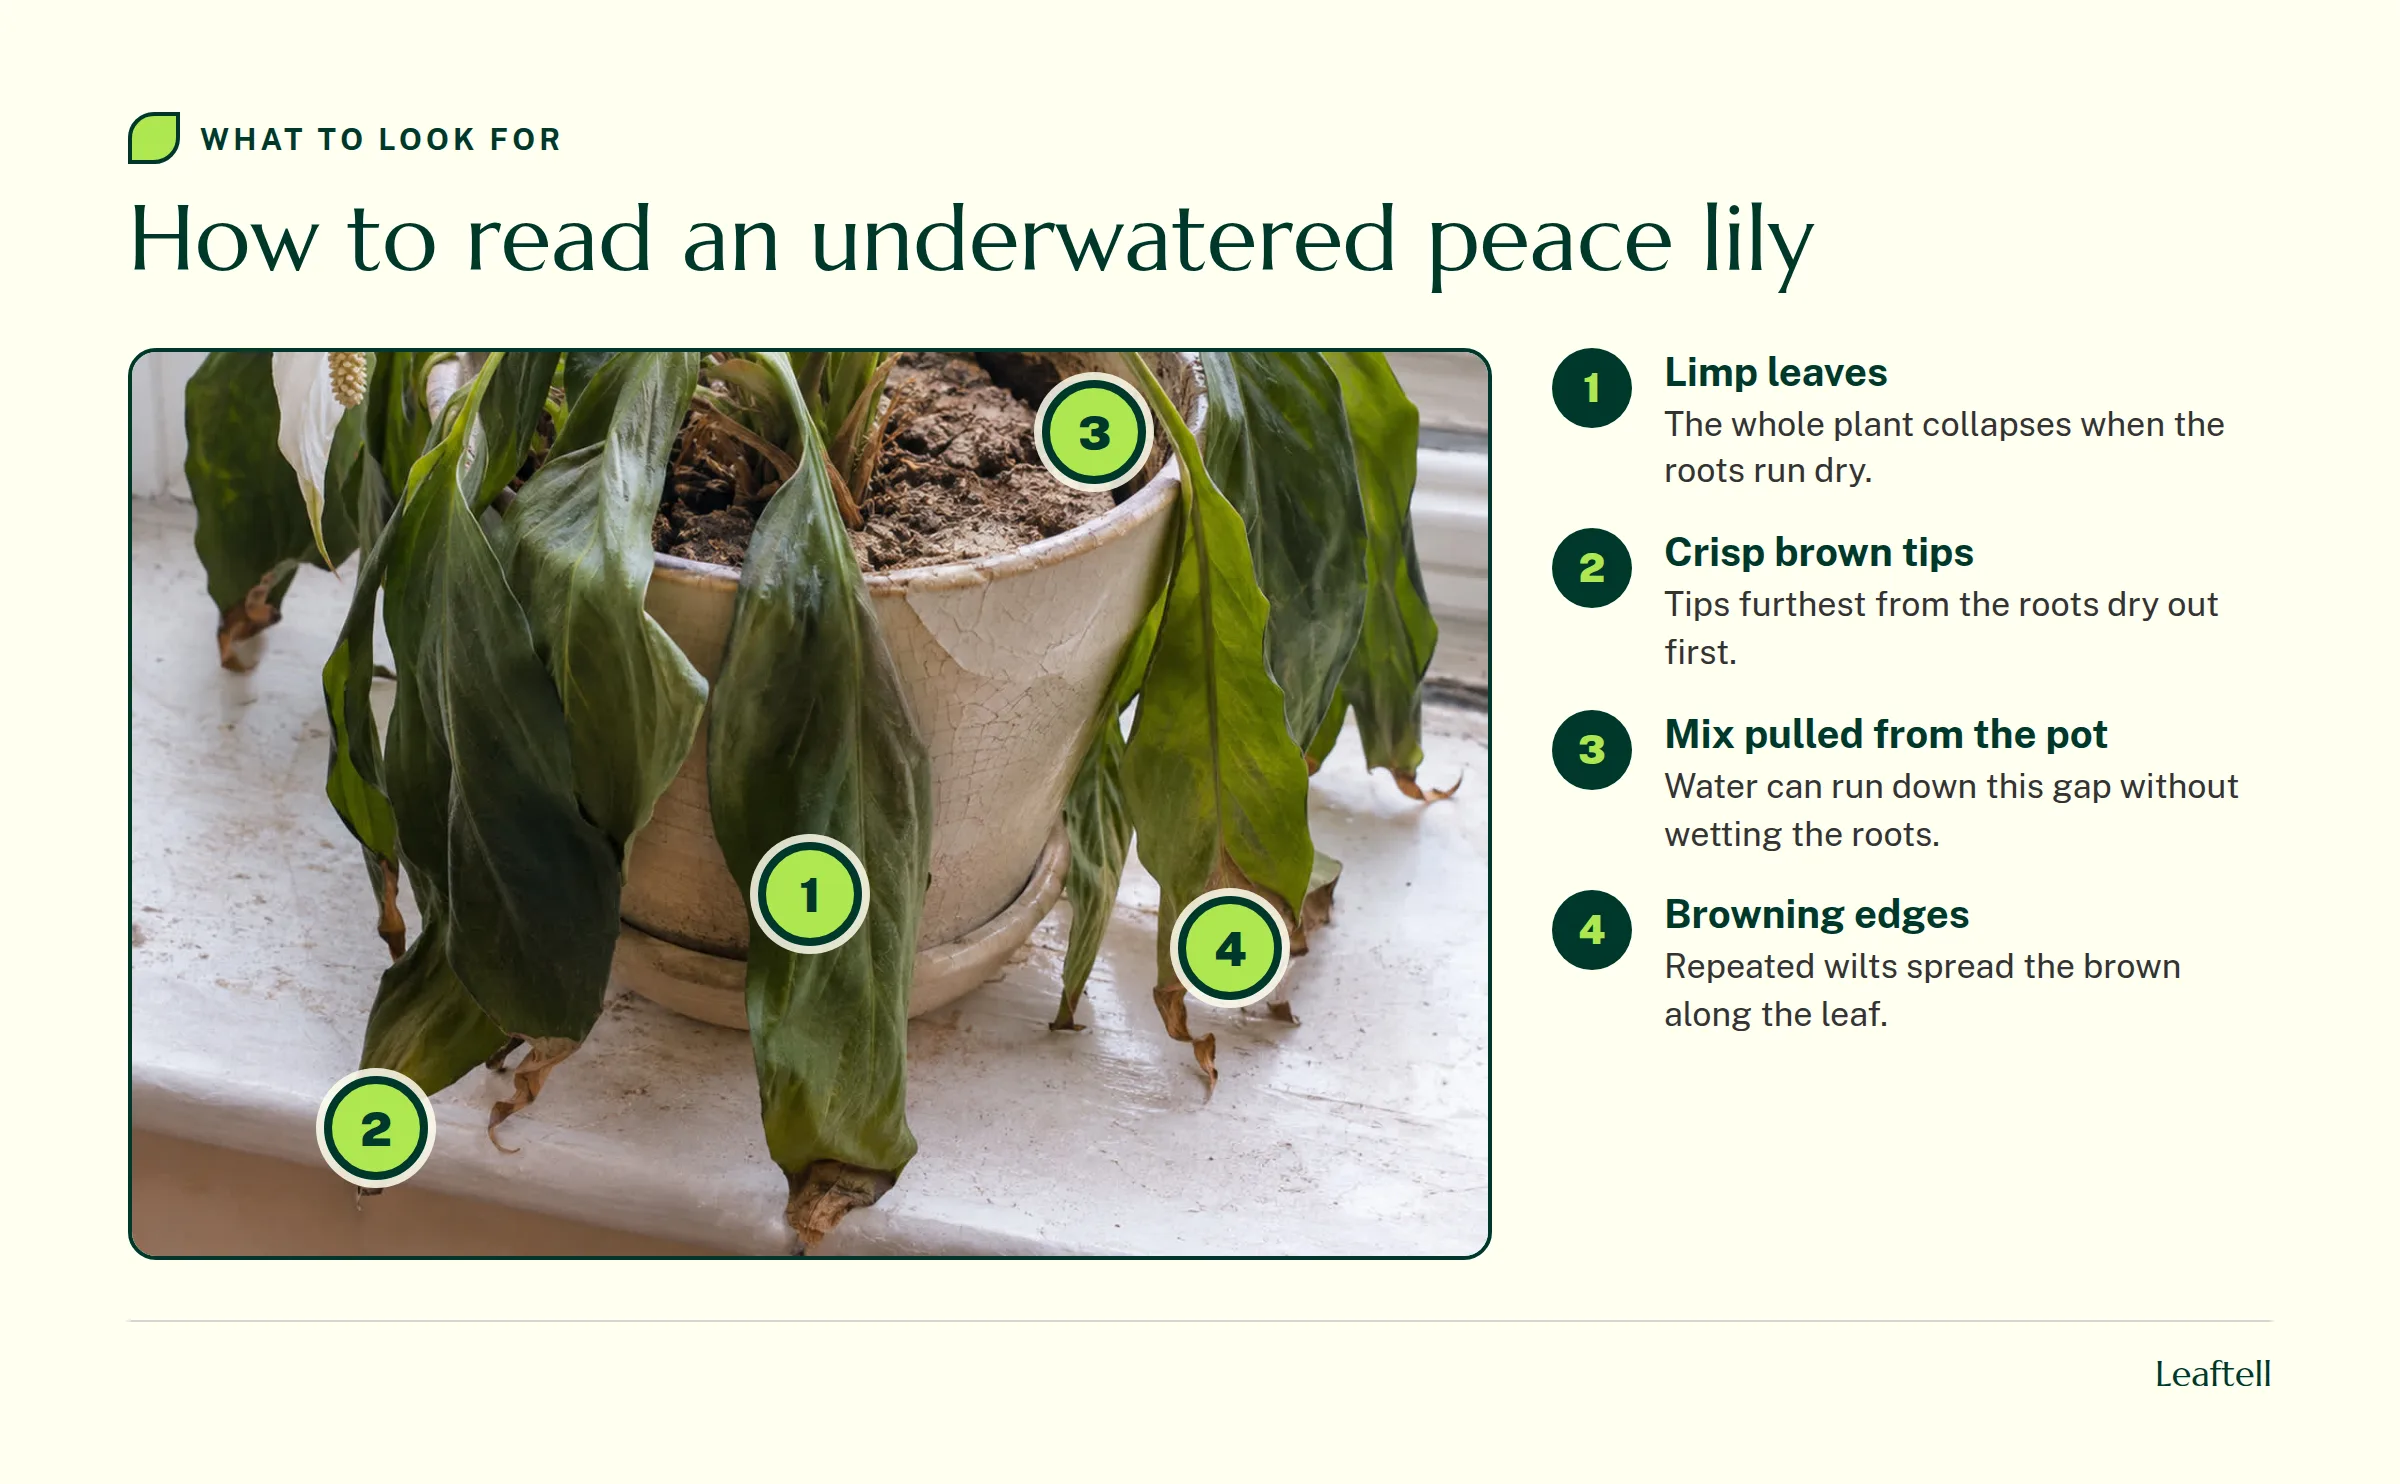
The fix is to water a little earlier. Push a finger into the mix: when the top inch is dry and the pot feels lighter, water until it runs out of the bottom. Do not wait for the droop. If you are not sure what "dry an inch down" feels like, this soil check walks through it, and if the plant is drooping right now, start with why a peace lily droops before you water again.
One more clue: if the mix has shrunk away from the side of the pot, water runs straight down the gap and out the bottom without wetting the root ball. The plant gets a drink that never reaches it. Soak the whole pot in a bowl of water for 20 minutes to rewet it.
Cause 2: salts from fertilizer and tap water
If the tips look burned and you see a white or tan crust on top of the soil or around the rim of the pot, salt is the likely cause. Every feed and every can of hard tap water leaves dissolved minerals behind. When water never runs out of the bottom, those salts stay in the pot and concentrate at the root tips, and the leaf tips burn.
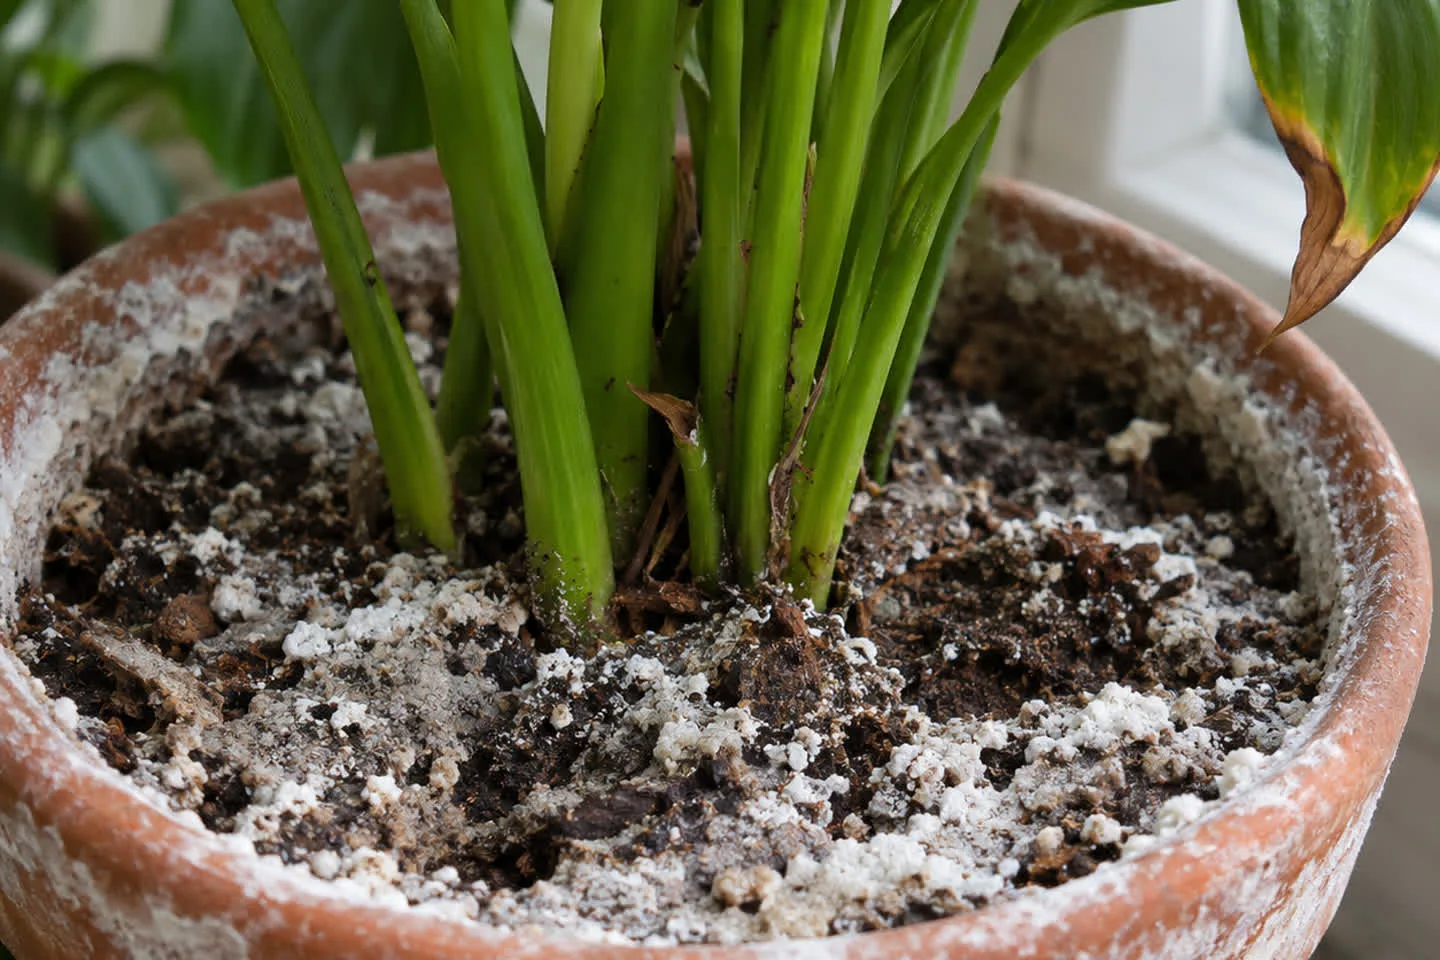
Peace lilies need very little food. Clemson recommends a balanced liquid houseplant fertilizer every six to eight weeks in spring and summer only, and warns that over-fertilizing burns the leaf tips and roots. NC State goes further: feed at one quarter of the label strength and flush the soil between feedings. If you have been feeding at full strength, or using a slow-release product on top of liquid feed, that is your answer.
The University of Georgia indoor plant guide also warns that saucers let salts build up, because the water that drains out carries salts and then gets wicked back up. Empty the saucer every time.
How to flush salts from a peace lily
- Take it to the sink
Move the plant in its plastic nursery pot to a sink or tub. If it sits in a decorative pot with no hole, lift it out first.
- Run water through the soil
Pour room temperature water slowly over the whole soil surface until it runs freely out of the drainage holes, then keep going for about as long again. UGA's advice is to apply large quantities of water to leach the salts out.
- Scrape off the crust
Lift off any white crust from the top of the mix with a spoon and wipe the rim of the pot. Top up with a little fresh potting mix if the level drops.
- Let it drain fully
Leave it in the sink until it stops dripping, then put it back with an empty saucer.
- Pause the fertilizer
Do not feed again for at least two months, and when you restart, use one quarter of the label strength.
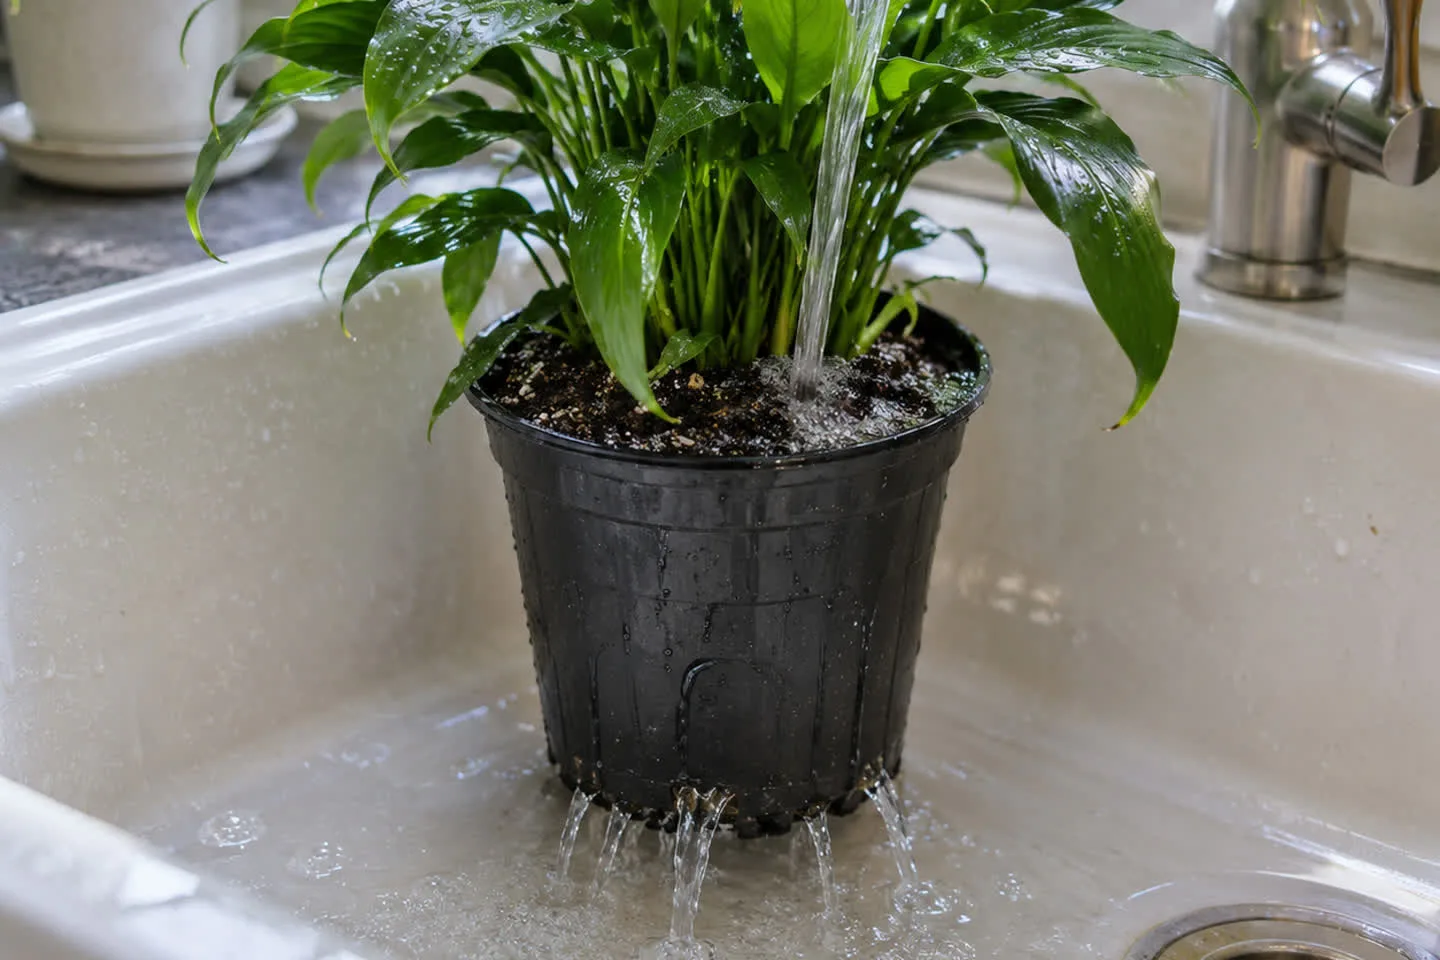
If your tap water is very hard, try rainwater or distilled water for the next month or two and watch the new leaves. That is a test, not a rule: plenty of peace lilies do fine on tap water once the salts are flushed regularly.
Not sure whether it is salt, dry roots or sun? A photo of the whole plant, a close-up of one brown tip and a note on how the soil feels an inch down is enough to start.
Cause 3: direct sun and heat
Peace lilies grow in the shade of forest trees. Clemson says they grow best in bright, indirect light and should not sit in direct sun, because the heat scorches the leaves. Sun damage looks different from the other causes: larger dry, pale or brown patches on the leaves that face the window, not just neat tips all over the plant.
Heat does a similar job. A radiator, a heating vent or the top of a fridge dries the leaves and the soil faster than the rest of the room. Move the plant a few feet back from a south or west window, or behind a sheer curtain, and away from the vent. Reading your plant's light explains how to tell bright indirect light from direct sun without a meter.
Cause 4: dry air, the one everyone blames first
Dry air does brown peace lily tips, and NC State lists low humidity among the causes. But it is rarely the only one, and the usual fix for it does not work.
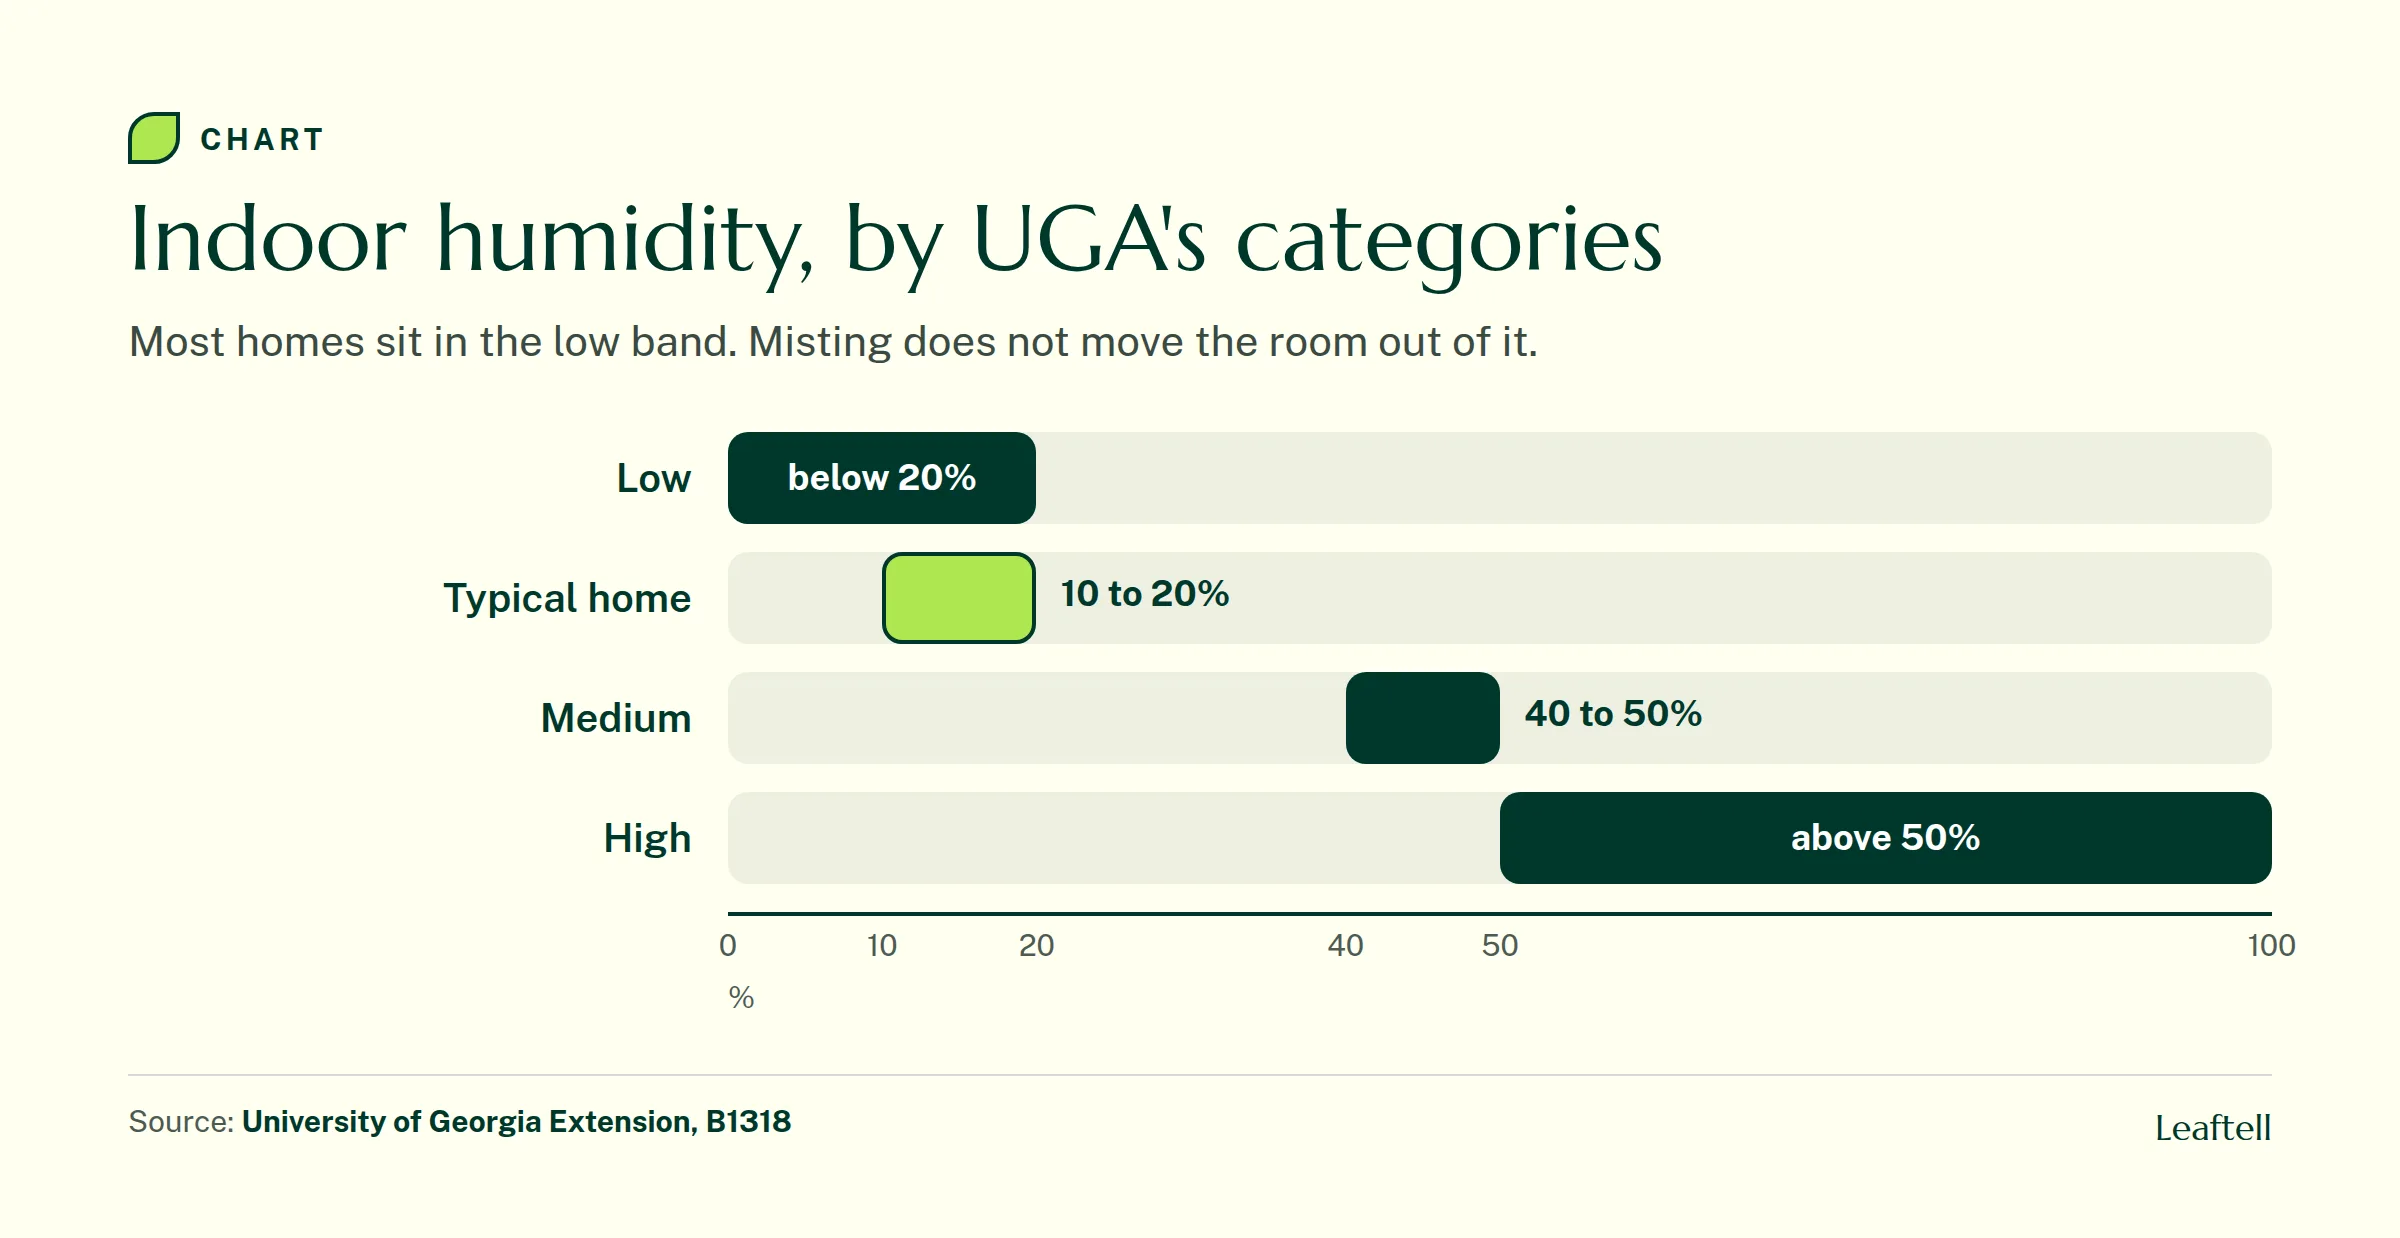
UGA calls indoor humidity below 20 percent low, 40 to 50 percent medium and above 50 percent high, and notes that 10 to 20 percent is typical of most homes. That is a big gap for a tropical plant. Misting does not close it: UGA says you would need to mist every few minutes for an indefinite amount of time to make a real difference. What helps more is grouping plants together, a tray of wet gravel under the pot, or a humidifier in the room.
Check the root-zone causes above first. If the watering is steady, the salts are flushed, the plant is out of the sun and new leaves still brown at the tips, then dry air is the most likely cause left.
Should you cut off the brown tips?
Yes, if they bother you. The brown tissue is dead and will not recover, and trimming it does not hurt the plant. Use clean, sharp scissors and follow the natural shape of the leaf so it still comes to a point.
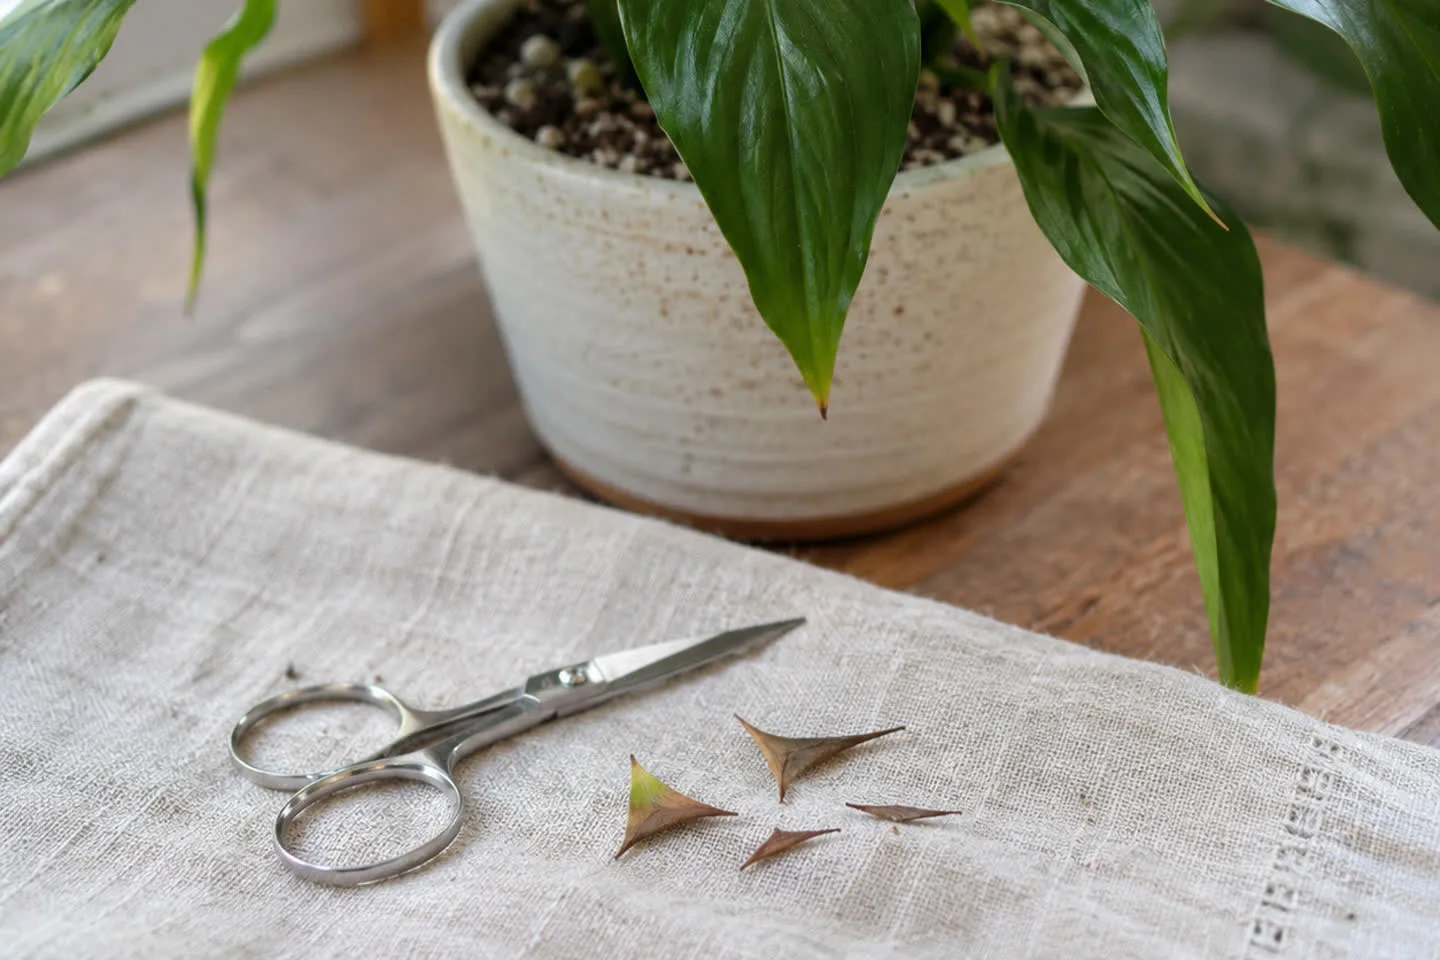
Leave a very thin line of brown at the cut. Cutting into the green tissue opens a fresh wound that often browns again, which makes it look as if the problem came back. Remove a leaf completely only when most of it is brown or yellow; cut its stalk near the base.
Trim after you fix the cause, not instead of it. A freshly trimmed plant makes it easy to see whether any new browning appears.
How to tell your fix is working
The old leaves are not your scorecard. A leaf that already browned stays that way, and a damaged tip can keep drying a little after the cause is gone. The test is the next leaf that unfolds from the center of the plant.
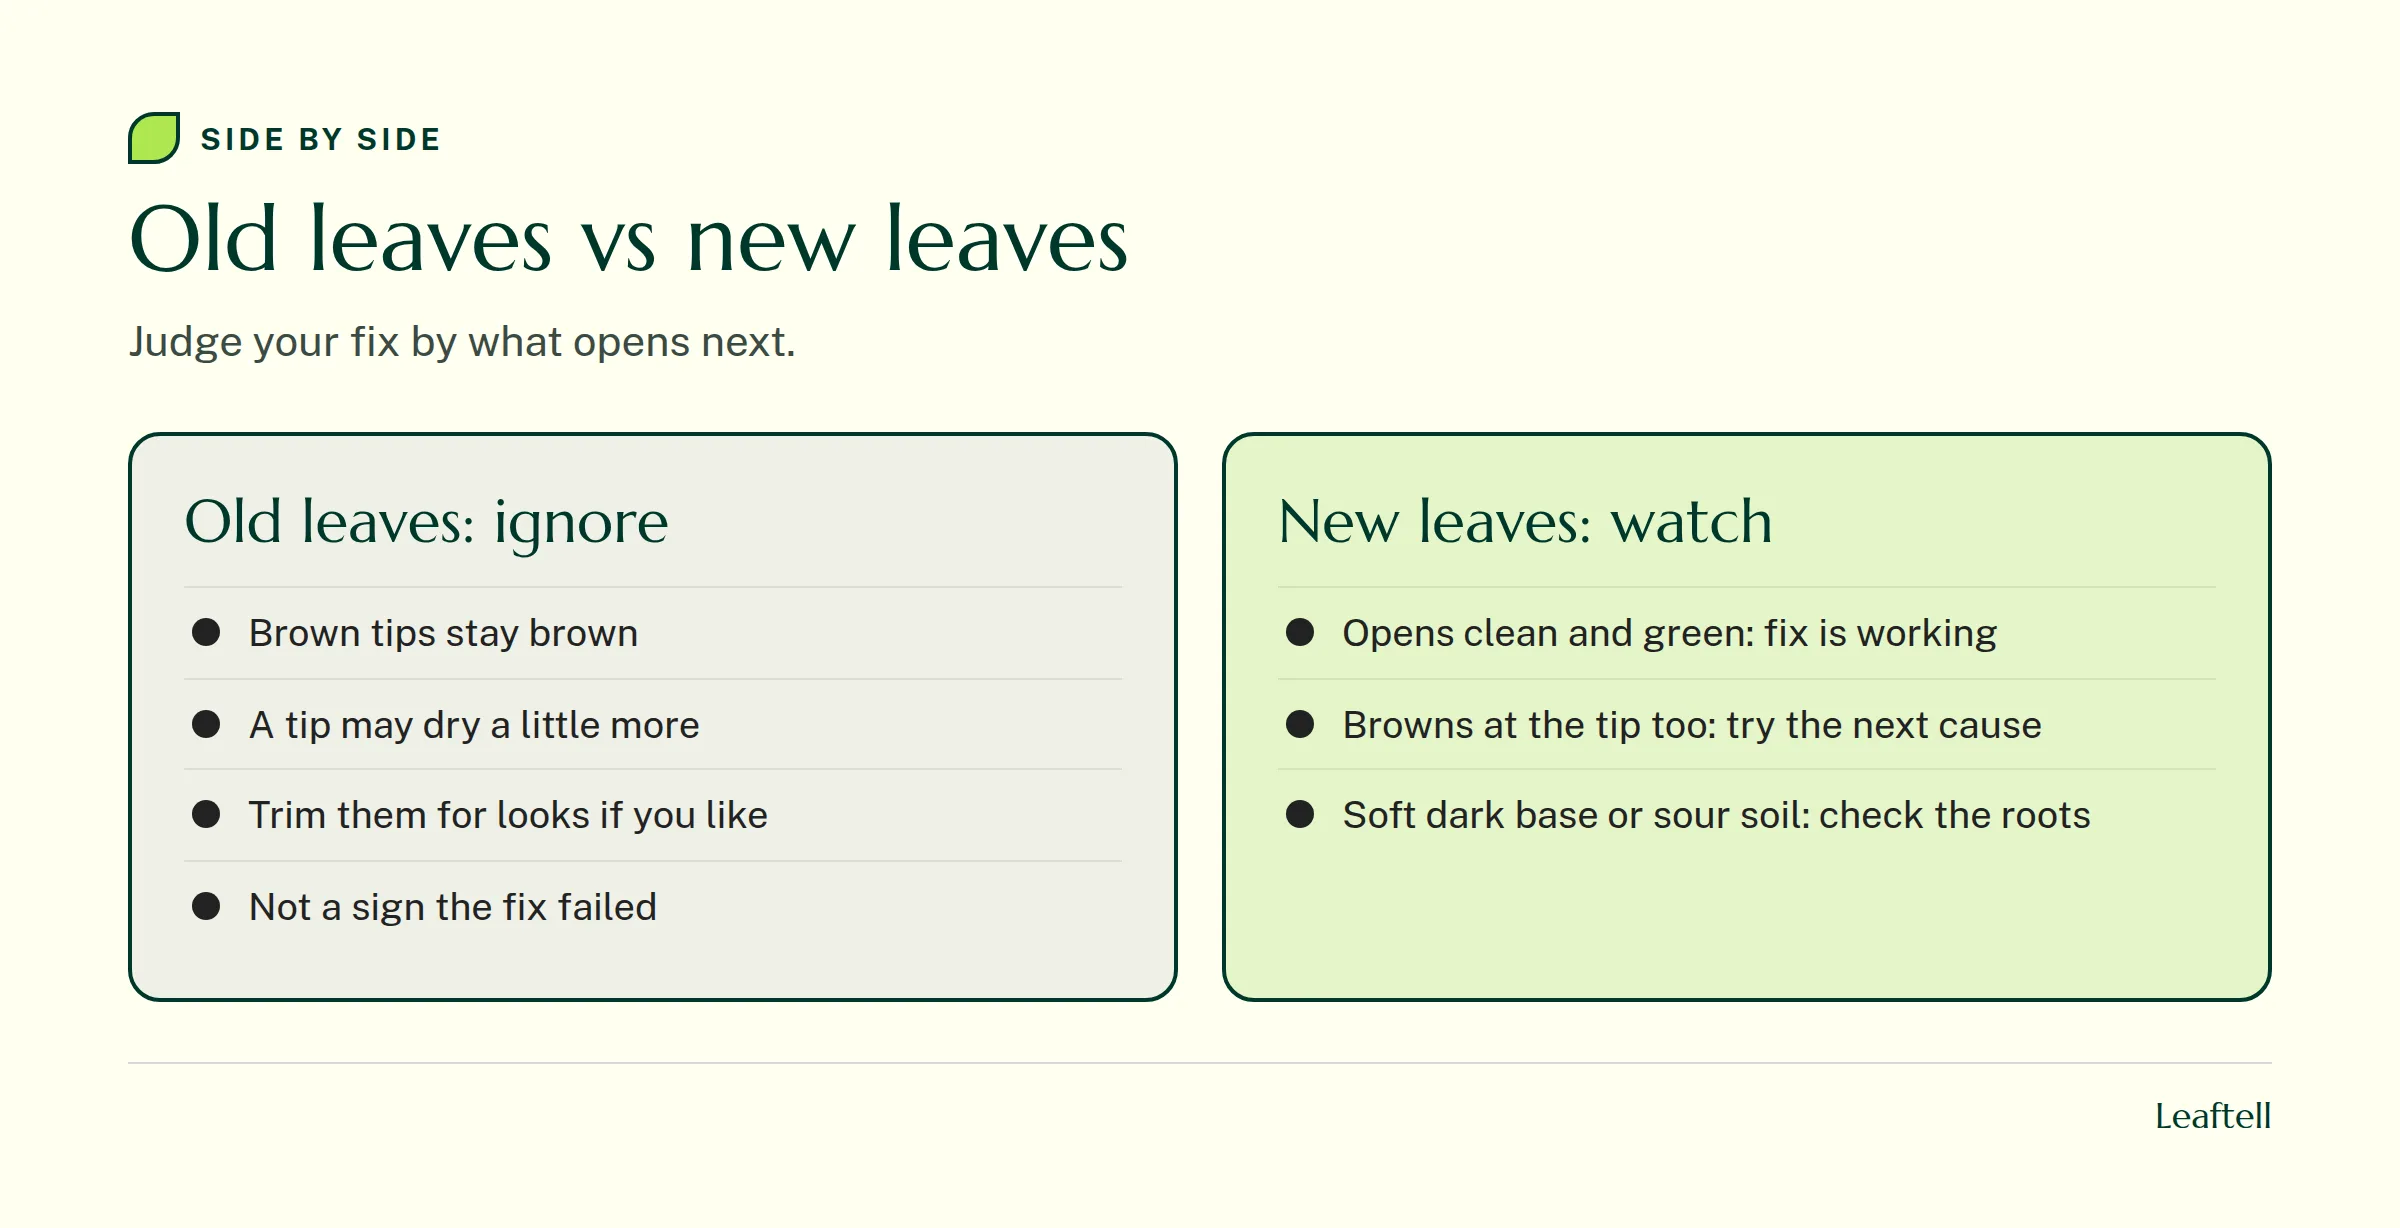
If new leaves open clean and green, keep doing what you are doing. If they brown too, go back to the table above and work through the next cause. When the plant also has soft stems, a sour smell from the soil or roots that look dark and mushy, the problem is no longer the tips: check the roots and follow the root rot rescue steps.
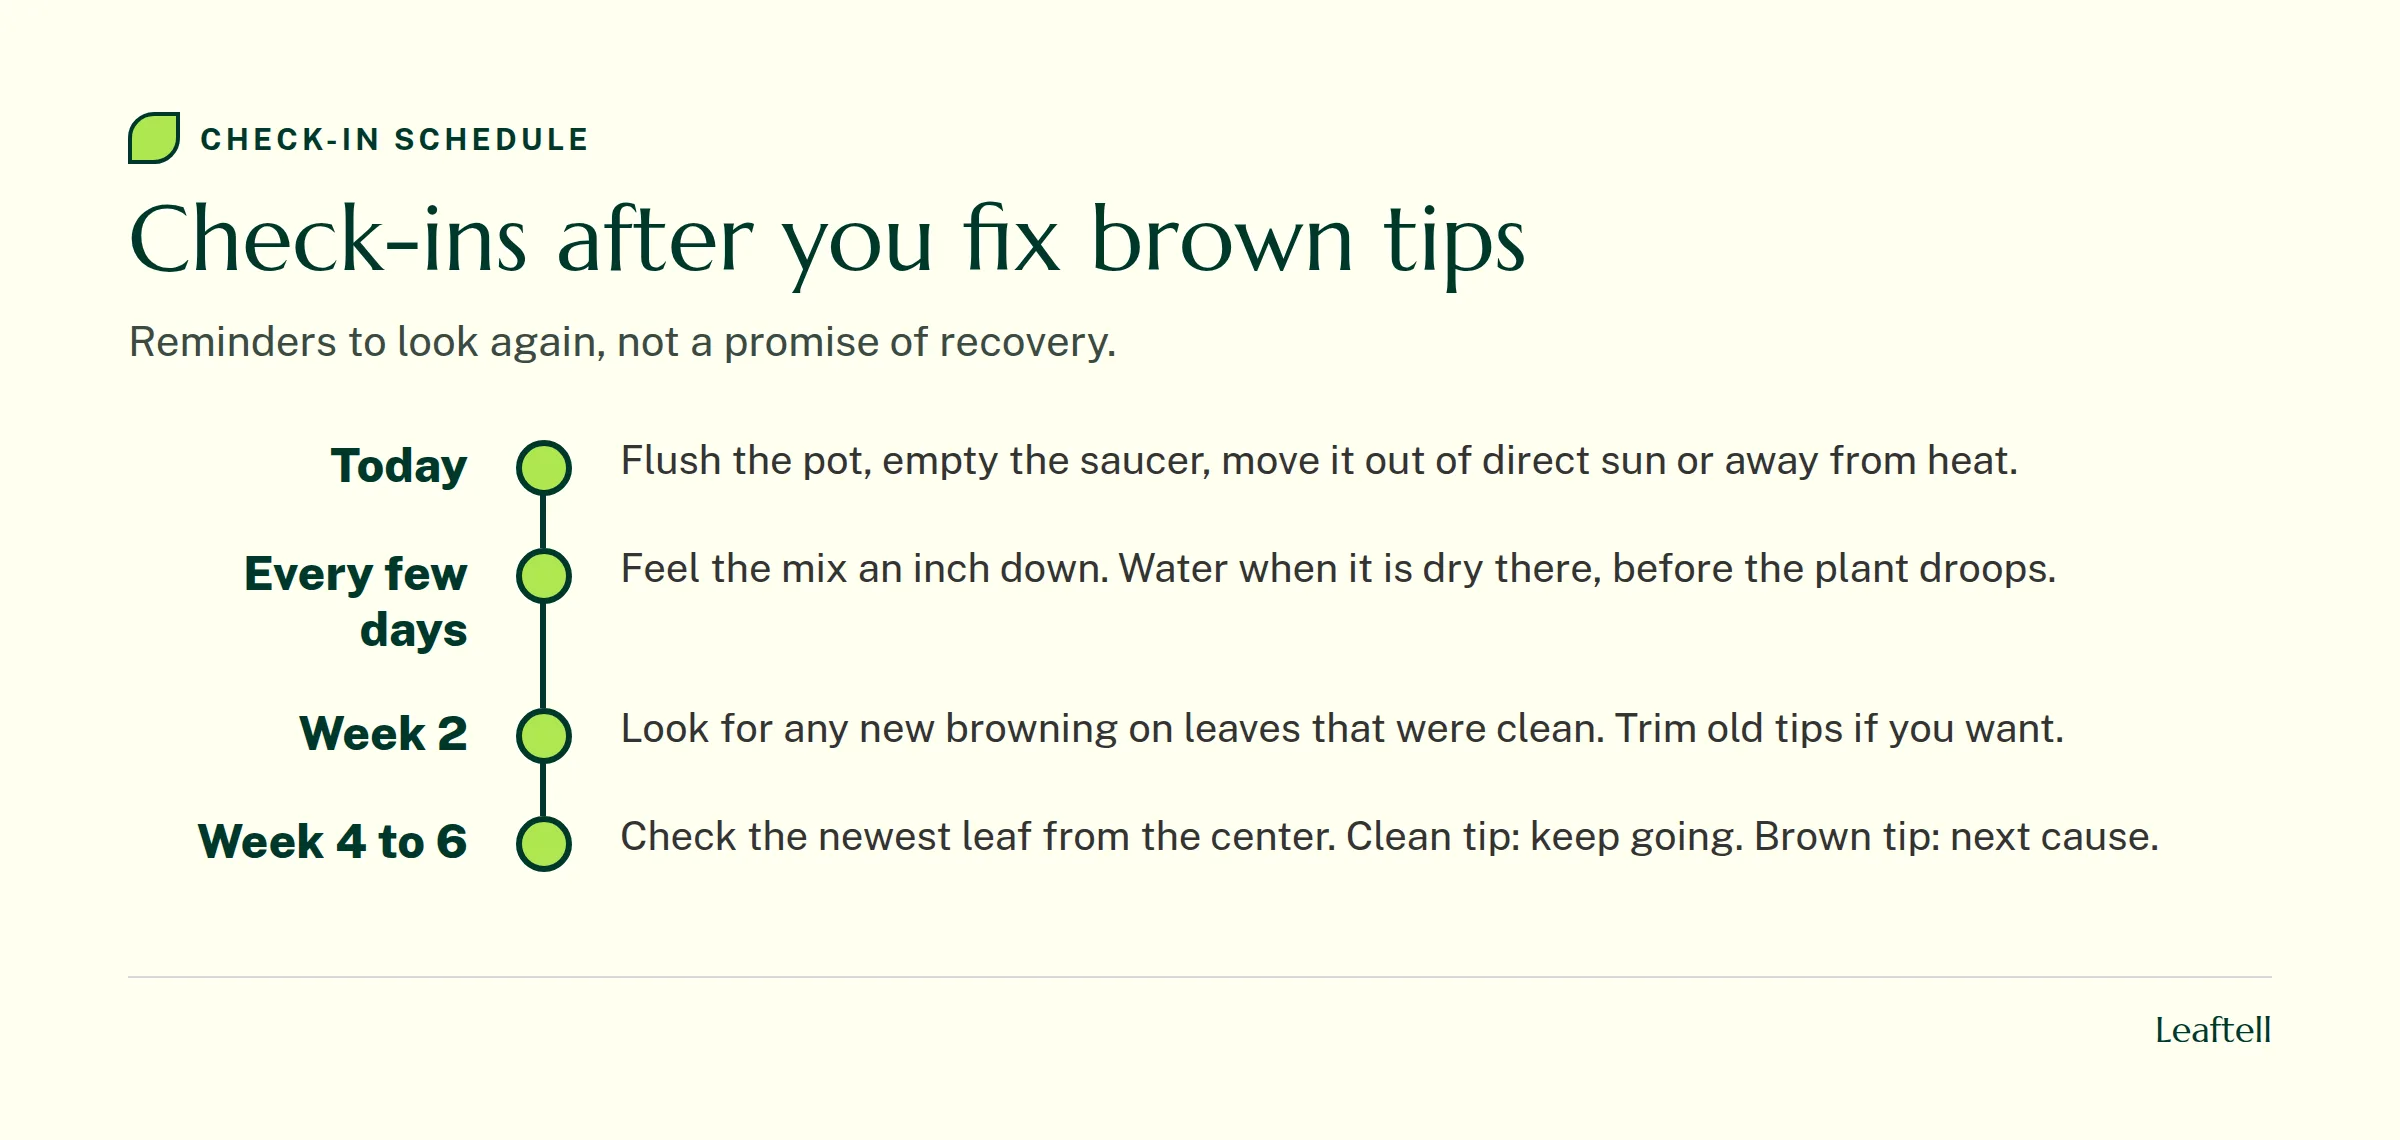
The short version
Brown tips on a peace lily are a record of something that already happened, usually in the pot. Water before it wilts, flush the salts and feed far less, keep it out of direct sun and away from heat, and only then worry about the air. For the rest of the routine, from light to repotting, see the full peace lily care guide, and for brown tips on other houseplants, the general guide to brown leaf tips covers the same causes across species.
If the tips keep browning and you cannot tell which cause is behind it, check your peace lily in Leaftell with a photo of the whole plant, a close-up of a brown tip and a note on how the soil feels an inch down. Take a fresh photo when the next leaf opens and compare.
Sources
Check your growing conditions with the plant watering calculator.
Frequently asked questions
Water when the top inch of mix is dry instead of waiting for the plant to droop, and always let water run out of the bottom. Feed lightly, at a quarter of the label strength in spring and summer, flush the soil between feedings, and keep the plant in bright light without direct sun.
An overwatered peace lily droops even though the soil is wet, its lower leaves turn yellow, and brown areas tend to be soft and dark rather than crisp. The soil may smell sour and stay wet for days. Check the roots: healthy ones are firm and white, rotting ones are brown and mushy.
There is no fixed number of days, because light, pot size, room temperature and season all change how fast the mix dries. Check the soil every few days and water when the top inch is dry and the pot feels lighter. In a warm, bright room that can be weekly; in winter it is often less.
Not with brown tips. Coffee grounds are not a balanced fertilizer, and a layer of them on top of the soil can stay wet and hide how dry the mix really is. If the plant needs food, a diluted houseplant fertilizer every six to eight weeks in the growing season does the job more predictably.
Share article
About the author

Keep checking your plant
Plant care reference
Indoor plant care
Build a routine around your plant, light and potting mix.
Plant care reference
Why is my plant dying
Trace leaf and root symptoms before choosing a care change.
Plant care reference
Pothos plant care
Choose a growing spot and prune a trailing pothos for fuller growth.
Plant care reference
How to fix root rot
Inspect root firmness and drainage, then decide whether to repot.