How to Propagate Pothos: Water, Soil and the Node Rule
Filip Leszczyński 1 November 2026 11 min read
In this article
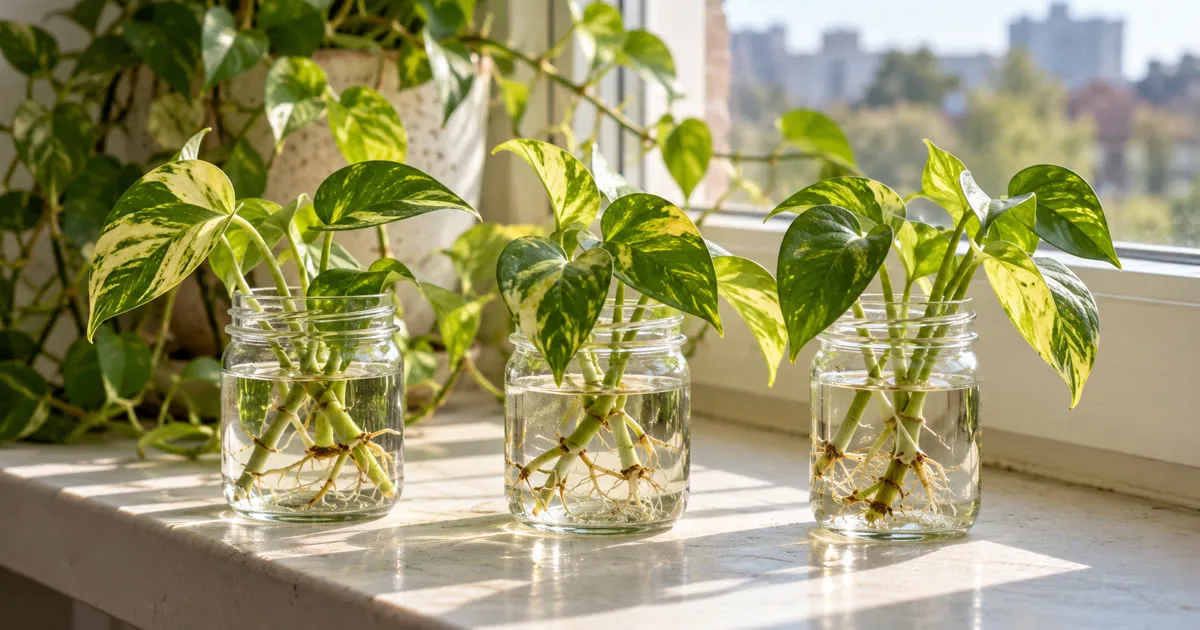
To propagate pothos, cut a piece of vine with at least one node and one or two leaves, set the node in water or moist potting mix, and keep it in bright, indirect light until white roots form. Pot water-rooted cuttings once the roots are an inch or two long, and keep the new mix lightly moist while they adjust.
The part most people get wrong is not the jar or the soil. It is the node. A pothos cutting roots from that small joint on the vine, so a leaf with only its own stalk can sit in water for months and never become a plant. Get the node right and almost any method works.
Find the node before you cut
A node is the slightly swollen joint where a leaf stalk meets the vine. On a pothos it usually carries a small brown bump: an aerial root that the plant uses to climb. Put that bump in water or soil and it becomes the first real root.
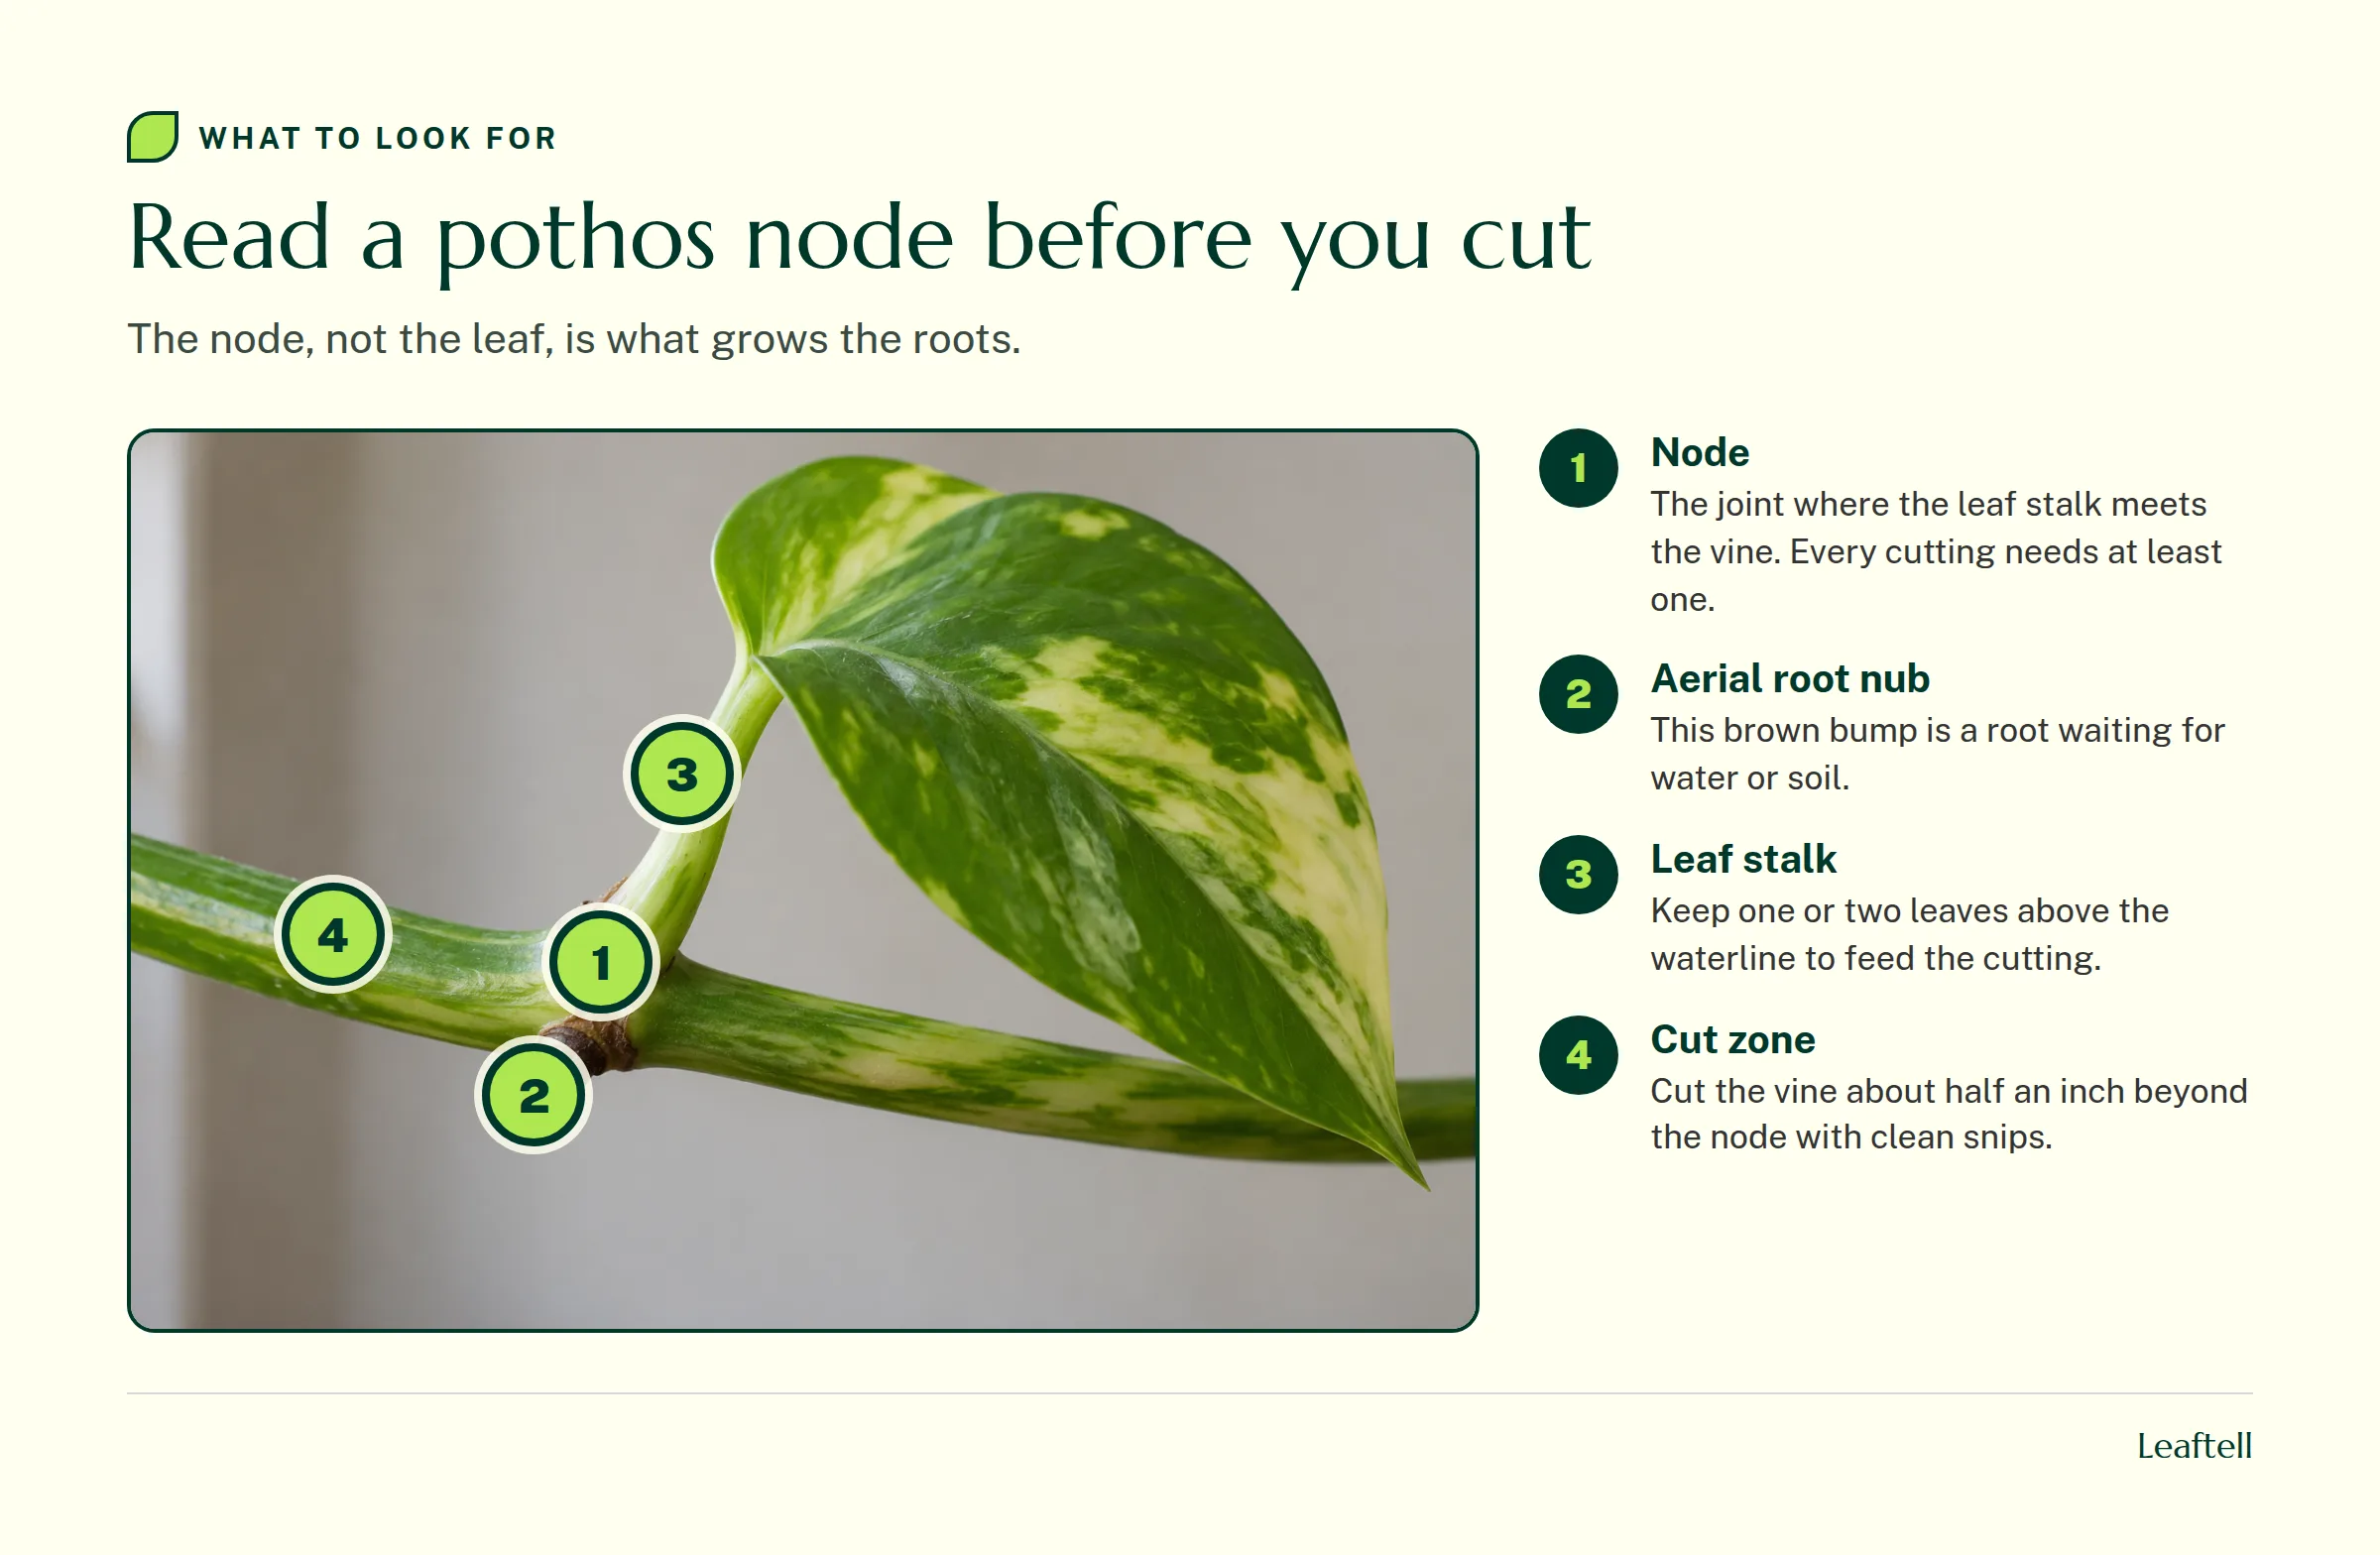
Look at the vine before you reach for scissors. Long vines with healthy leaves along their length give you the most cuttings. A bare stretch with widely spaced leaves still has nodes, but a cutting needs at least one leaf to feed itself while it roots. If most of your vines look like that, the plant is probably short on light; our guide to leggy plants explains why before you start cutting for numbers.
Where to cut a pothos vine
Use clean, sharp snips or scissors. Cut the vine into pieces that each carry one to three leaves and at least one node, and make each cut about half an inch past a node so the stem below it is not crushed. University of Missouri Extension suggests most houseplant stem cuttings be 4 to 6 inches long, cut just below a node, with the lower leaves removed.
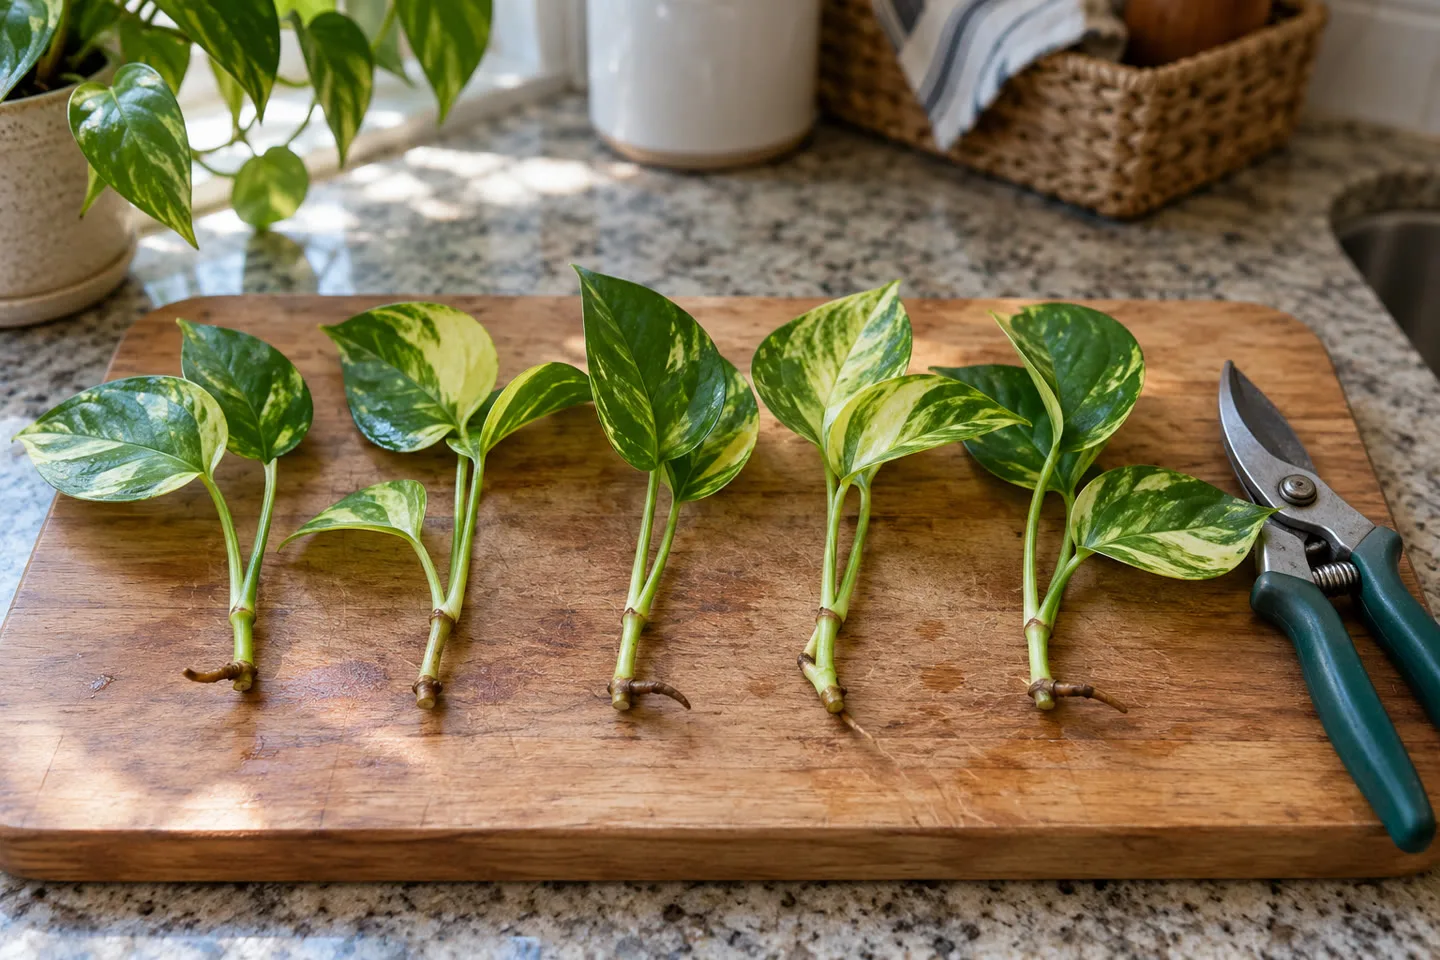
Single node pieces work too. UF/IFAS commercial growing guidelines for Epipremnum describe the standard nursery method as a short stem cutting with one node and an attached leaf. At home, a longer cutting with two or three nodes is more forgiving: if one node rots, another can still root.
Take cuttings from vines that look healthy. Check the undersides of leaves and the leaf joints first, because cuttings carry pests into every new jar. The houseplant pest checklist shows what to look for.
Water or soil: which method to choose
Both work. Choose by what you plan to do with the cuttings, not by which one is "better".
| Method | Best for | Watch out for | Move on when |
|---|---|---|---|
| Water jar | Seeing roots form, a handful of cuttings | Stale water, rot at the cut end | Several roots are 1 to 2 inches long |
| Straight into potting mix | A new pot with no transplant step | Mix staying soggy, or drying out completely | New leaf growth starts and a gentle tug meets resistance |
| Back into the mother pot | A fuller plant | Packing the pot so it stays wet | Cuttings stay upright and start growing |
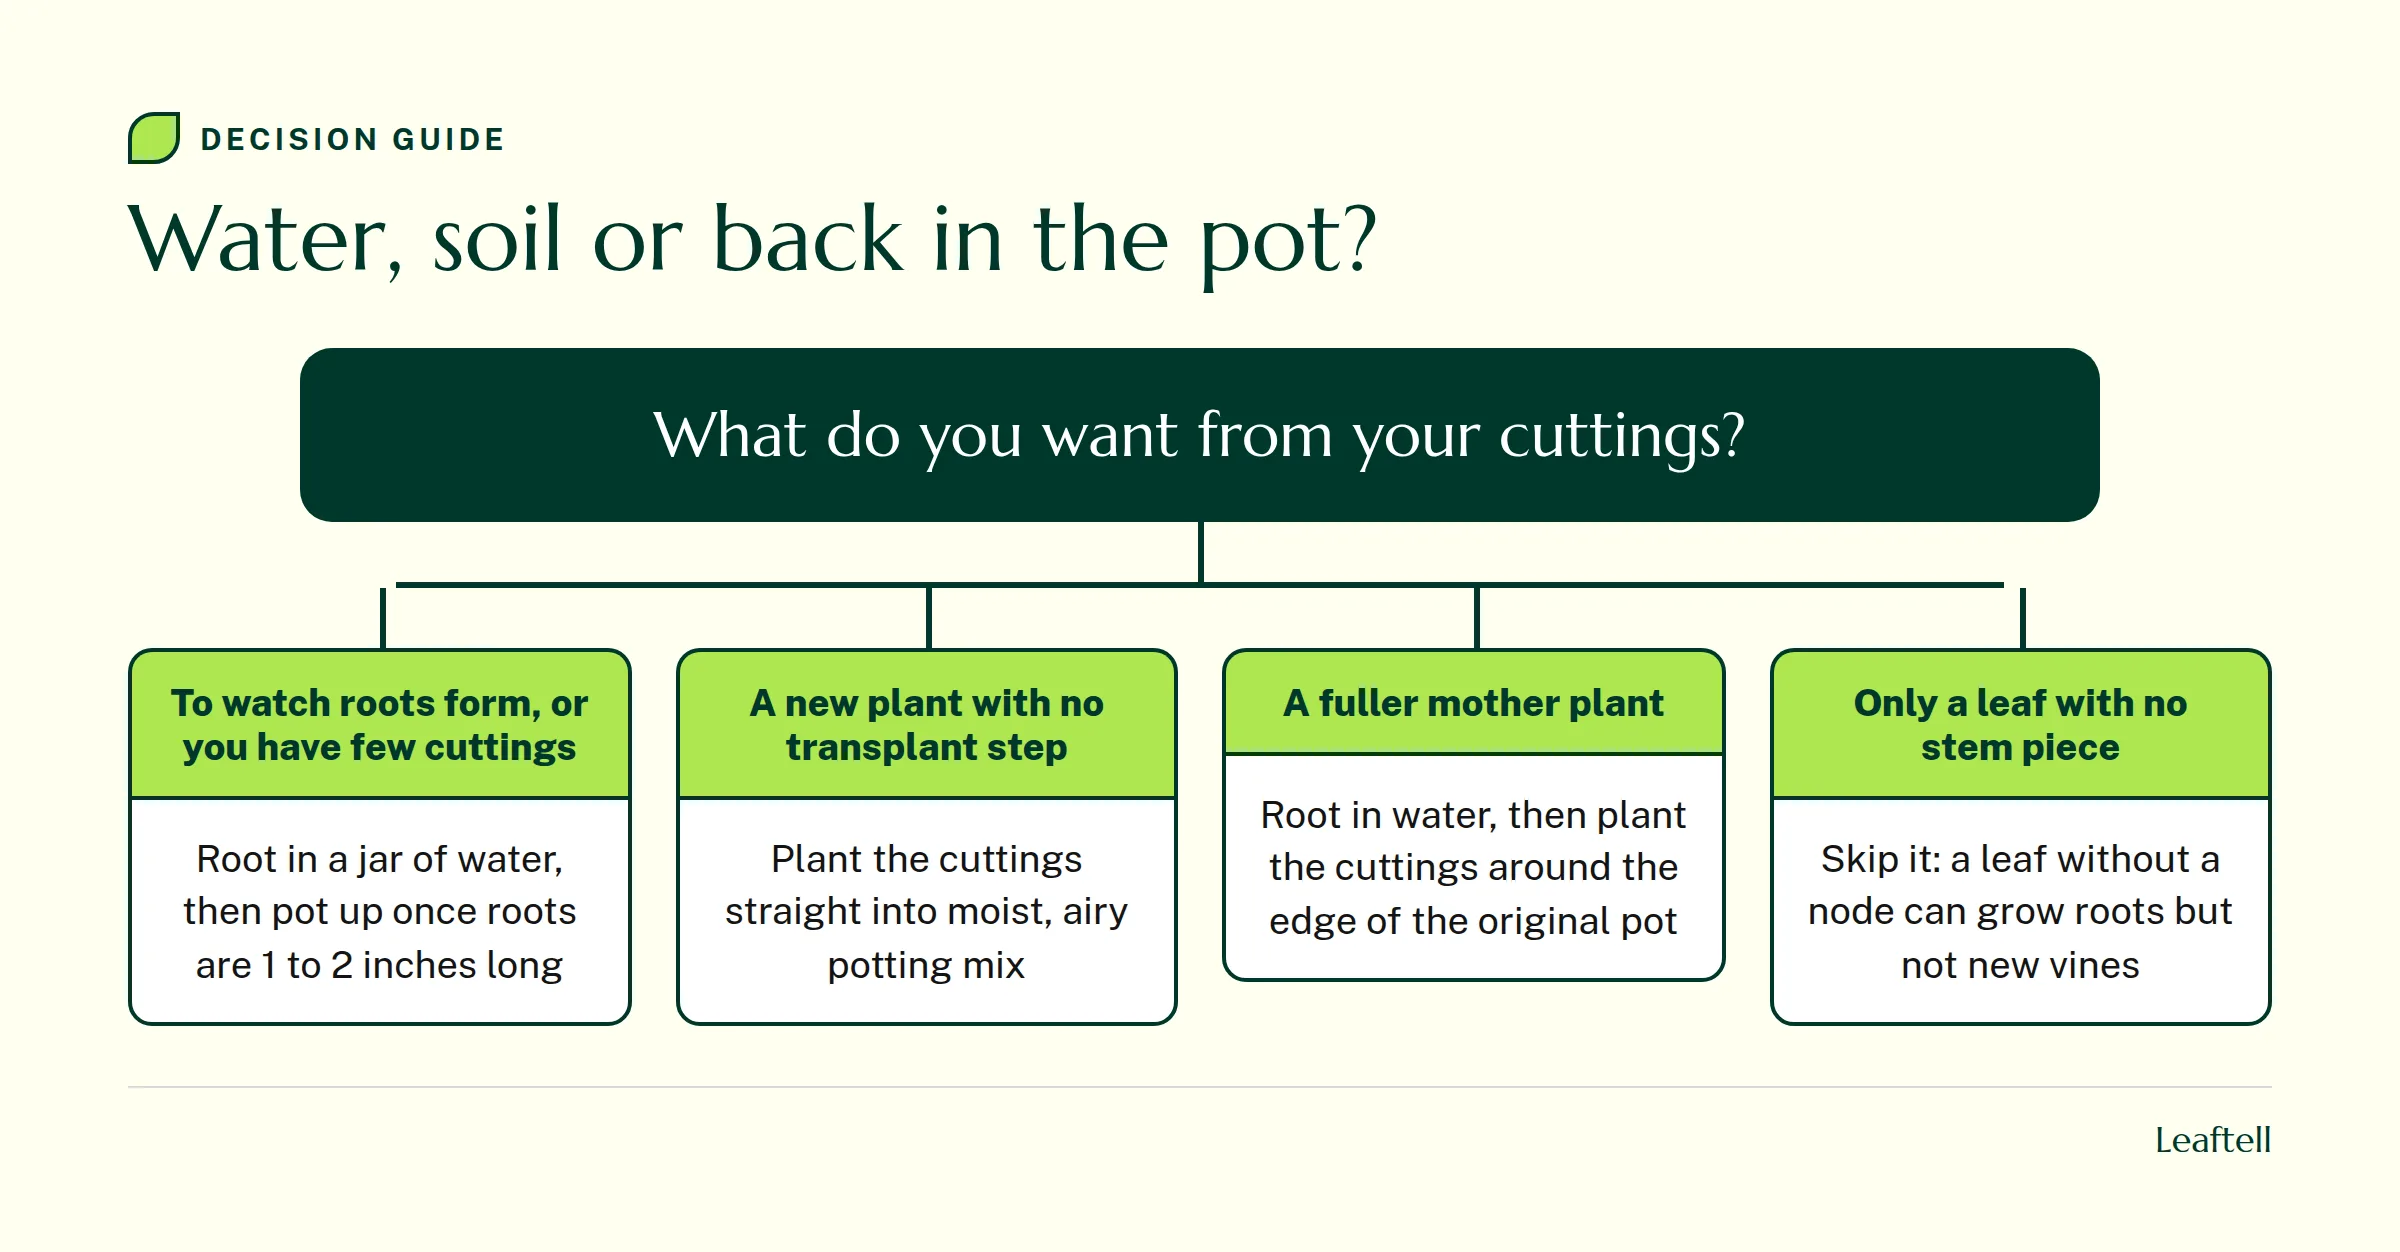
NC State Extension notes that pothos vines root easily in water, so water is the easiest place to start if this is your first try. Soil skips the adjustment period that water roots go through after potting. Neither choice changes the most important part: a node in contact with water or moist mix.
How to propagate pothos in water
- Cut below a node
Take a cutting with one to three leaves and at least one node. Remove any leaf that would sit below the waterline.
- Submerge the node, not the leaves
Stand the cutting in a clear jar of room temperature water so the node is under water and the leaves stay above the rim. Leaves under water rot and foul the jar.
- Place it in bright, indirect light
A spot near a window without hot direct sun on the glass works well. A jar in strong sun can heat up and grow algae.
- Refresh the water
Swap in fresh water whenever it looks cloudy, and at least once a week. Rinse the jar and check the cut end each time.
- Pot it up once roots form
When several roots are about 1 to 2 inches long, plant the cutting in a small pot of moist potting mix with drainage holes.
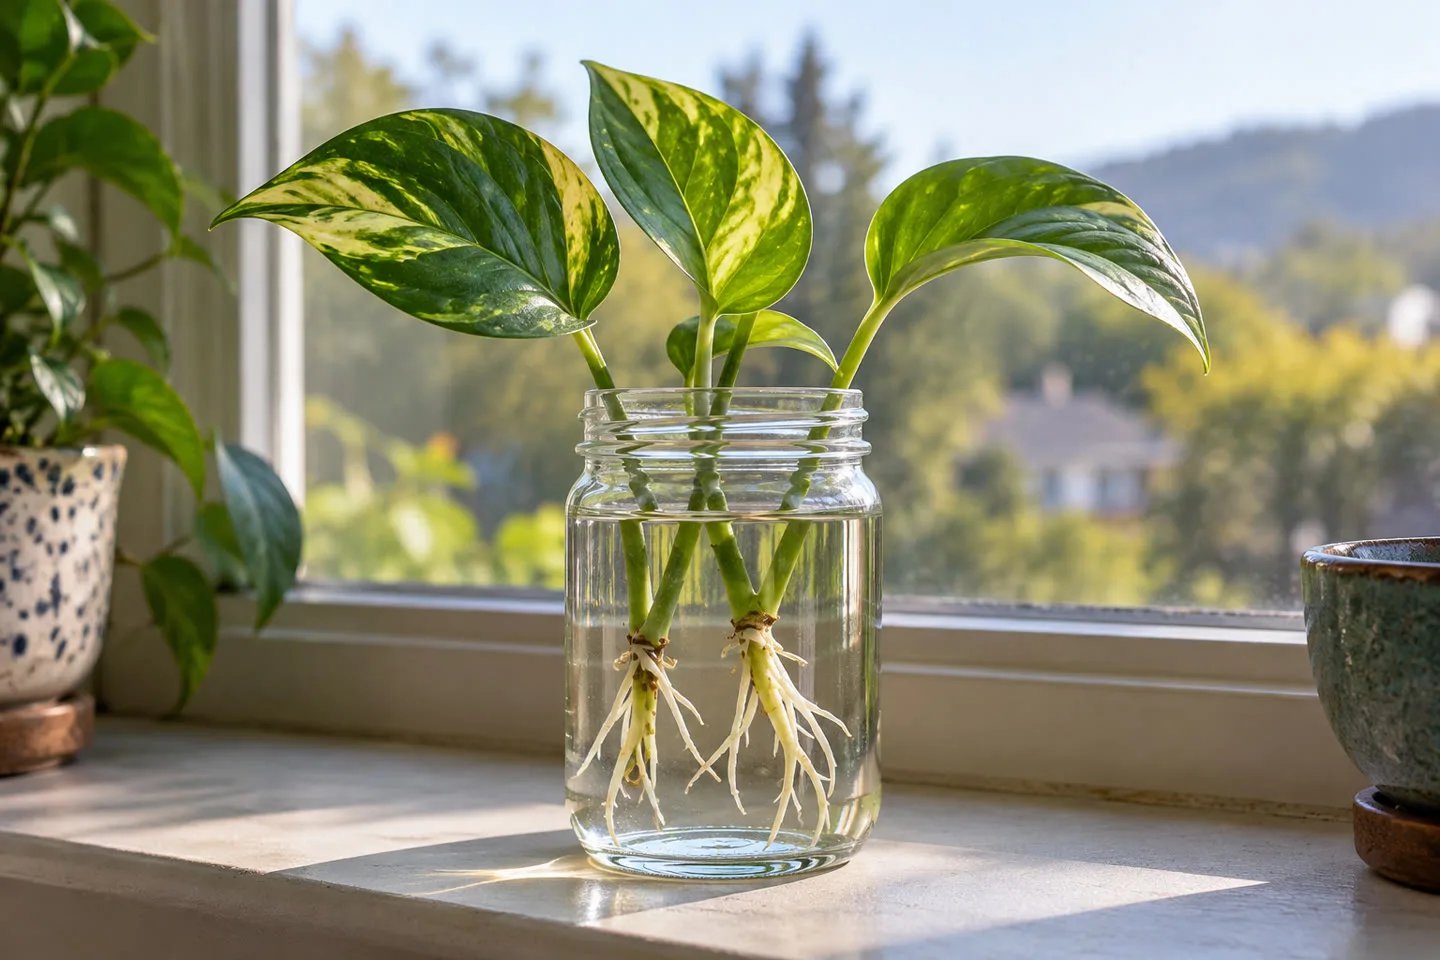
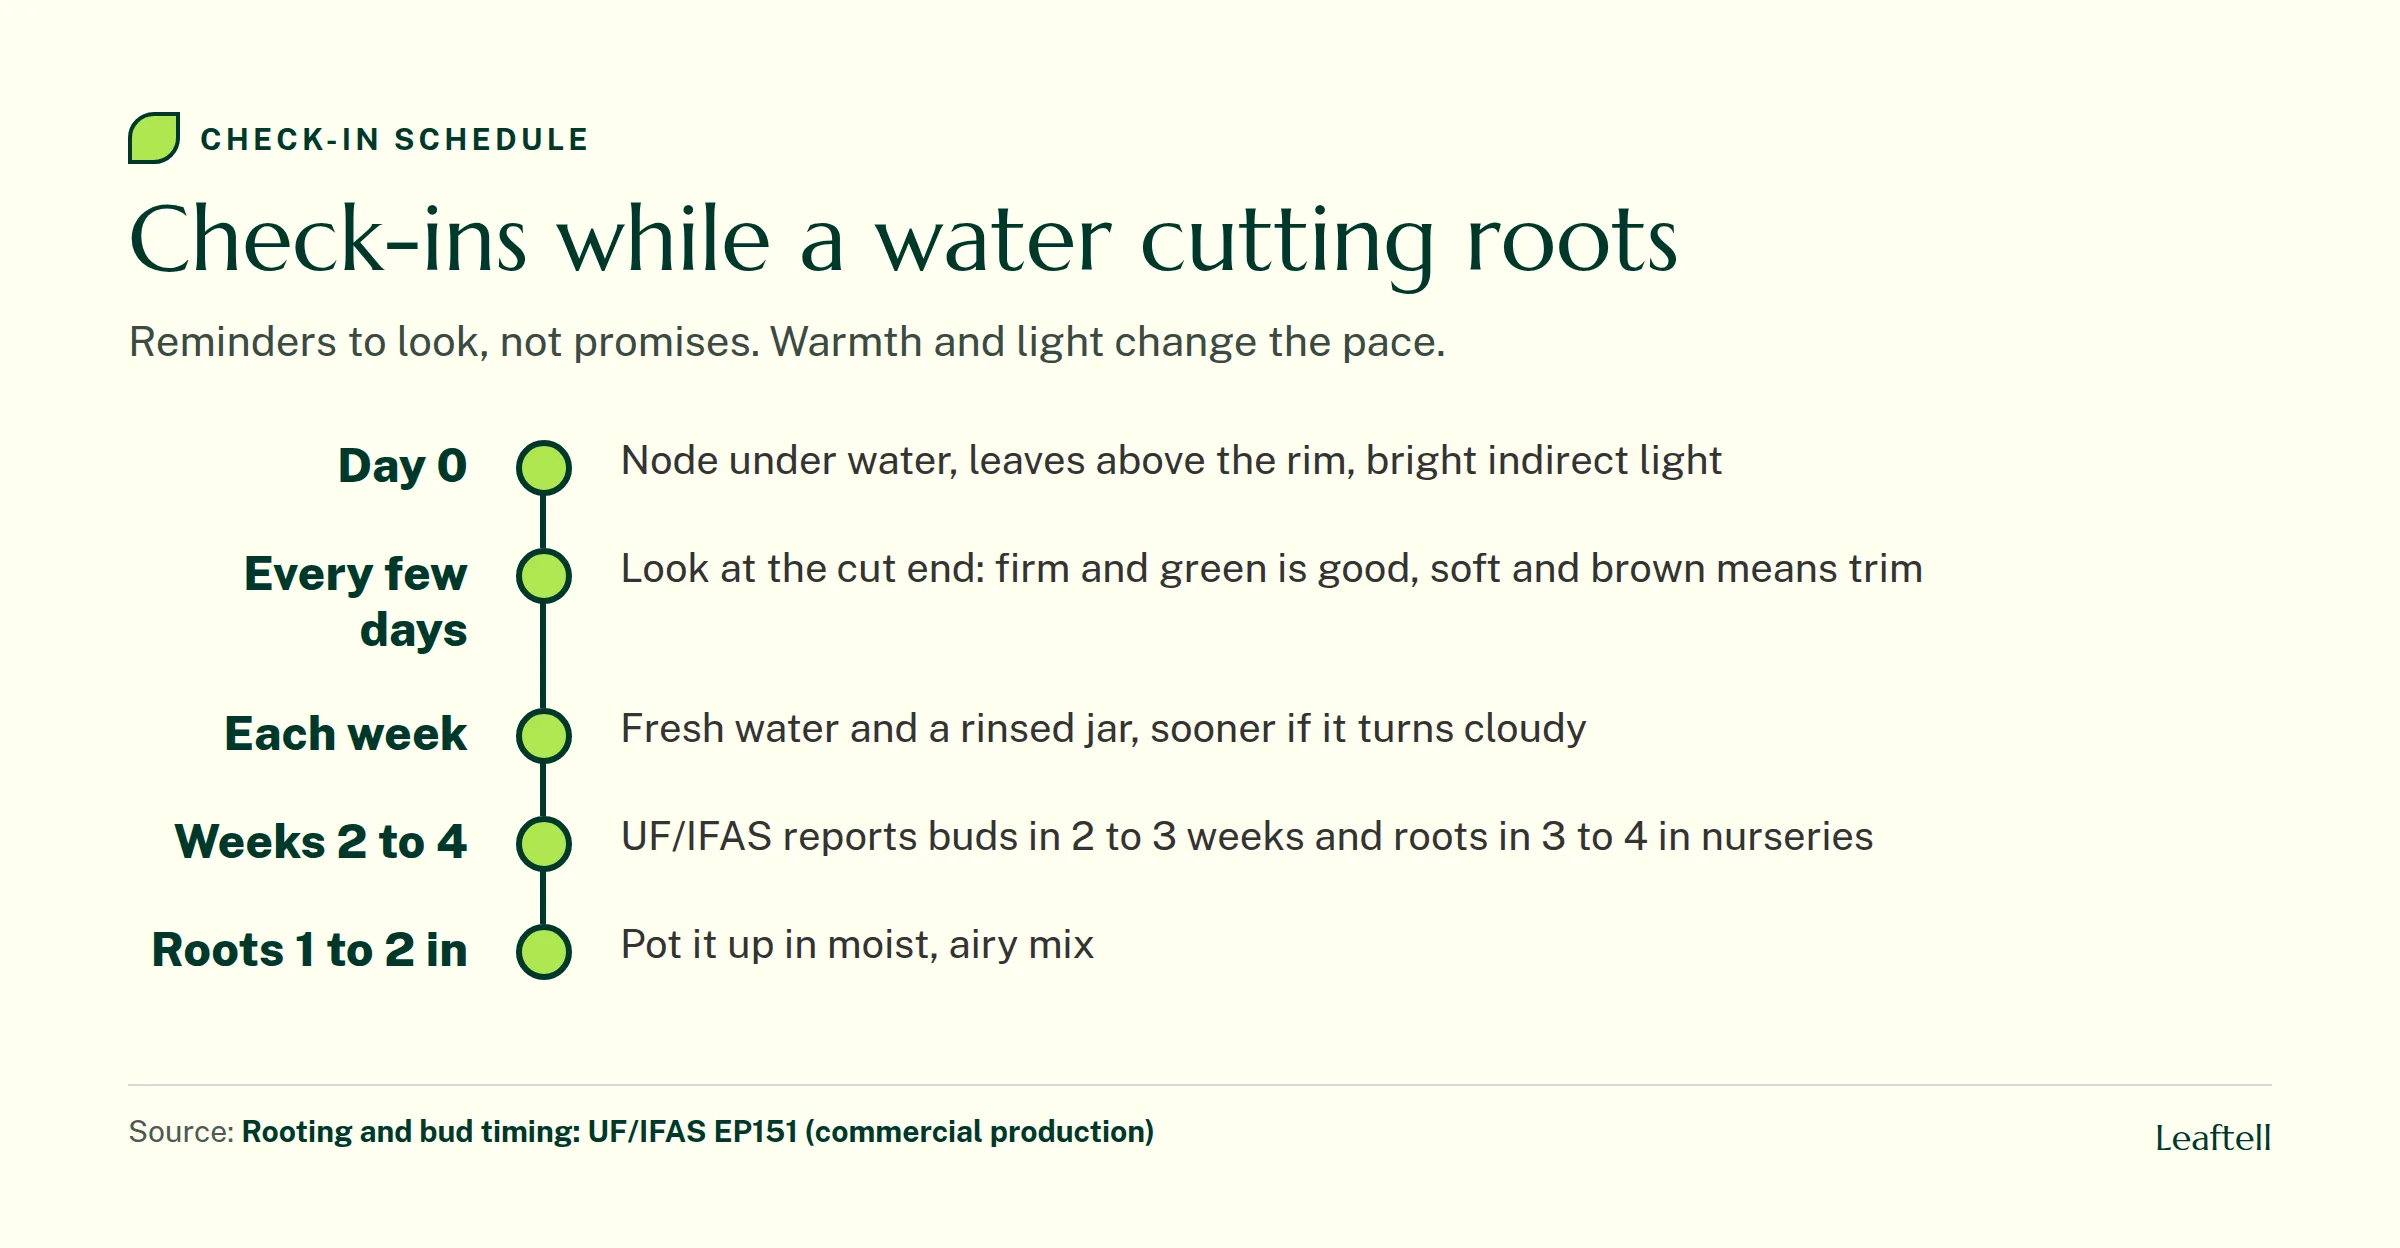
Expect the wait to vary with warmth and light. UF/IFAS reports that in commercial production, buds break in 2 to 3 weeks and rooting happens in 3 to 4 weeks. A cool apartment in winter is slower. Use those numbers as a reason to stay patient, not a deadline: if the cut end is still firm and green, the cutting is still working.
Move water roots into soil without shock
Roots that grew in water are adapted to water. They need a gentle start in soil. Plant them in a small pot of fresh, airy potting mix, firm it lightly around the stem, and water it through. For the first couple of weeks, keep the mix lightly moist rather than letting it dry the way you would for an established pothos.
Some leaves may droop or one may yellow while the roots adjust. That is common and usually passes if new growth appears. Once the cutting is putting out new leaves, switch to normal pothos watering: check the mix below the surface and water when it has dried, as described in our pothos care guide. If you are not sure whether the pot is still wet, the soil checks before watering will tell you.
Don't wait for a huge tangle of roots. A jar full of long water roots is harder to plant without tearing, and it doesn't make the transition any easier.
How to propagate pothos directly in soil
Fill a small pot with drainage holes with moist, airy potting mix. Push each cutting in so at least one node sits below the surface and the leaves stay above it. Firm the mix so the cutting stands on its own, then water it through and let it drain.
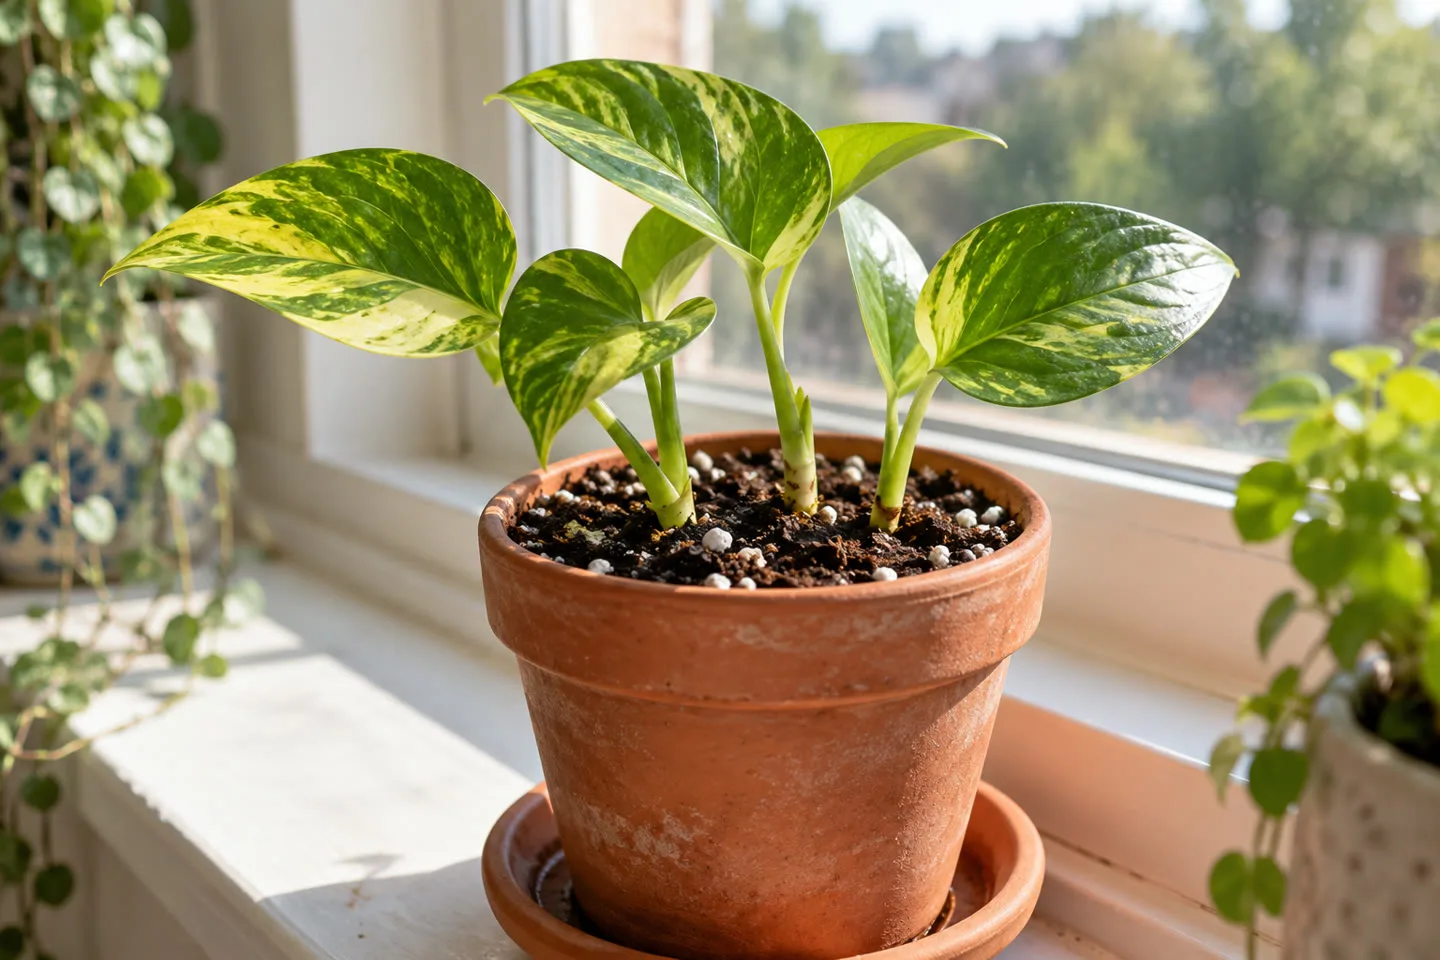
Keep the mix lightly moist, never waterlogged, and keep the pot in bright, indirect light. Check it by touch every few days. A clear plastic bag tented over the pot can help hold humidity in a dry room; open it daily so condensation does not drip onto the leaves.
You can't see roots form, so watch the top instead. A new leaf, or gentle resistance when you tug the stem, tells you roots have taken hold. A cutting that wilts while the mix is still wet needs less water, not more.
Make your pothos fuller with its own cuttings
The best use of cuttings is often the plant they came from. A pothos that has gone sparse at the top of the pot fills back in when you plant rooted cuttings around the edge of the original pot. Root them in water first, then tuck each one into the existing mix at the same depth as the other stems.
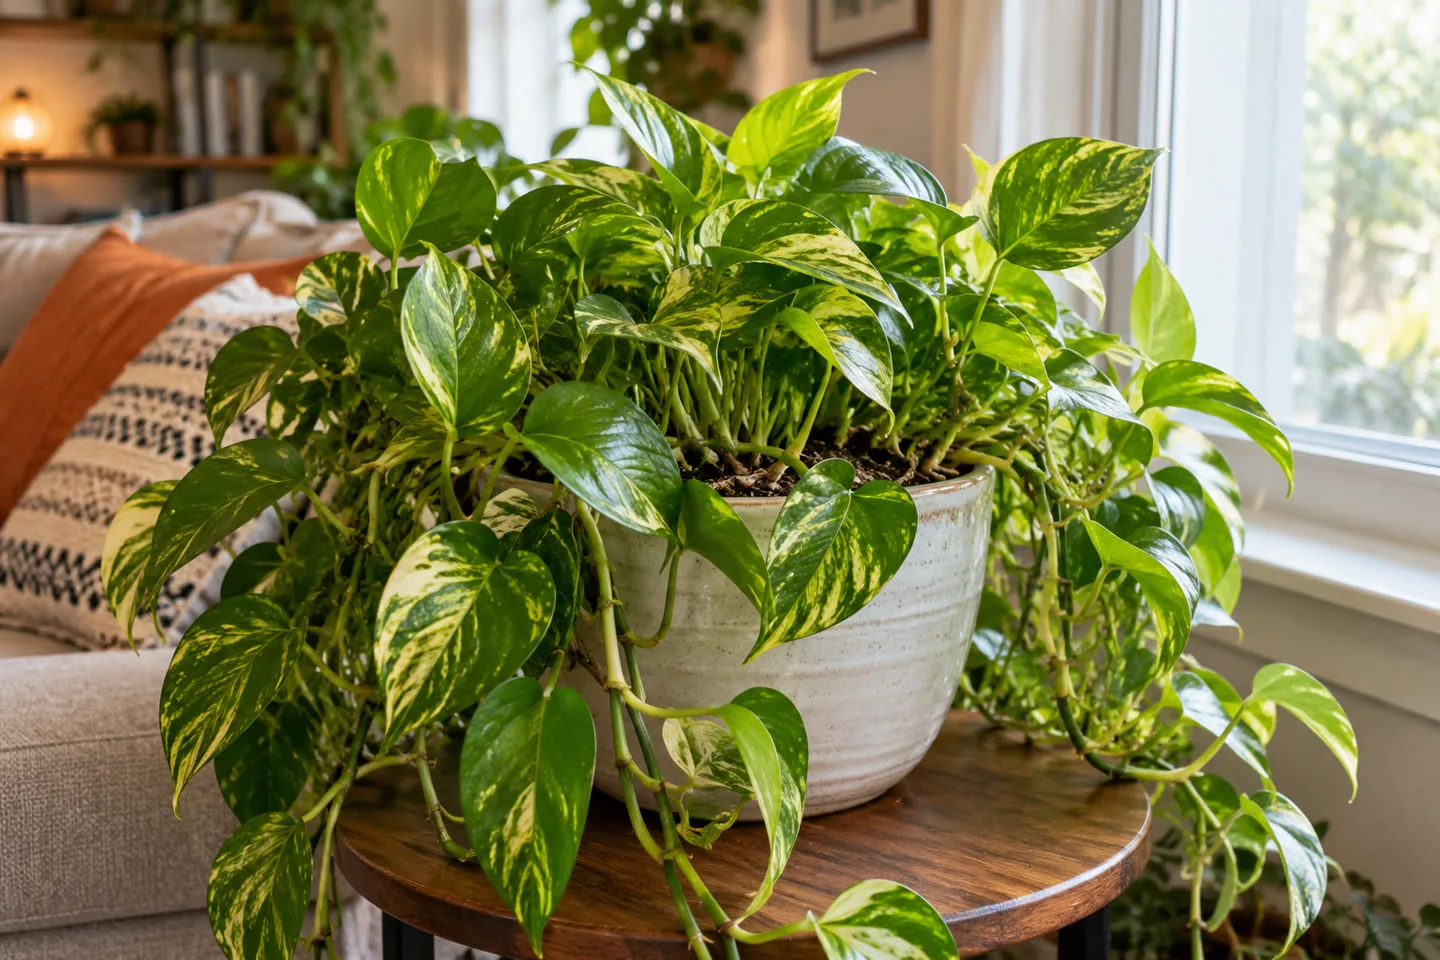
Don't overcrowd the pot or pack the mix tight to hold the cuttings in place. A crowded, compacted pot stays wet longer, and that is when roots start to rot. If the pot already struggles to dry, plant the cuttings in their own pot instead.
Pruning the mother plant at the same time helps. NC State Extension recommends pruning pothos stems back to keep the plant bushy, so the cuts that give you cuttings also tidy the vines that went bare.
Propagation mistakes and what they cost
Most failed cuttings fail for one of a few reasons. Catch them early and you lose one cutting, not the whole batch.
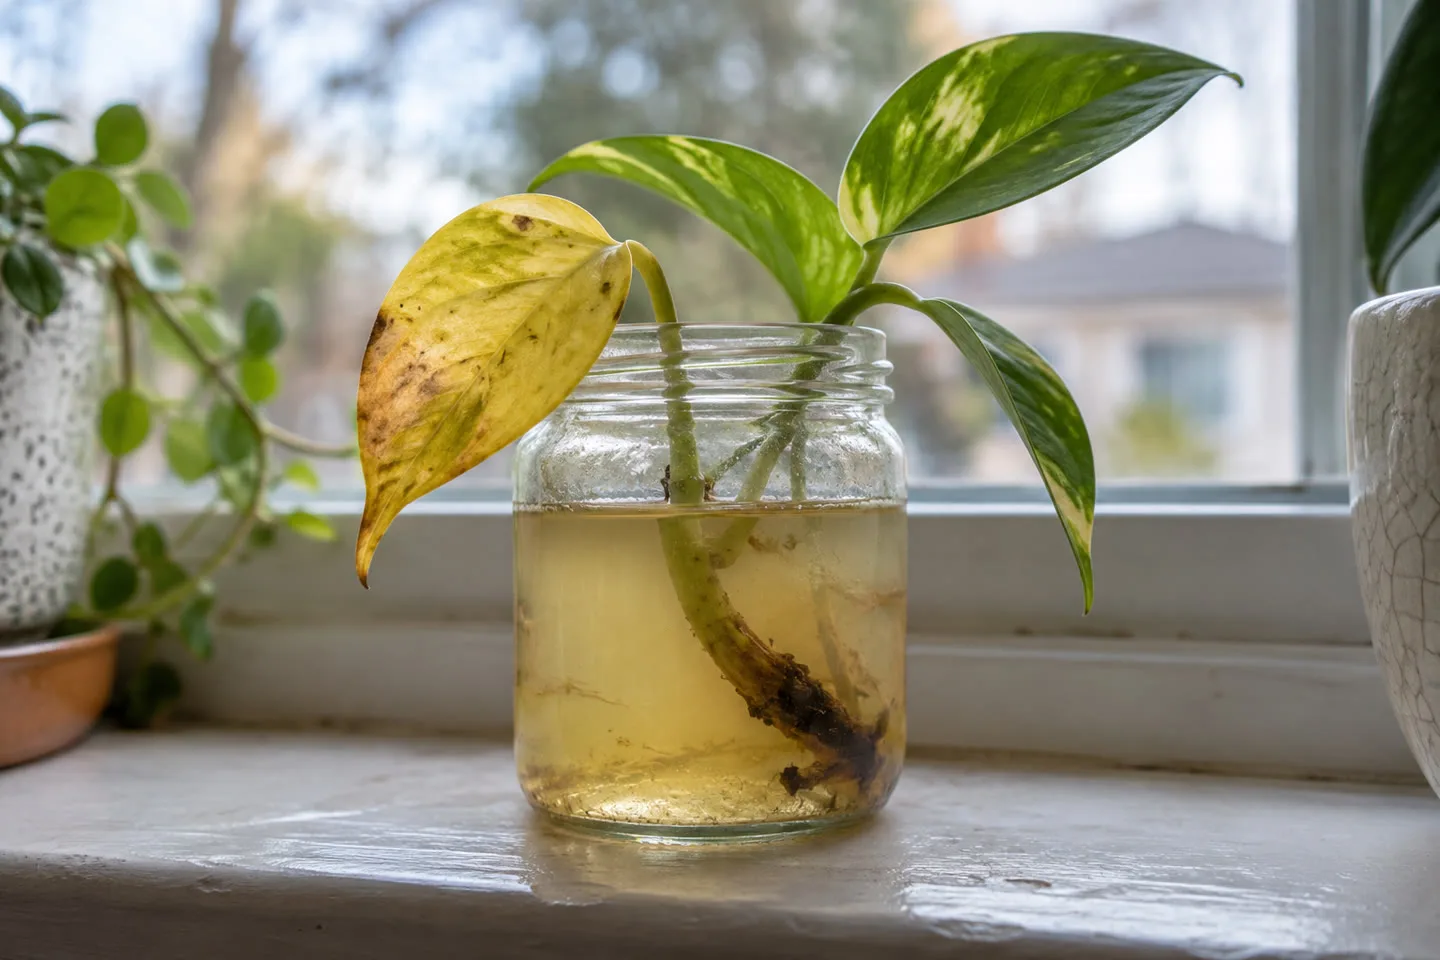
- No node on the cutting. A leaf on its own stalk can grow roots but not a new vine. Cost: weeks of waiting for nothing.
- Leaves under water. Submerged leaves rot and cloud the water. Cost: rot spreads to the stem.
- Stale water. Cloudy water that is never changed grows bacteria. Cost: a soft, brown cut end.
- Soggy soil. Cuttings in soil need moisture and air. Cost: rot before roots form.
- Hot direct sun on the jar. Glass in strong sun heats the water and grows algae. Cost: scorched leaves and green slime.
- Cutting a stressed plant. Cuttings from a plant with yellowing leaves or pests carry the problem along. Cost: weak cuttings and spread pests. Sort out the cause first with our pothos yellow leaves guide.
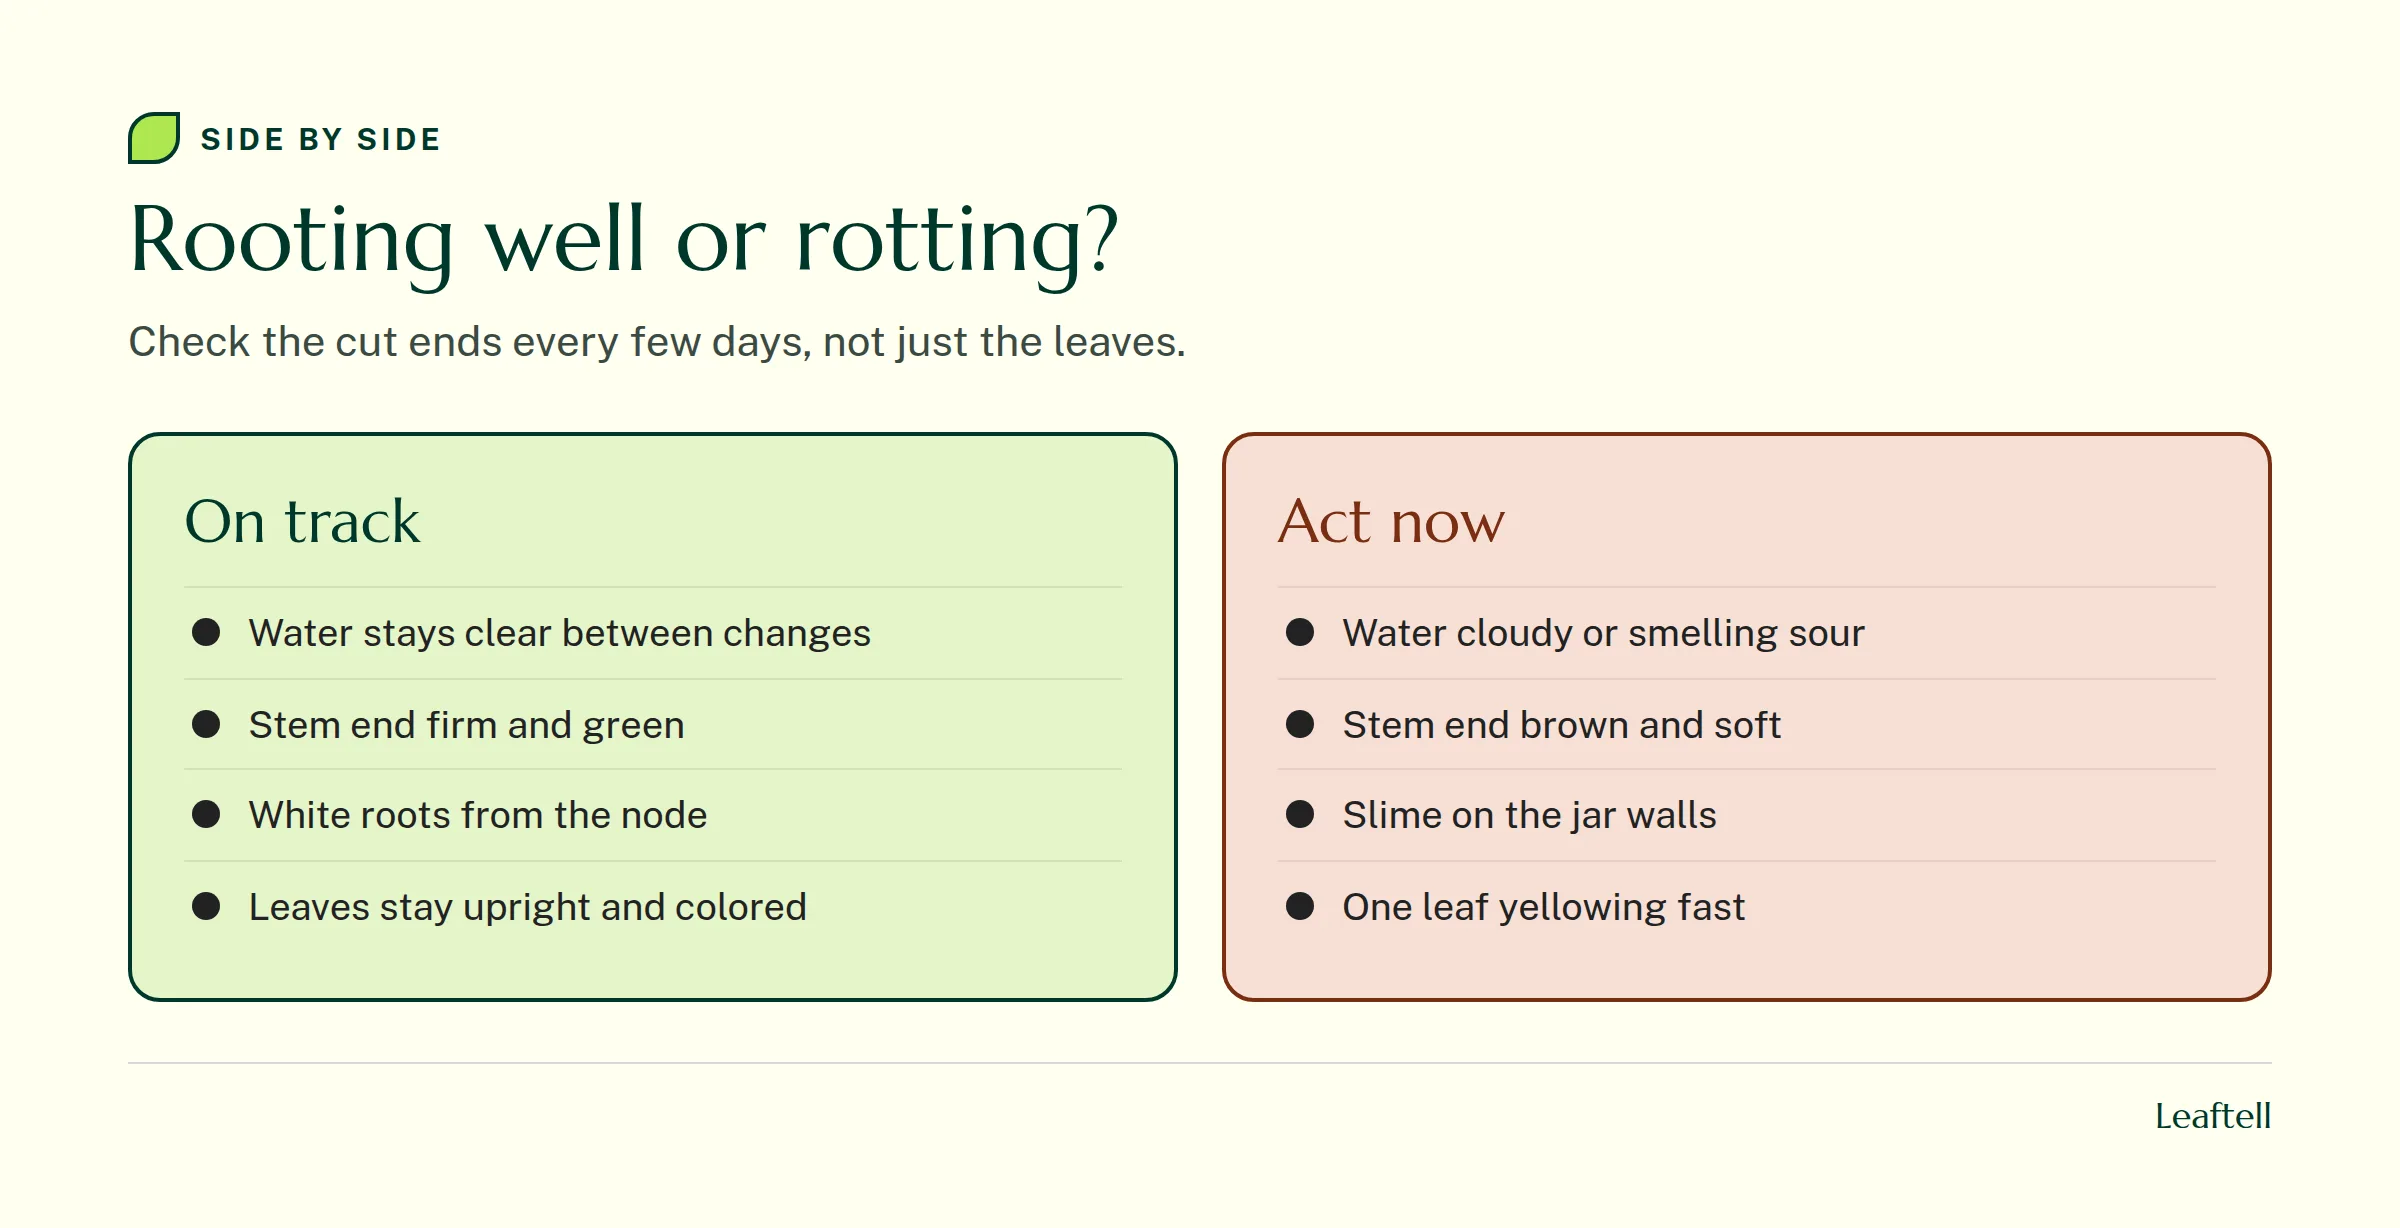
If the cut end turns brown and soft, take the cutting out, trim back to firm, green tissue above the rot, rinse the jar and start again with fresh water. If the rot reaches every node, compost it and take a fresh cutting. A rooted plant that later collapses in wet mix is a different problem: our root rot guide covers what to check.
Keep cuttings and jars away from pets
Pothos is toxic to cats and dogs, according to the ASPCA plant list. A row of jars on a low windowsill is easy for a cat to reach. Put cuttings somewhere pets can't get to, clear up trimmed leaves, and call your veterinarian or a poison control service if a pet chews one.
The one thing that decides whether a cutting roots
A node in water or moist mix, in bright, indirect light, does almost all the work. Everything else is housekeeping: fresh water, a pot that drains and a look at the cut end every few days. The same approach works on other vining plants, and if you grow a spider plant you can also root its babies, as described in our spider plant care guide. If your pothos rarely produces healthy vines worth cutting, start with the light at your window.
If a cutting or the mother plant looks wrong and you are not sure why, check your pothos in Leaftell with a photo of the whole plant, a close-up of the problem and a note on how wet the mix or water is.
Sources
Check your growing conditions with the plant watering calculator.
Frequently asked questions
Start new cuttings in a small pot, only a little wider than the cluster of roots. A big pot holds a lot of wet mix the young roots can't reach, and it dries slowly, which raises the risk of rot. Move up one size once roots fill the pot.
Push a cutting with at least one node into moist, airy potting mix so the node is buried and the leaves stay above the surface. Keep the mix lightly moist in bright, indirect light, and look for new leaf growth or resistance to a gentle tug as signs of roots.
The most common are cuttings without a node, leaves left under water, water that is never changed and soil that stays soggy. Each one leads to rot or a cutting that never grows. Check the cut end every few days and act as soon as it turns soft or brown.
Give the jar warmth and bright, indirect light, change the water whenever it looks cloudy, and use cuttings with a healthy node and one to three leaves. A cutting with two or three nodes under water gives you more than one chance to root. Cold, dark spots slow rooting the most.
Share article
About the author

Keep checking your plant
Plant care reference
Indoor plant care
Build a routine around your plant, light and potting mix.
Plant care reference
Why is my plant dying
Trace leaf and root symptoms before choosing a care change.
Plant care reference
Pothos plant care
Choose a growing spot and prune a trailing pothos for fuller growth.
Plant care reference
How to fix root rot
Inspect root firmness and drainage, then decide whether to repot.