Brown Leaf Tips on Tomato Plants: 7 Causes and the Fix for Each
Filip Leszczyński 9 November 2026 14 min read
In this article
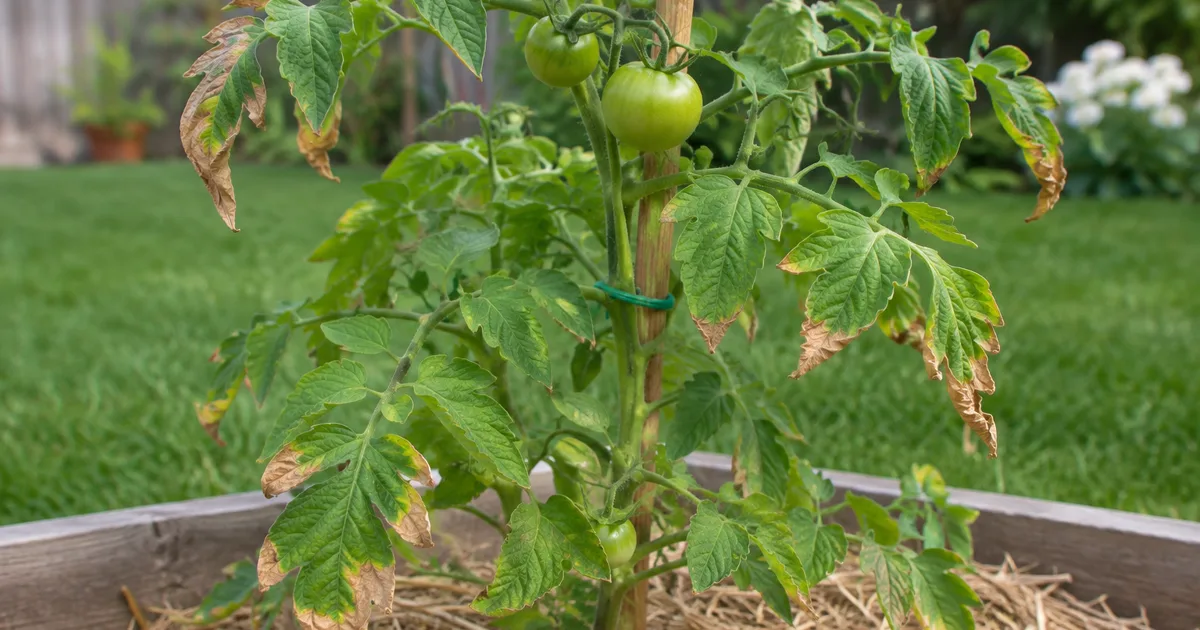
Brown leaf tips on tomato plants usually mean the roots are not getting enough water to the far end of the leaf. Uneven watering, too much fertilizer, hot sun and wind, or a potassium shortage are the common causes, and all of them are fixed in the soil, not on the leaf.
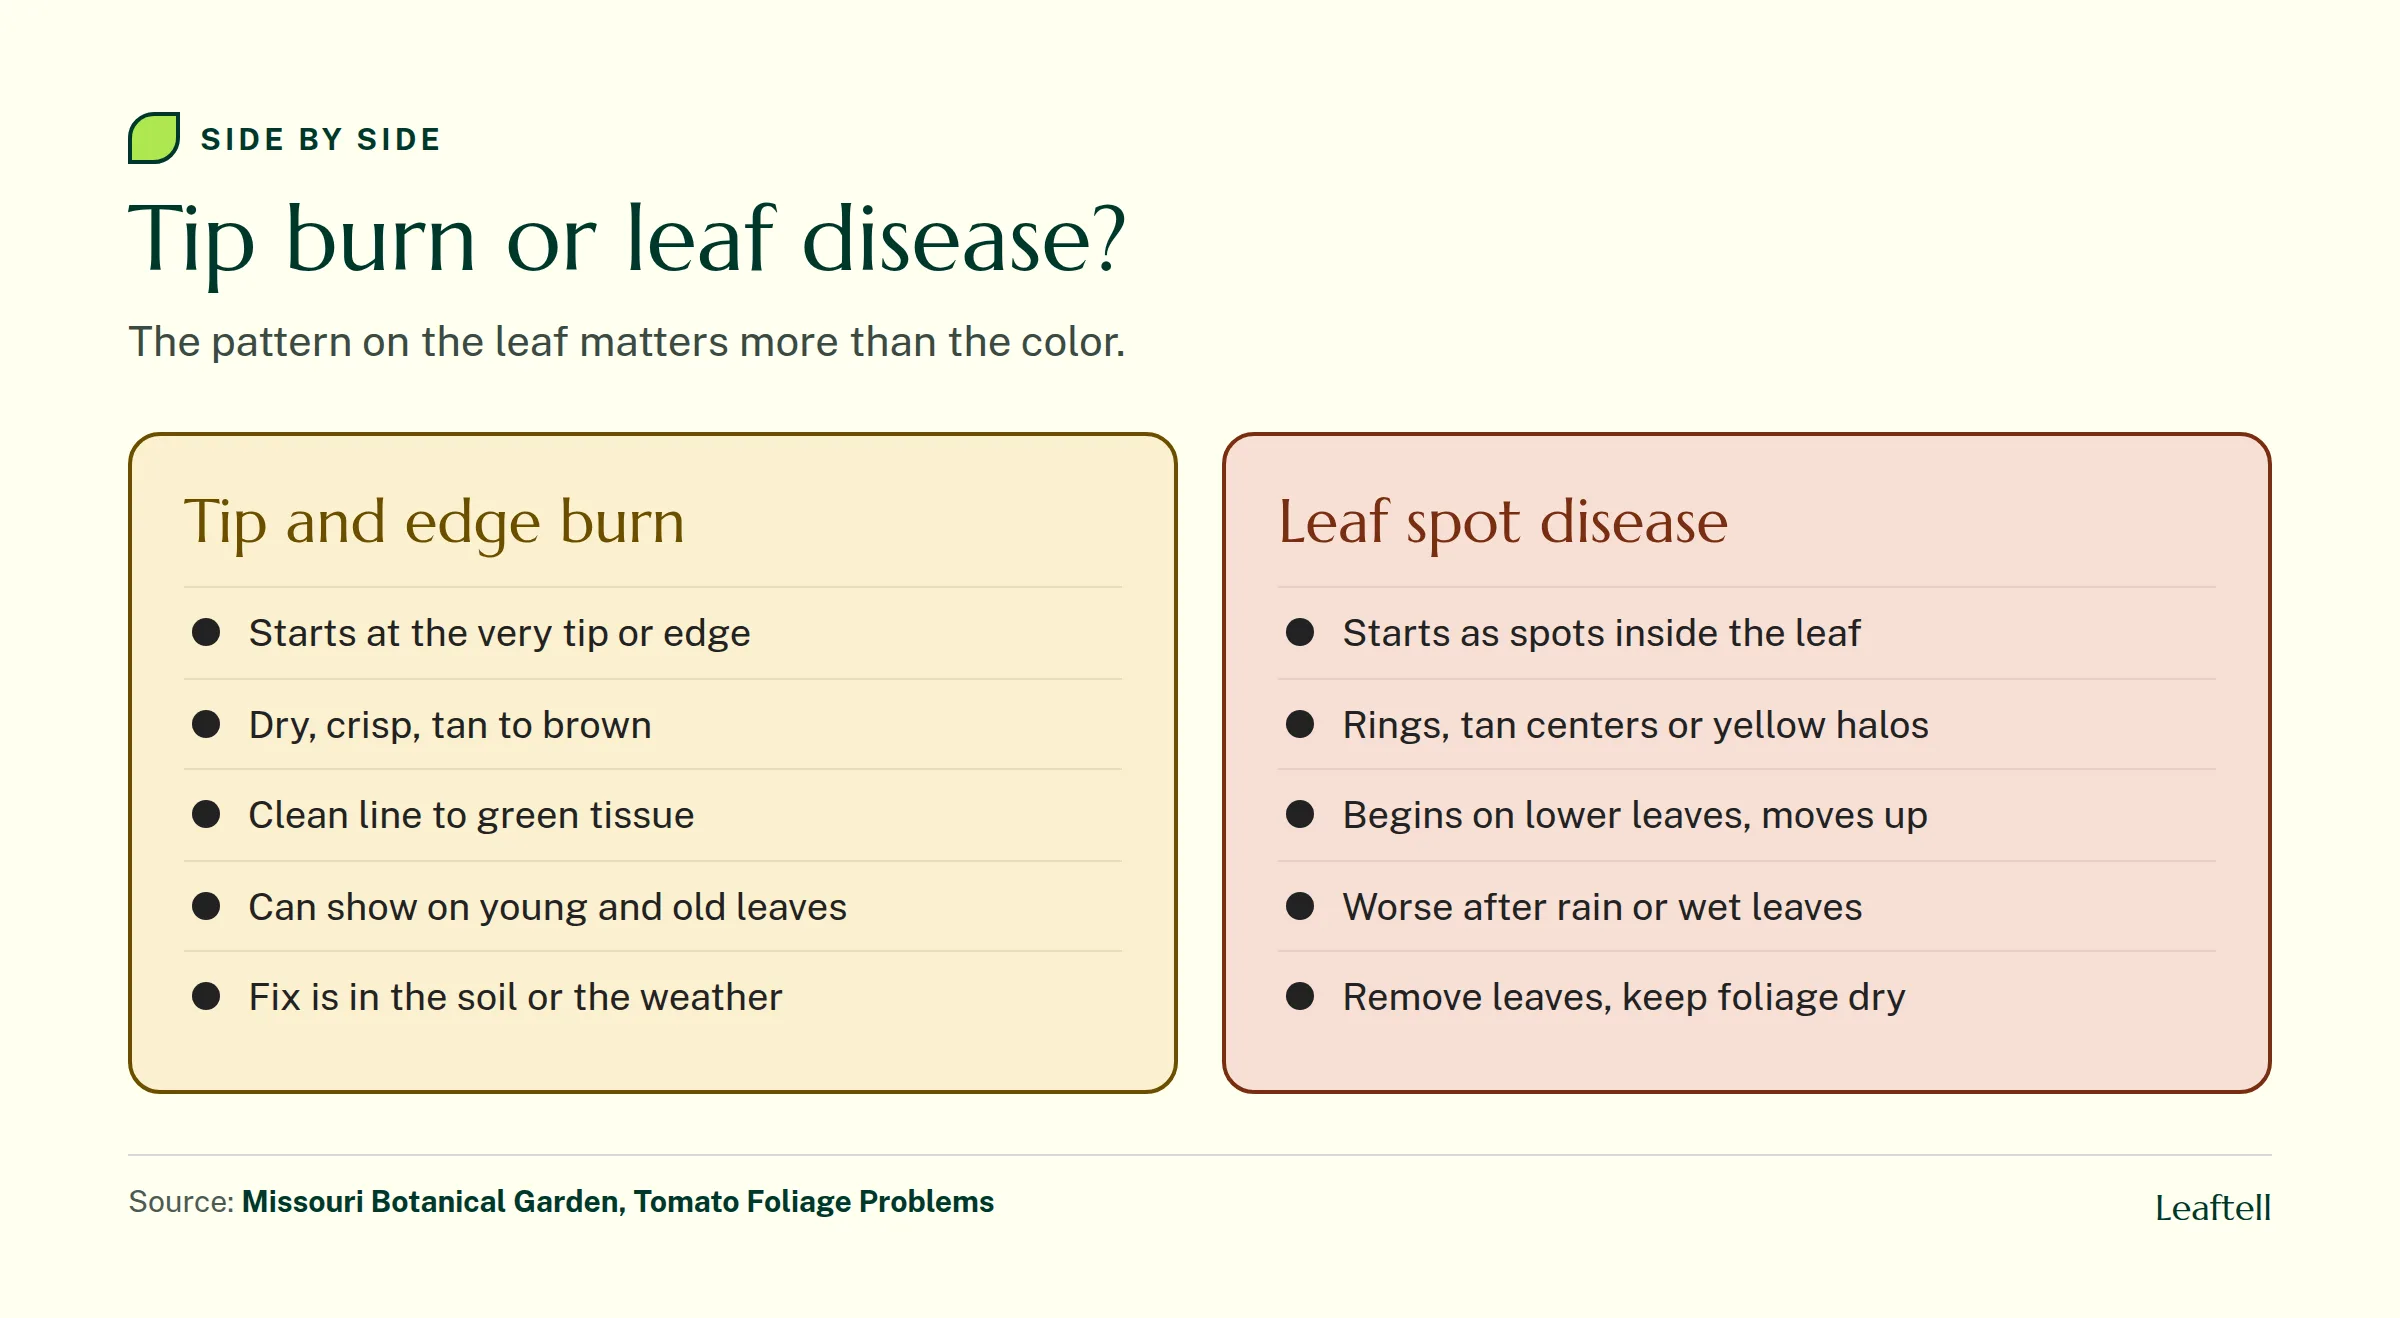
The one thing to check before you buy anything is where the brown starts. Crisp brown that begins at the tip or edge, with a clean line to green tissue, is stress. Brown that begins as a spot inside the leaf, often with rings or a yellow halo, is a leaf disease. Spraying a fungicide on tip burn does nothing, and watering more does nothing for leaf spot, so that five second look saves you a week of the wrong fix.
Tip or spot? Read the leaf first
Pick one affected leaflet and hold it up to the light. Look at where the brown begins, how dry it feels and which leaves on the plant have it. Those three facts sort most cases.
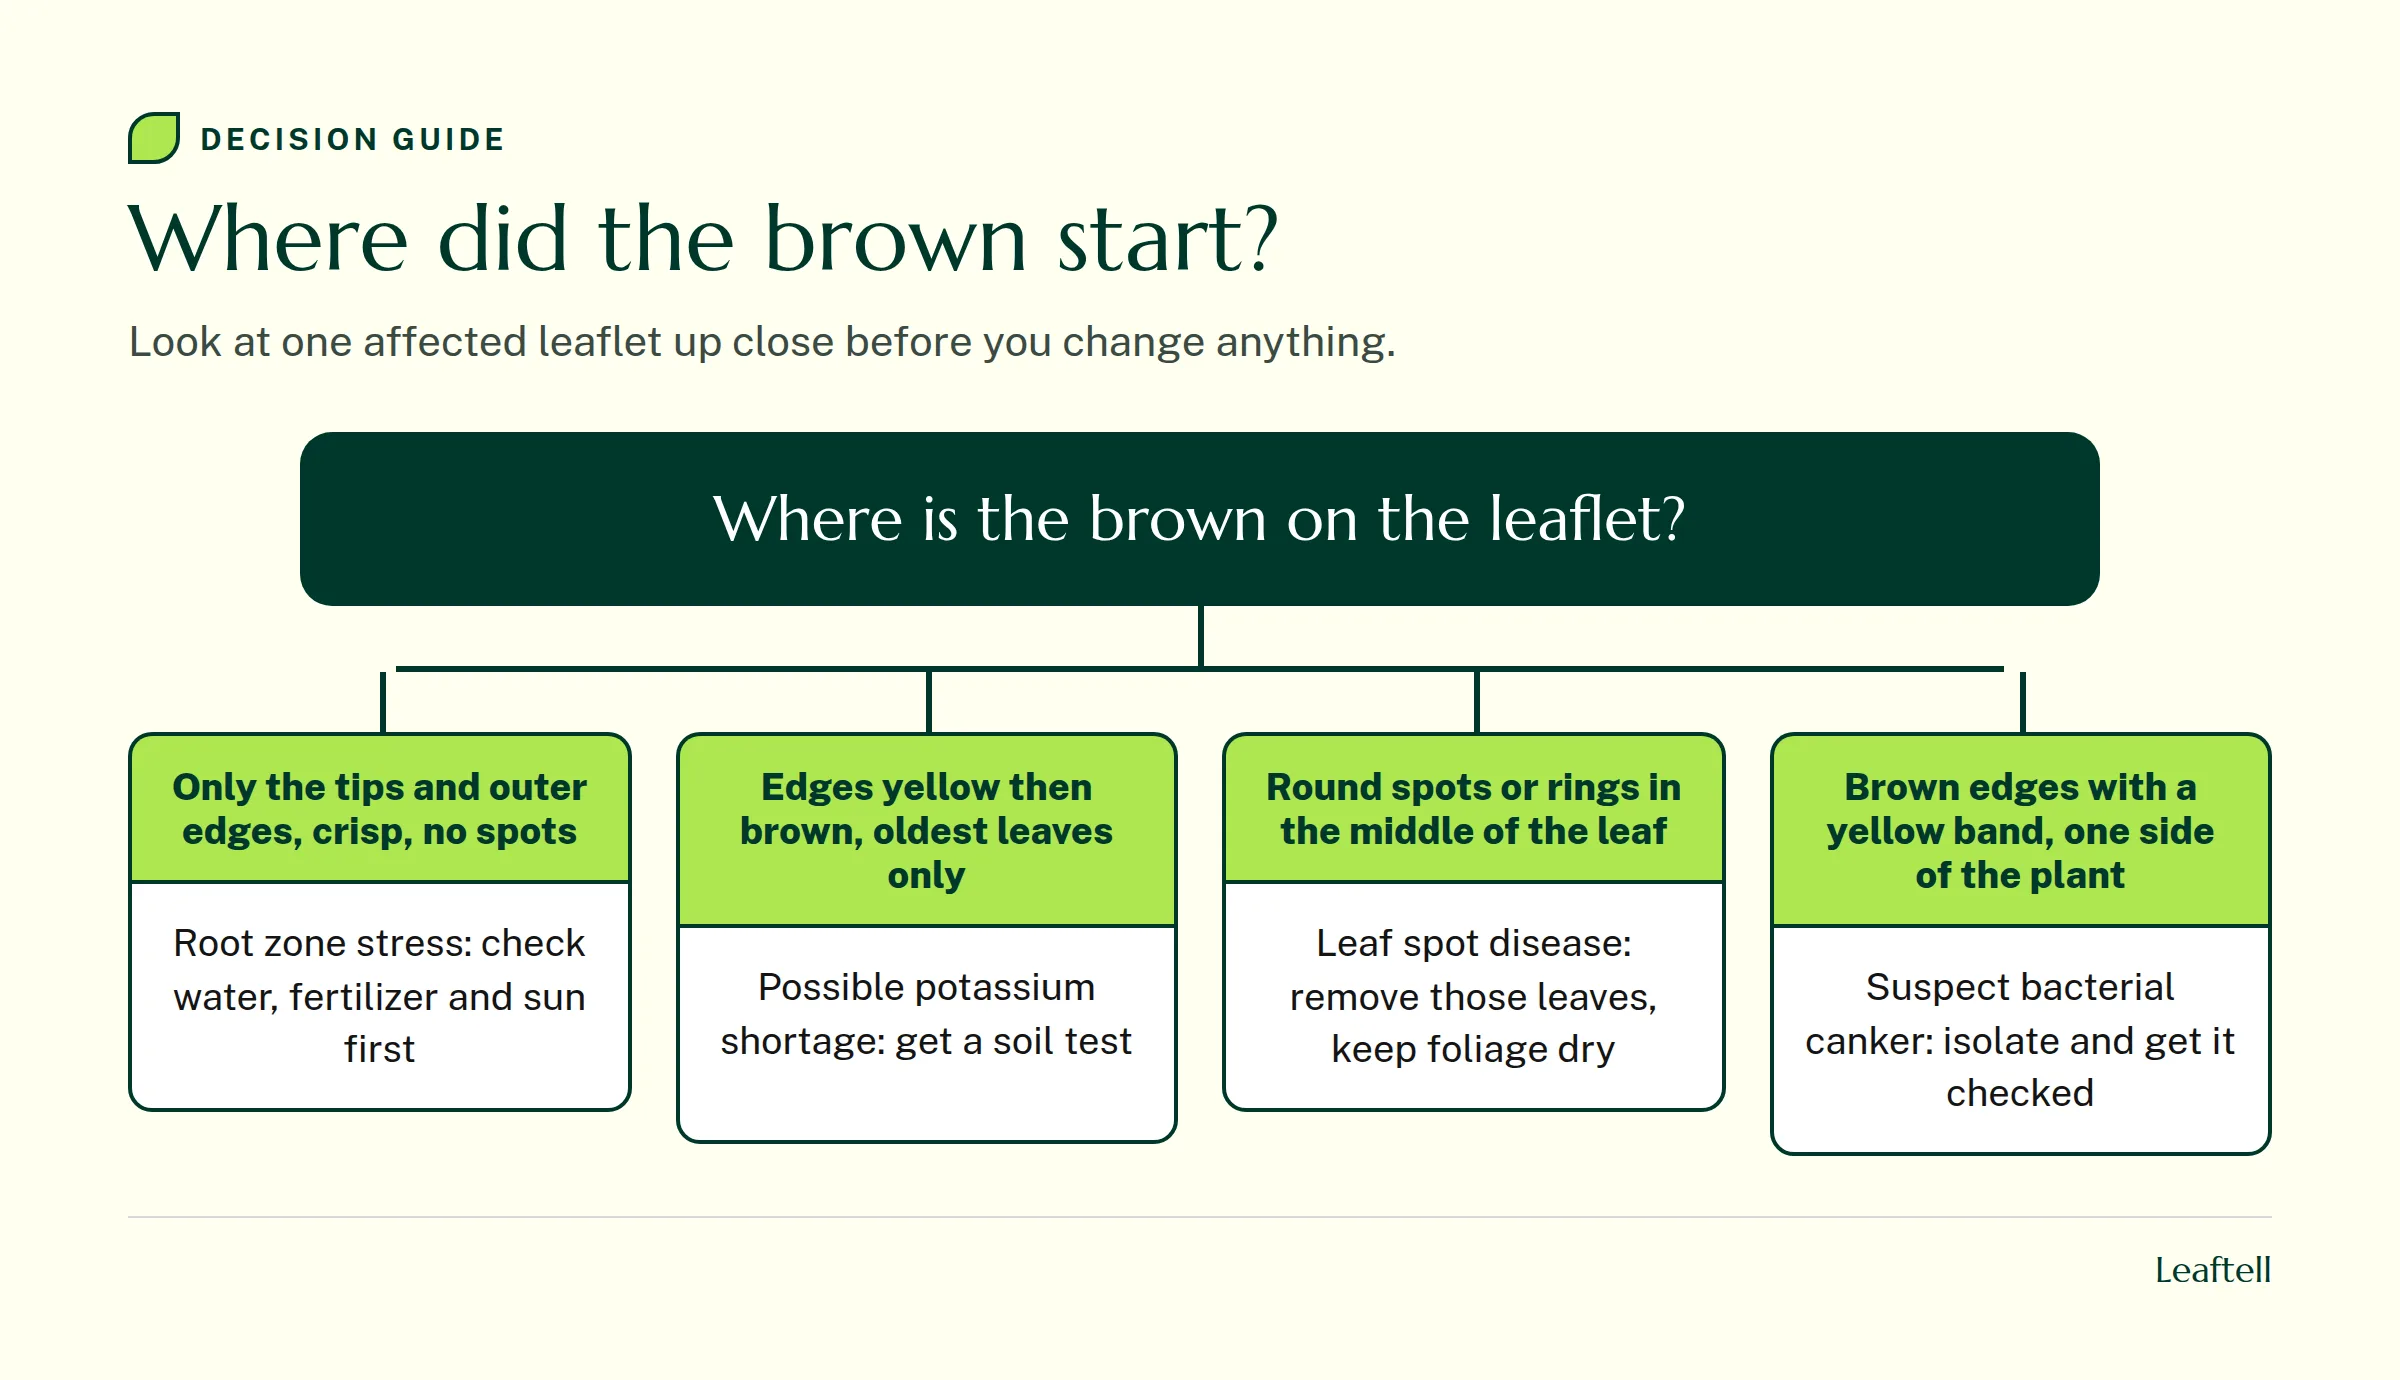
Tip and edge burn is dry and papery, tan to brown, and stops at a fairly sharp line. The green part of the leaf looks normal. It can show on a few leaves or across the whole plant, and it often appears after a heat wave, a dry week or a fresh dose of fertilizer.
A disease looks different. The Missouri Botanical Garden's visual guide to tomato foliage problems describes early blight as dark spots on the lower leaves that grow into concentric rings with a yellow area around them, and Septoria leaf spot as many small spots with tan to gray centers. Neither starts at the tip. If that sounds like your plant, our tomato plant diseases guide covers each one in more detail.
Causes of brown leaf tips on tomatoes at a glance
Find the row that matches your plant. If two rows fit, start with water, because it is the cause you can check and change today.
| Cause | Where the brown shows | Other clues | First move |
|---|---|---|---|
| Uneven watering or a dry spell | Tips and edges, often on many leaves | Soil dry 2 inches down, leaves limp in the afternoon | Deep, slow soak, then mulch |
| Too much fertilizer | Tips and edges, young and old leaves | Recent feeding, white or brown crust on the soil or pot rim | Flush the soil with plain water, stop feeding |
| Potassium shortage | Edges of the oldest, lowest leaves, yellow first | Upper leaves fine, no spots | Soil test before you add anything |
| Sun, heat or wind | Leaves on the exposed side | Recently planted out, bleached or papery patches | Shade and shelter for a few days |
| Indoor seedling stress | Tips of seedling leaves | Close grow light, dry air, strong feed | Raise the light, feed weaker |
| Early blight or Septoria | Spots inside the leaf, lower leaves first | Rings, tan centers, yellow halos | Remove spotted leaves, keep foliage dry |
| Bacterial canker | Brown margins with a yellow band | Often one side of the plant, plant wilts | Isolate the plant, get it confirmed |
Uneven watering and dry spells
This is the most common cause in a garden bed or pot. The leaf tip is the last stop on the water line inside the plant, so when the roots run short, the tip and edges dry out first. Long gaps between waterings, then a heavy soak, give you the same result, because a plant that has been through a dry spell has already lost those edges.
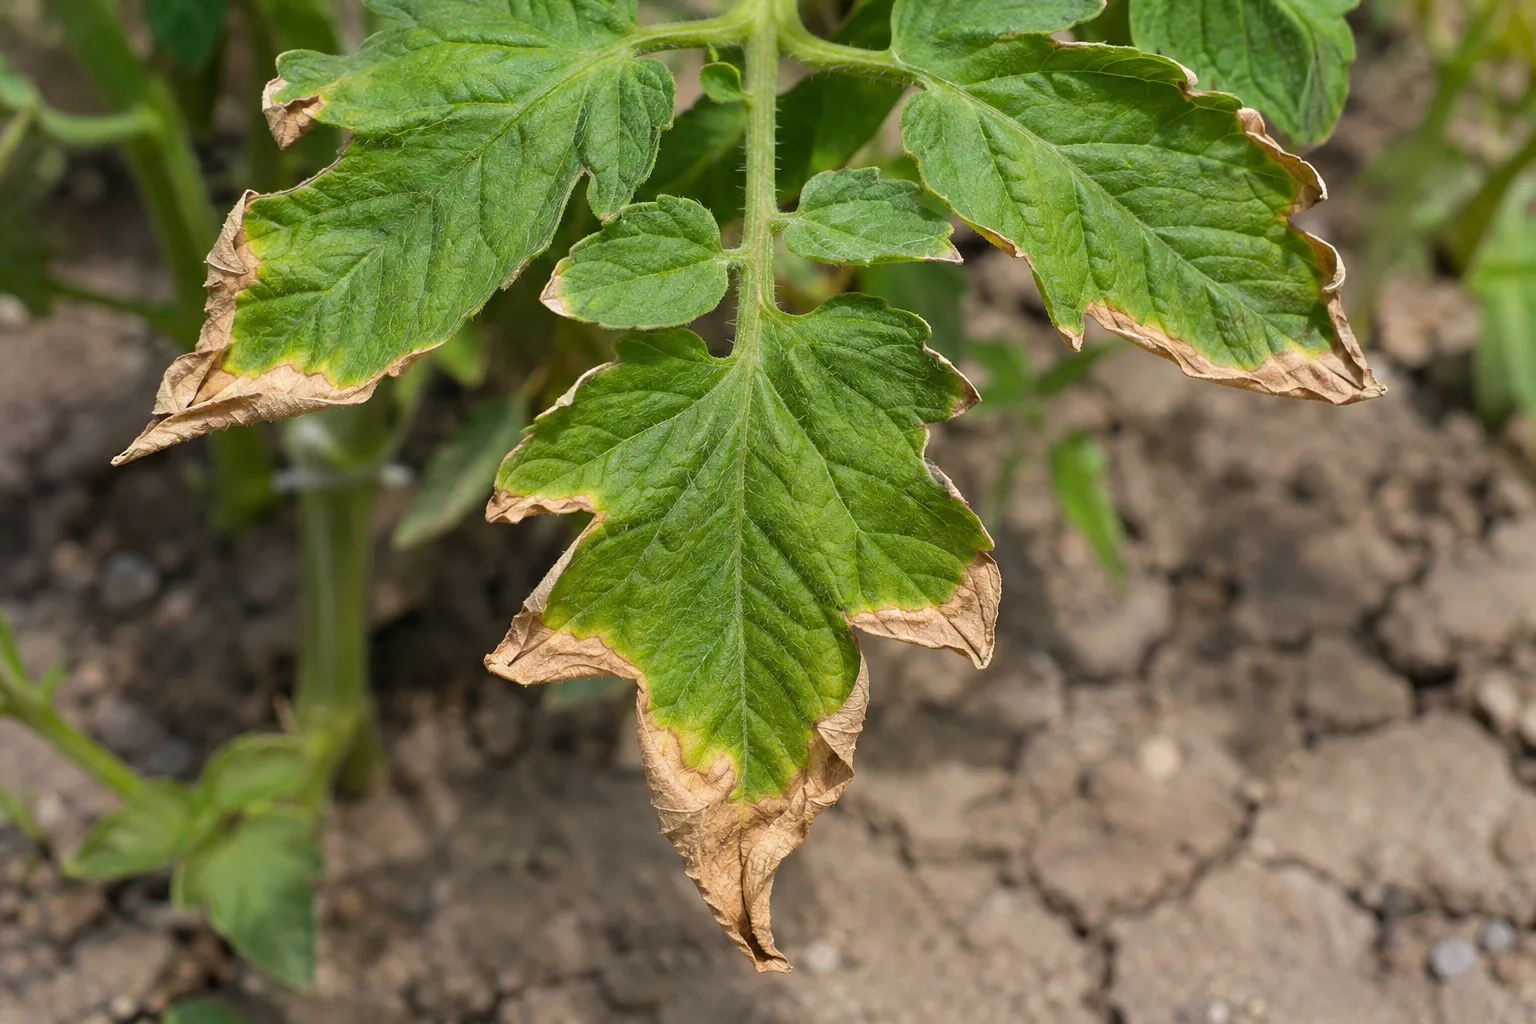
Push a finger about 2 inches into the soil beside the stem. If it is dry, water slowly at the base until the whole root zone is wet, not just the surface. Then put down a layer of straw or shredded leaves to slow drying between waterings. Our guide on how often to water tomato plants covers how to judge timing in beds and containers.
Too much water can also brown the edges, because roots sitting in soggy soil stop taking up water too. If the soil is wet and the lower leaves are also yellowing, read our guide to telling an overwatered plant from an underwatered one before you water again.
Too much fertilizer
Fertilizer is a salt. When too much of it sits in the soil, the roots struggle to take up water, and the extra salts travel to the leaves and build up where water leaves the plant. Washington State University's Hortsense notes that salts can cause dieback of leaf tips and margins, and that container plants are especially likely to show it, often with a whitish or brownish crust on the soil or the inside rim of the pot.
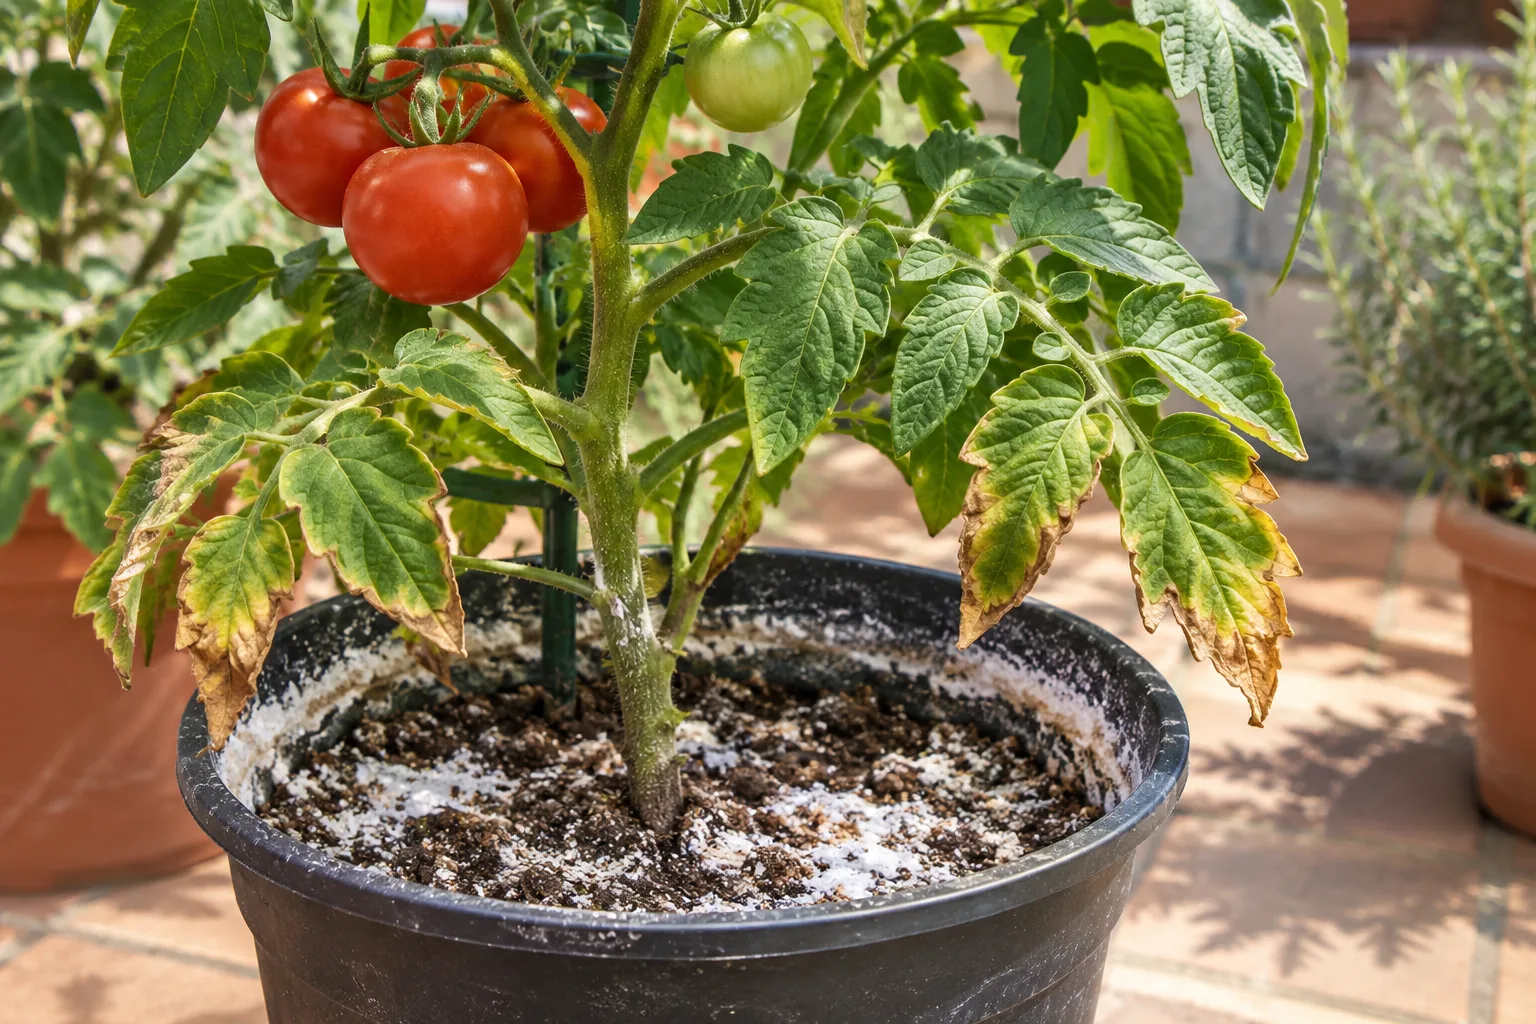
The University of Maryland Extension adds that fertilizer burn is worse in hot, dry weather, because the salts are more concentrated when the soil is dry. That is why a feed followed by a heat wave so often ends in brown tips.
- In a pot, scrape off the crust, then run plain water slowly through the soil until it drains freely from the bottom. Let it drain completely.
- In a bed, water deeply a couple of times over a few days to move the salts below the roots.
- Stop feeding until new leaves come in clean. When you start again, use the label rate or less, and water it in.
Potassium shortage on older leaves
When the brown shows up only on the oldest, lowest leaves, and the edges turn yellow before they turn brown, a potassium shortage is worth considering. The plant moves potassium from old leaves to new growth, so the bottom of the plant shows it first while the top stays green.
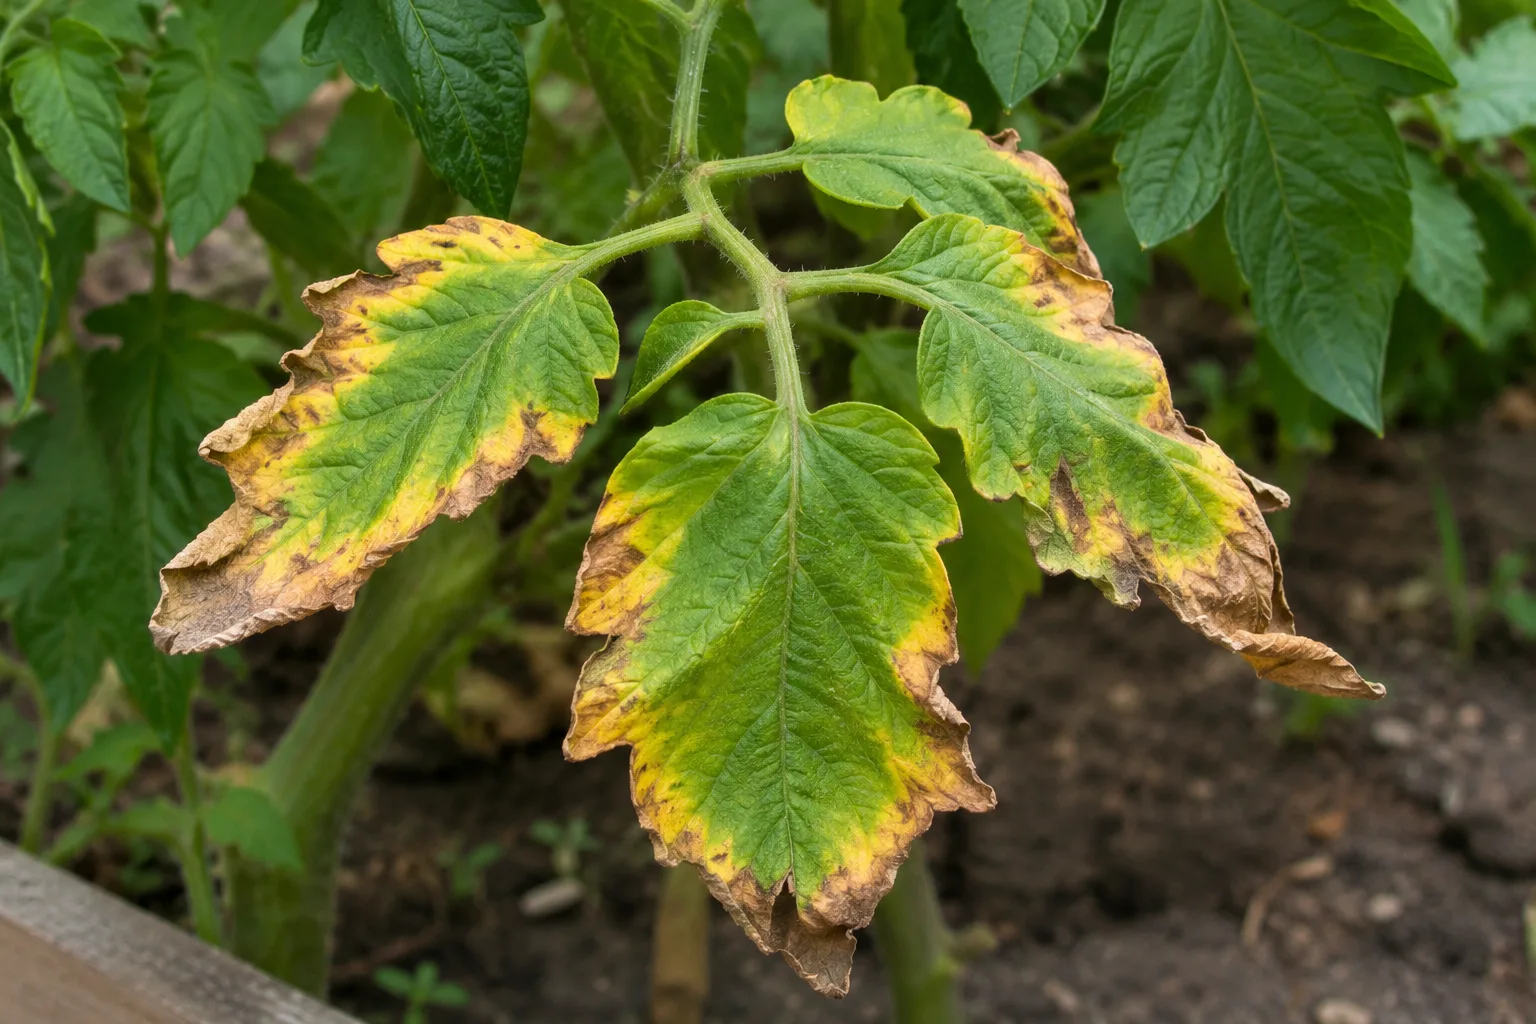
Do not guess with fertilizer here. A soil test tells you whether potassium is actually low, and Clemson's tomato diseases and disorders factsheet recommends testing garden soil every year and keeping potassium at a sufficient level. Adding more fertilizer to a plant that already has enough just sends you back to the salt problem above. Cold soil can also stop roots taking up potassium early in the season; the Missouri Botanical Garden notes the leaves usually recover as the soil warms.
Sun, heat and wind after planting out
Young plants moved outside from a windowsill or a nursery have soft leaves that are not used to full sun and wind. The leaves on the exposed side can scorch within a day or two, with bleached, papery patches and dry brown edges, while new leaves that grow outside come in fine.
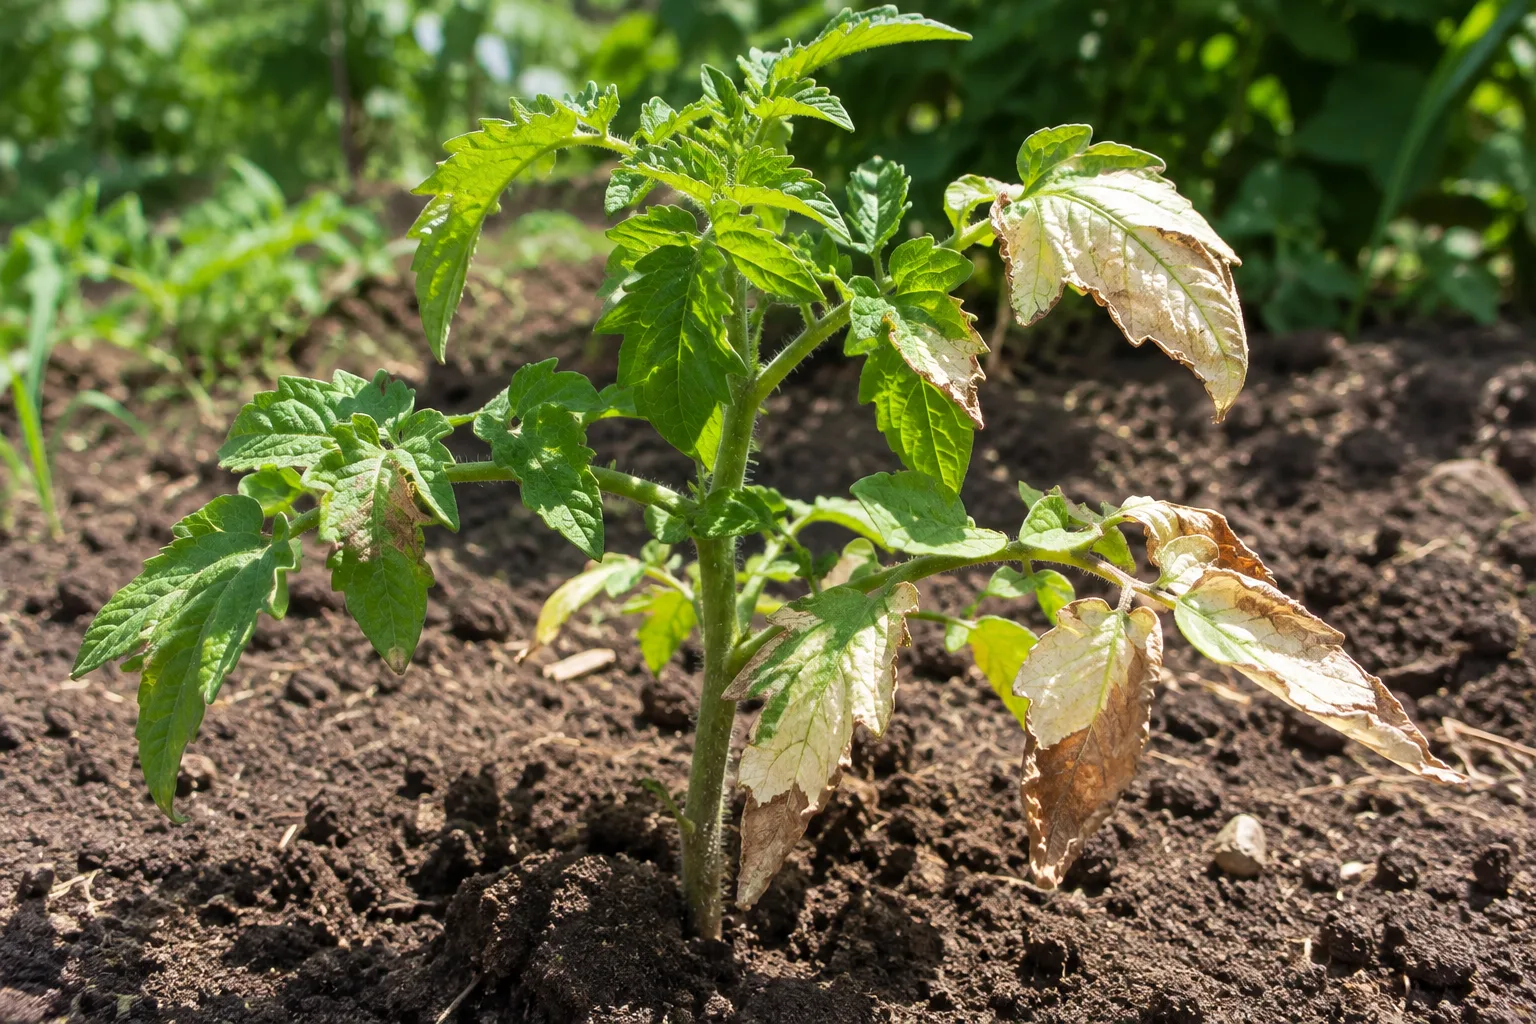
The damaged leaves will not turn green again, but the plant usually grows past them. Give it light shade during the hottest part of the day for a few days, keep the soil evenly moist, and shelter it from strong wind. Next time, harden seedlings off by setting them outside for a few hours a day and lengthening the time over about a week. If the leaves curl or roll instead of browning, our guide to tomato leaves curling explains which kinds are harmless.
Brown tips on indoor tomato seedlings
Seedlings on a windowsill or under a grow light often get brown tips on their first true leaves. The usual causes are a light placed too close, soil that dries out between checks, dry indoor air, or seedling feed mixed too strong. A seed tray holds very little soil, so it dries out and concentrates salts much faster than a garden bed.
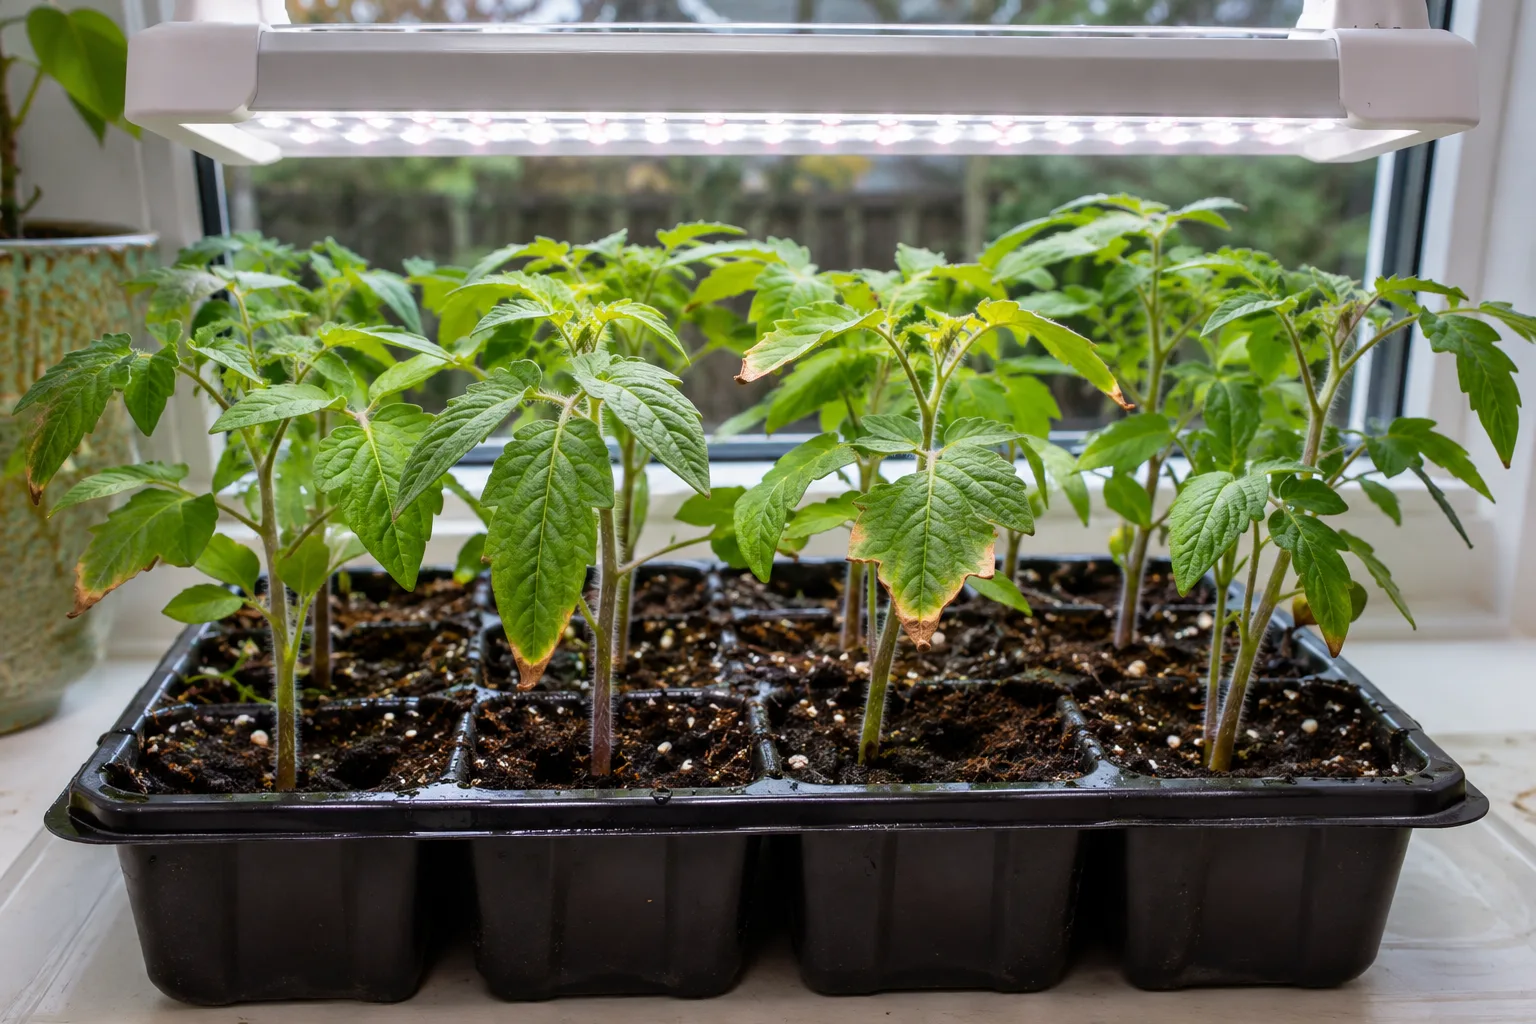
Raise the light a little, check the soil every day with a fingertip, and if you feed, use a diluted seedling strength. Clemson's factsheet also advises waiting until seedlings have their first true leaves before adding nitrogen fertilizer. Brown tips on a few leaves are cosmetic; a seedling with a pinched, dark stem at the soil line is a different and more serious problem.
When brown edges mean a disease
Most brown tips are stress, but two disease patterns are worth ruling out before you relax.
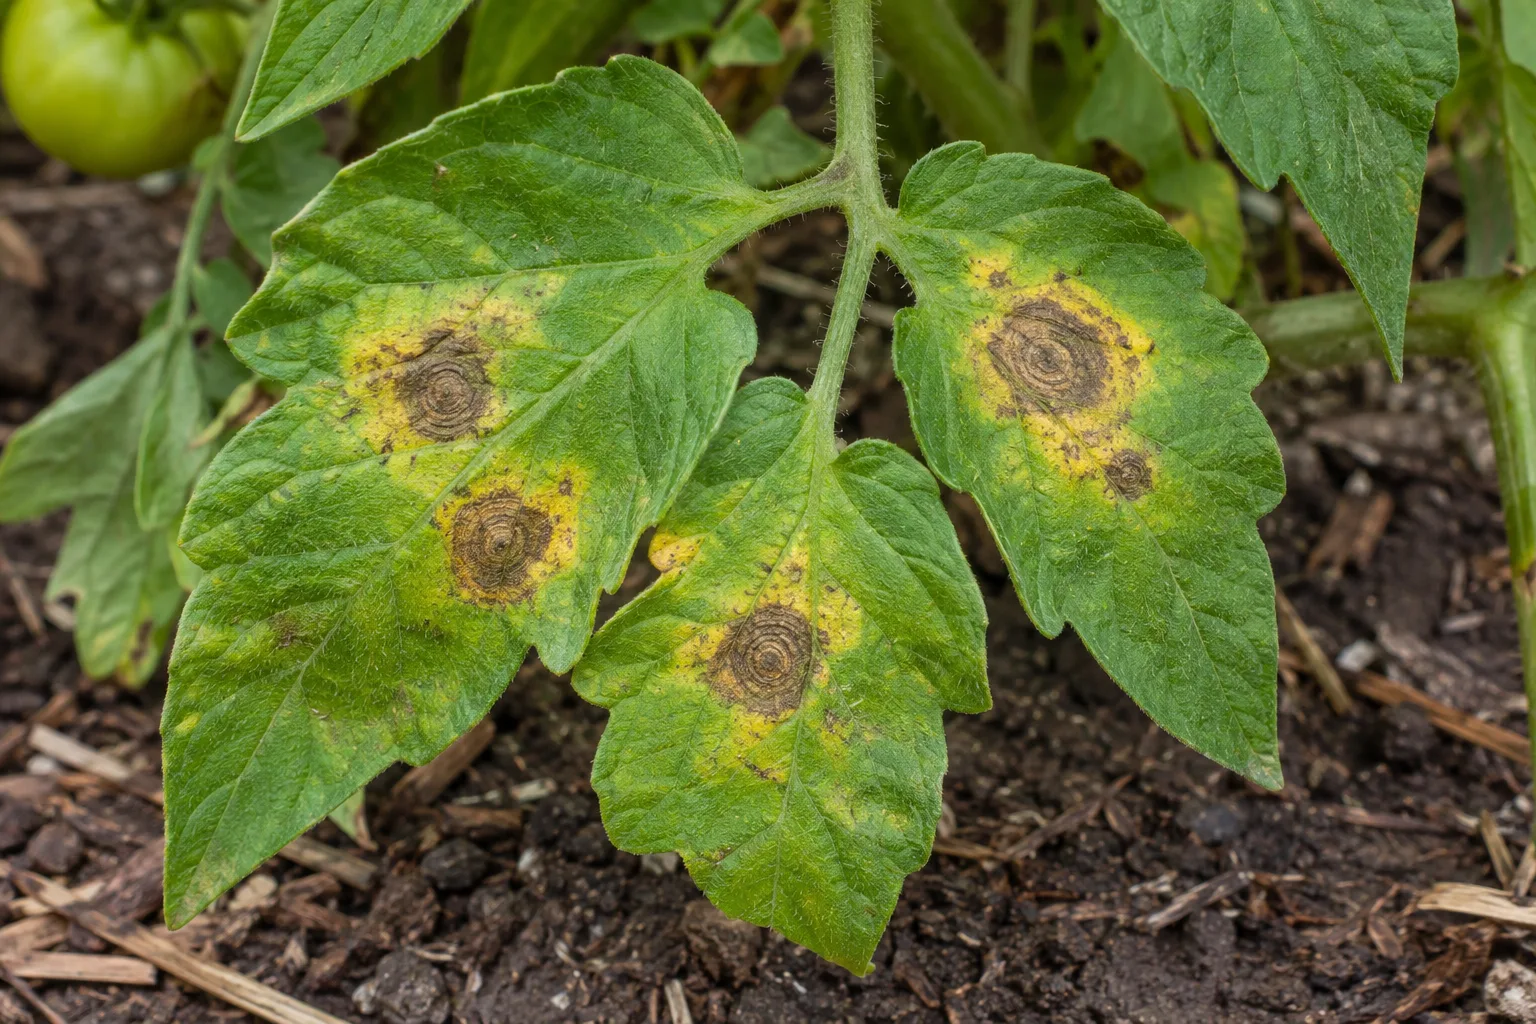
Early blight and Septoria leaf spot start on the lower leaves as spots, not as tip burn. The spots grow, the leaf yellows around them, and the leaf dies from the bottom of the plant upward. Remove spotted leaves as soon as you see them, bag them rather than composting them, water at the base in the morning and keep the lower stem clear of leaves so rain cannot splash soil onto them.
Bacterial canker is the one to take seriously. The Missouri Botanical Garden describes it as brown leaf margins with a yellow border next to the green tissue, spreading between the veins and often affecting only one side of the plant. It has no cure and spreads easily. If your plant has that pattern and is also wilting, pull it, bag it, and clean your tools and stakes before you touch other plants. When you are not sure, take a sample to your local extension office before you remove a healthy plant by mistake.
If you are thinking about a spray, keep to the least toxic steps first: remove affected leaves, improve air flow and keep the foliage dry. If you do use a garden fungicide, use a product labeled for tomatoes, follow the label exactly, never mix products, and keep pets and children away from treated plants. The ASPCA plant and toxin list is a good place to check pet risks.
How to fix brown leaf tips on tomato plants
Fix one cause at a time, so you can tell what worked.
How to fix brown leaf tips on tomato plants
- Check the leaf pattern
Look at one affected leaflet. Brown that starts at the tip or edge with no spots is stress; spots with rings or halos are a disease.
- Check the soil 2 inches down
Dry soil means a slow, deep soak at the base. Wet, soggy soil means stop watering until the top dries.
- Look for fertilizer crust
A white or brown crust on the soil or pot rim means too much feed. Flush with plain water and pause feeding.
- Remove the worst leaves
Cut off leaves that are mostly brown or spotted with clean pruners, then bag them. Leaves with only small dry tips can stay.
- Mulch and water at the base
Spread straw or shredded leaves around the plant and water the soil, not the leaves, so moisture stays even.
- Watch the new growth
Judge the fix by leaves that open after today. Old brown tips stay brown.
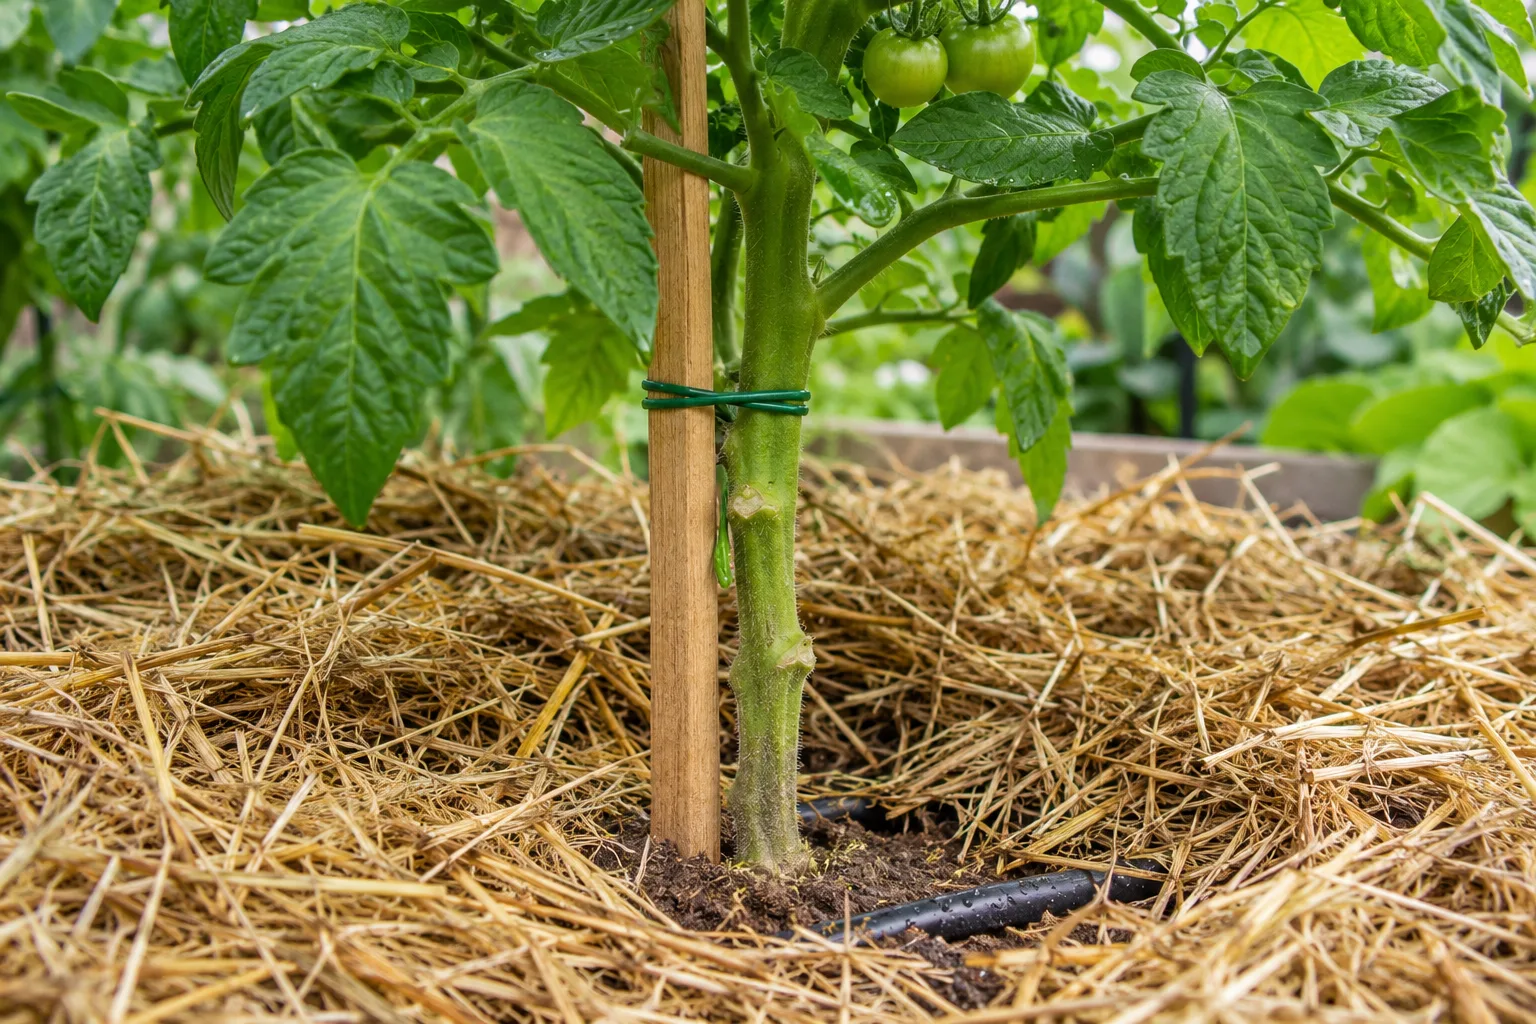
Removing a few of the lowest leaves and mulching the soil helps with every cause on this list. It keeps the soil moisture steadier, and it stops rain from splashing soil and disease spores onto the leaves.
Mistakes that keep the tips browning
- Feeding a plant that is already burning. More fertilizer on salt-burned roots makes the tips worse.
- Watering on a schedule instead of by the soil. A pot in full sun and a bed in clay can need very different amounts.
- Spraying for disease without a spot in sight. Crisp tips with no spots are not a fungus, and a spray adds cost and risk for nothing.
- Pulling every brown leaf at once. A plant stripped of most of its leaves loses shade for its fruit and the energy it needs to grow. Take the worst leaves and leave the rest.
- Ignoring yellow leaves below the brown. If the lower leaves are also yellowing, our guide to tomato leaves turning yellow sorts out what the color change means.
Will brown leaf tips on tomatoes turn green again?
No. Brown leaf tissue is dead and will not recover, but that does not mean the plant is in trouble. If the cause was water, fertilizer or sun, the new leaves will grow in clean, and a plant with a few brown edges still sets and ripens fruit. Trim the leaves that are mostly brown and leave the rest to keep working.
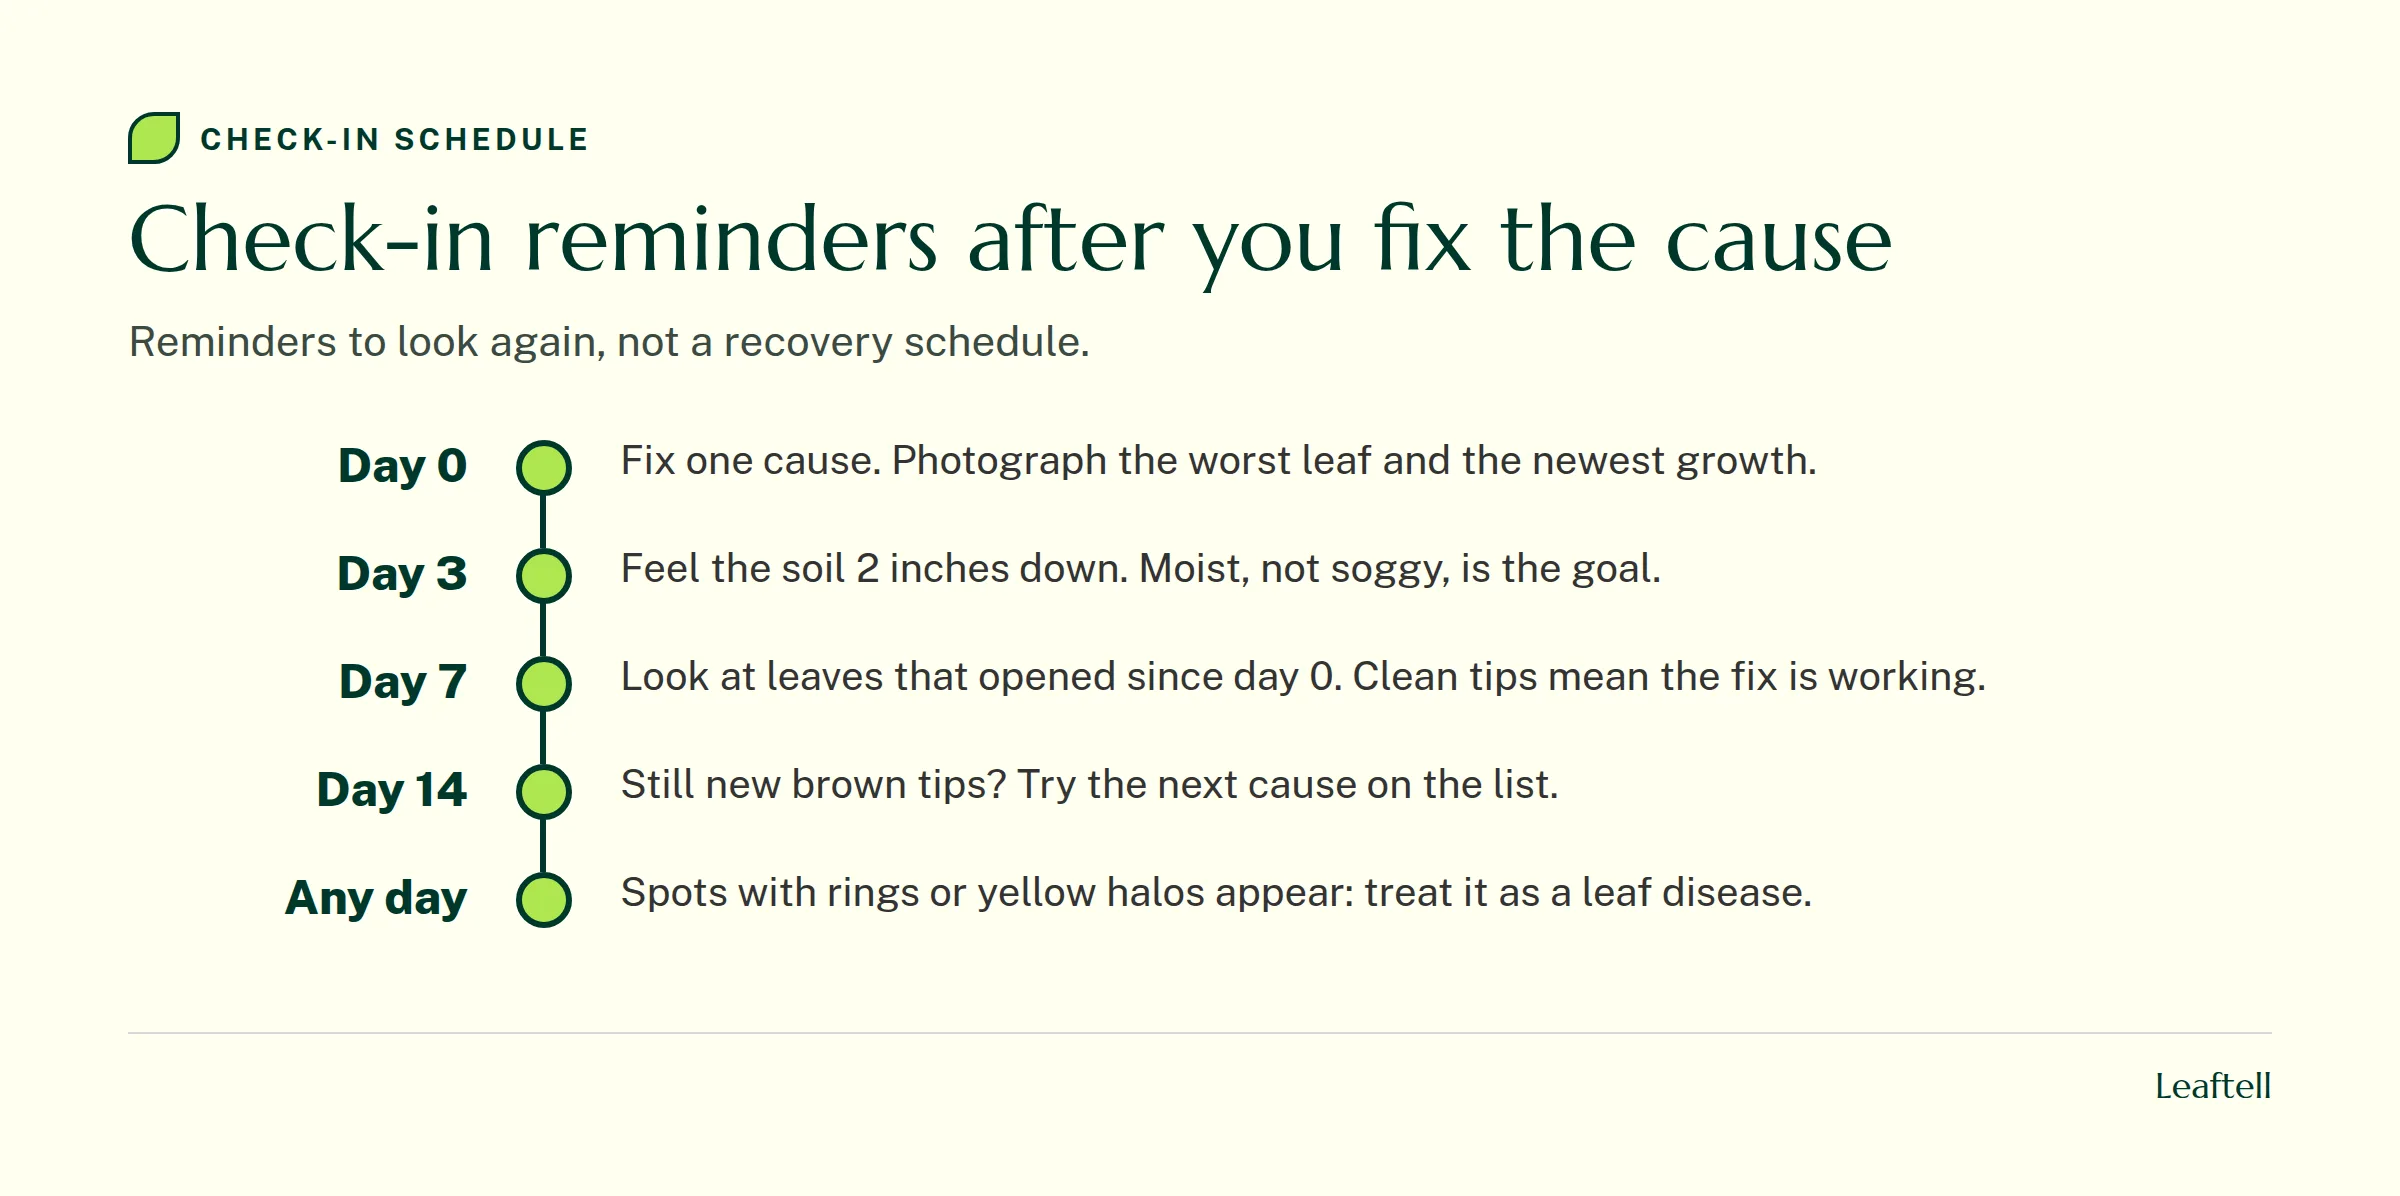
Judge your fix by the newest leaves over the next week or two, not by the old ones. If you also see the leaves hanging limp, our guide on why a tomato plant droops helps you tell heat from thirst or wilt disease. For brown tips on houseplants and other plants, our general guide to brown tips on leaves covers the wider list.
Check your tomato in Leaftell
If you cannot tell tip burn from a leaf spot, check your tomato in Leaftell. Send a close-up of one affected leaflet, a photo of the whole plant, and note how the soil felt 2 inches down, since a photo cannot feel the soil. Then take a fresh photo of the newest leaves as a check-in reminder in about seven days and compare.
Check your growing conditions with the plant watering calculator.
Frequently asked questions
Cut off leaves that are mostly brown, and any leaves with disease spots, using clean pruners. Bag the spotted ones rather than composting them. Leaves with only small dry tips are still feeding the plant, so leave them on. Removing the lowest leaves near the soil also cuts down on splashing soil.
Usually from a grow light too close, soil that dries out between checks, dry indoor air, or seedling feed mixed too strong. Raise the light a little, check the soil every day, and feed at a weak seedling strength only after the first true leaves appear.
Yellowing has its own set of causes, from too much or too little water to nutrient shortages and leaf diseases that start on the lowest leaves. Yellow edges that later turn brown on old leaves can point to a potassium shortage. Our guide to tomato leaves turning yellow covers each pattern.
There is no single schedule that fits every garden. Water when the soil is dry about 2 inches down, and soak the whole root zone at the base of the plant rather than giving small daily sips. Containers in full sun dry out much faster than beds and need more frequent checks.
Do not count on it. The extension guides we checked list fungicides labeled for tomatoes, such as chlorothalonil or copper products, not baking soda, and Missouri Botanical Garden notes fungicides only prevent spread rather than cure. Start with removing infected leaves, mulching and keeping foliage dry. Brown tips with no spots are not blight at all.
Find the cause first. Check the soil 2 inches down, look for fertilizer crust, and look at the leaves for spots. A plant stressed by water, feeding or sun usually recovers once the cause is fixed and grows clean new leaves. A plant with bacterial canker or a wilt disease will not recover and should be removed.
Share article
About the author

Keep checking your plant
Plant care reference
Indoor plant care
Build a routine around your plant, light and potting mix.
Plant care reference
Why is my plant dying
Trace leaf and root symptoms before choosing a care change.
Plant care reference
Pothos plant care
Choose a growing spot and prune a trailing pothos for fuller growth.
Plant care reference
How to fix root rot
Inspect root firmness and drainage, then decide whether to repot.